Project Management
Introduction
This module helps PMs manage projects, including task splitting and assignment, project status tracking, project delivery, rejection, and more.
My Projects List
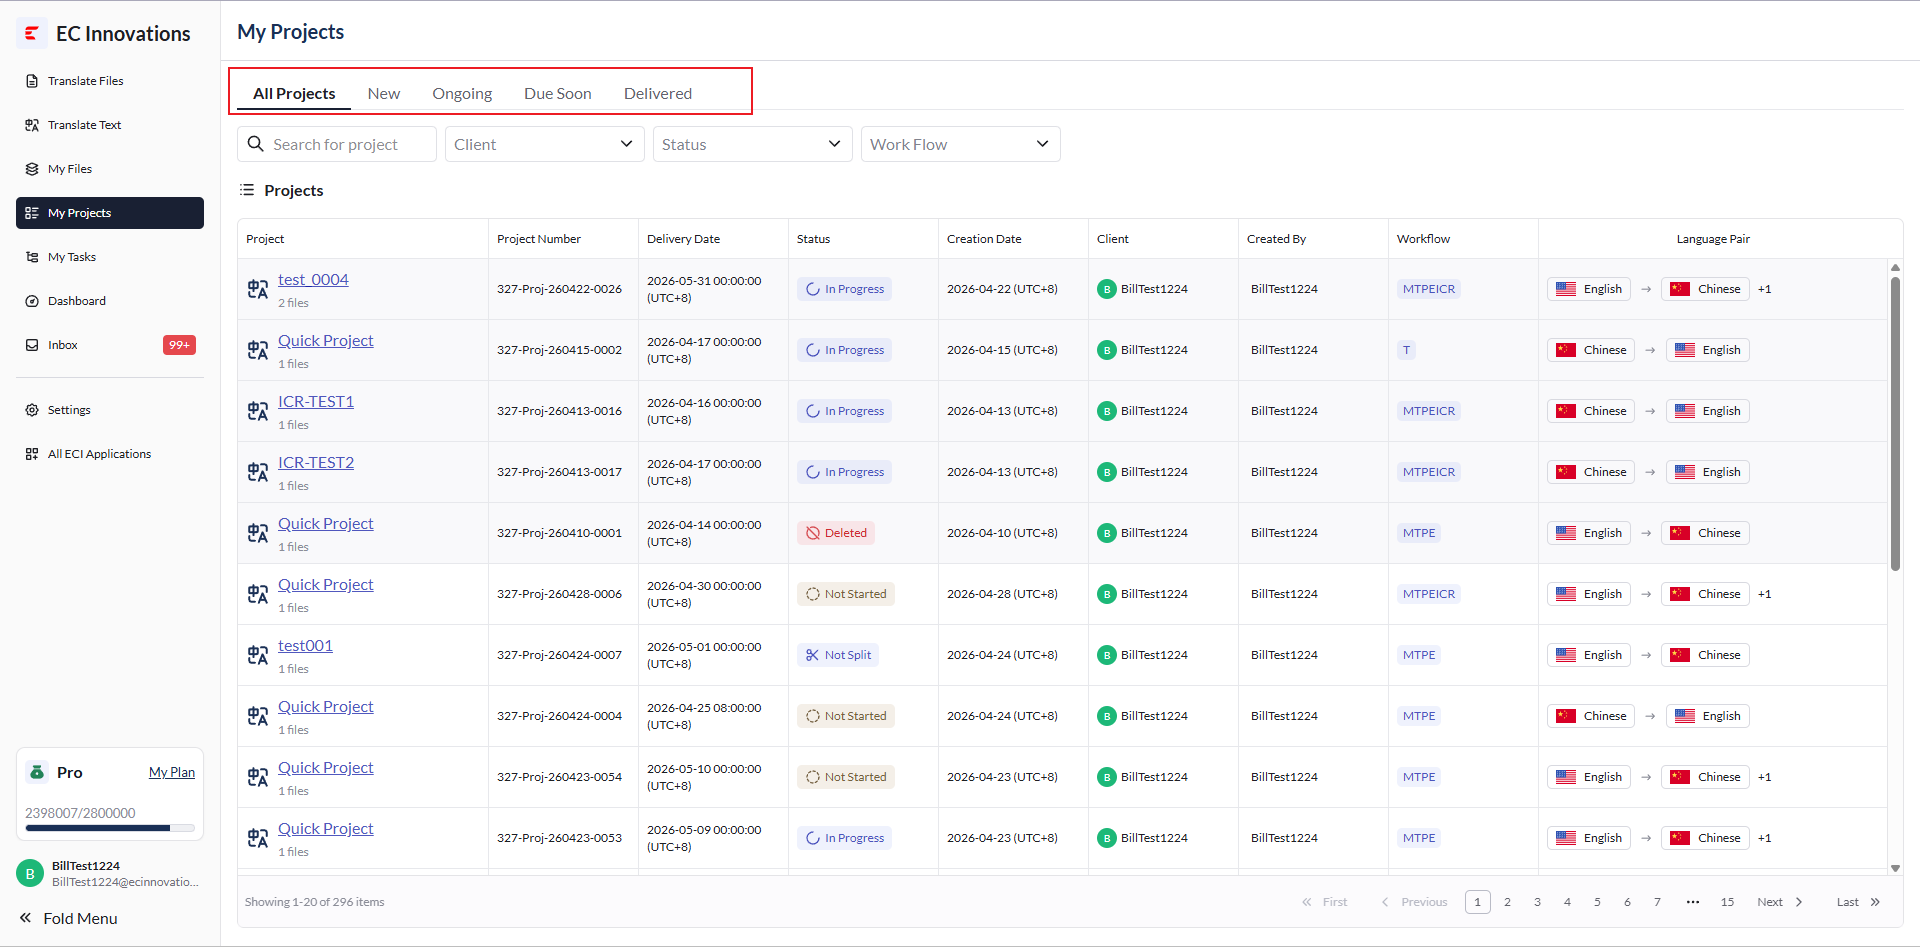
Tabs: ‘All Projects’ / ‘New’ / ‘Ongoing’ / ‘Due Soon’ / ‘Delivered’
Switch between tabs to view projects in different progress statuses.
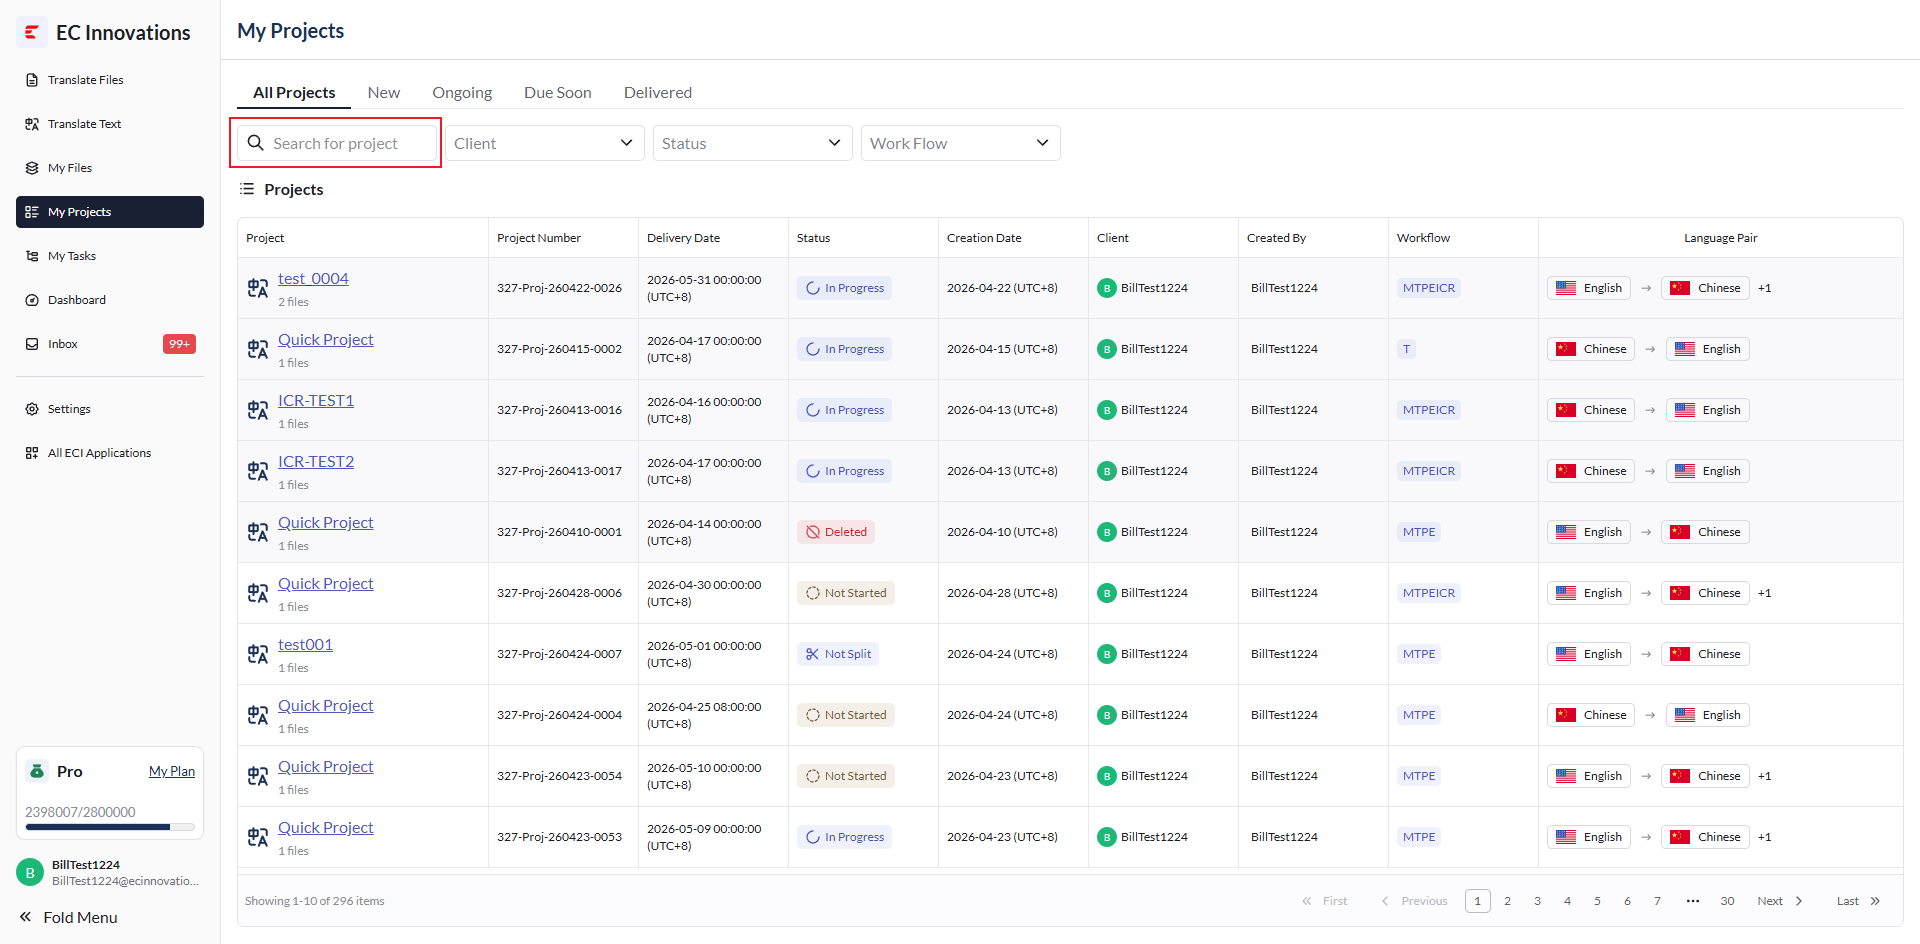
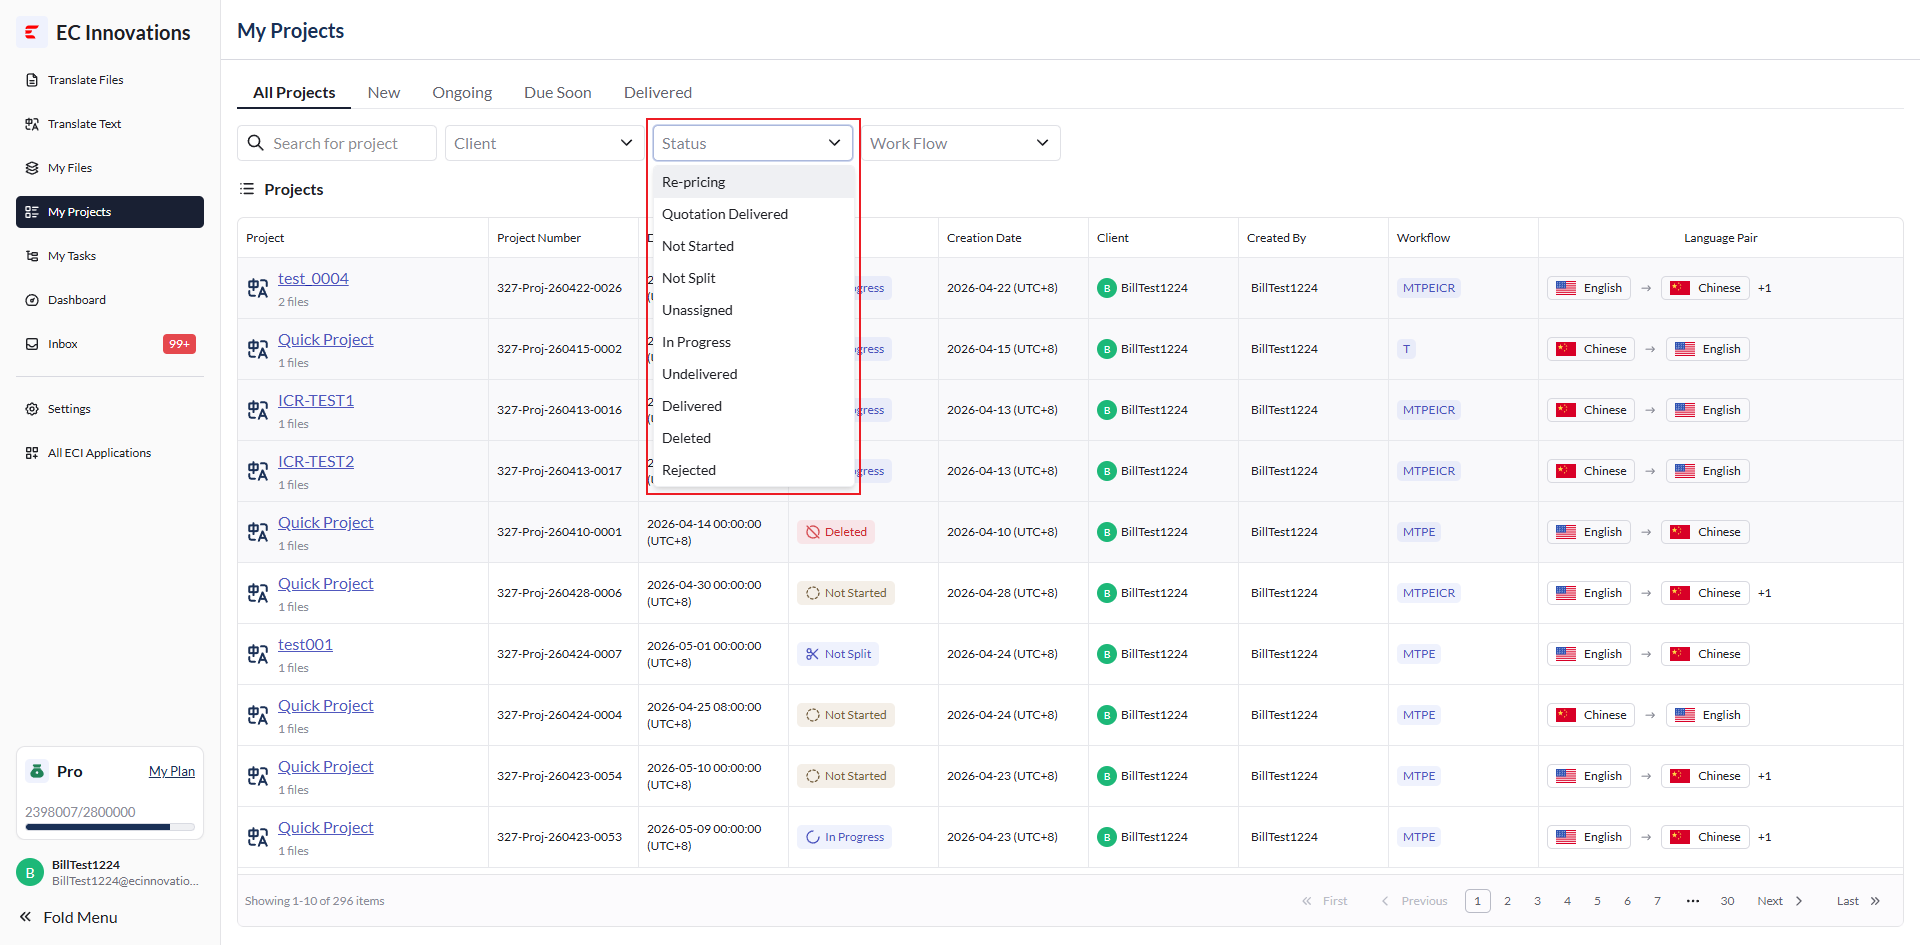
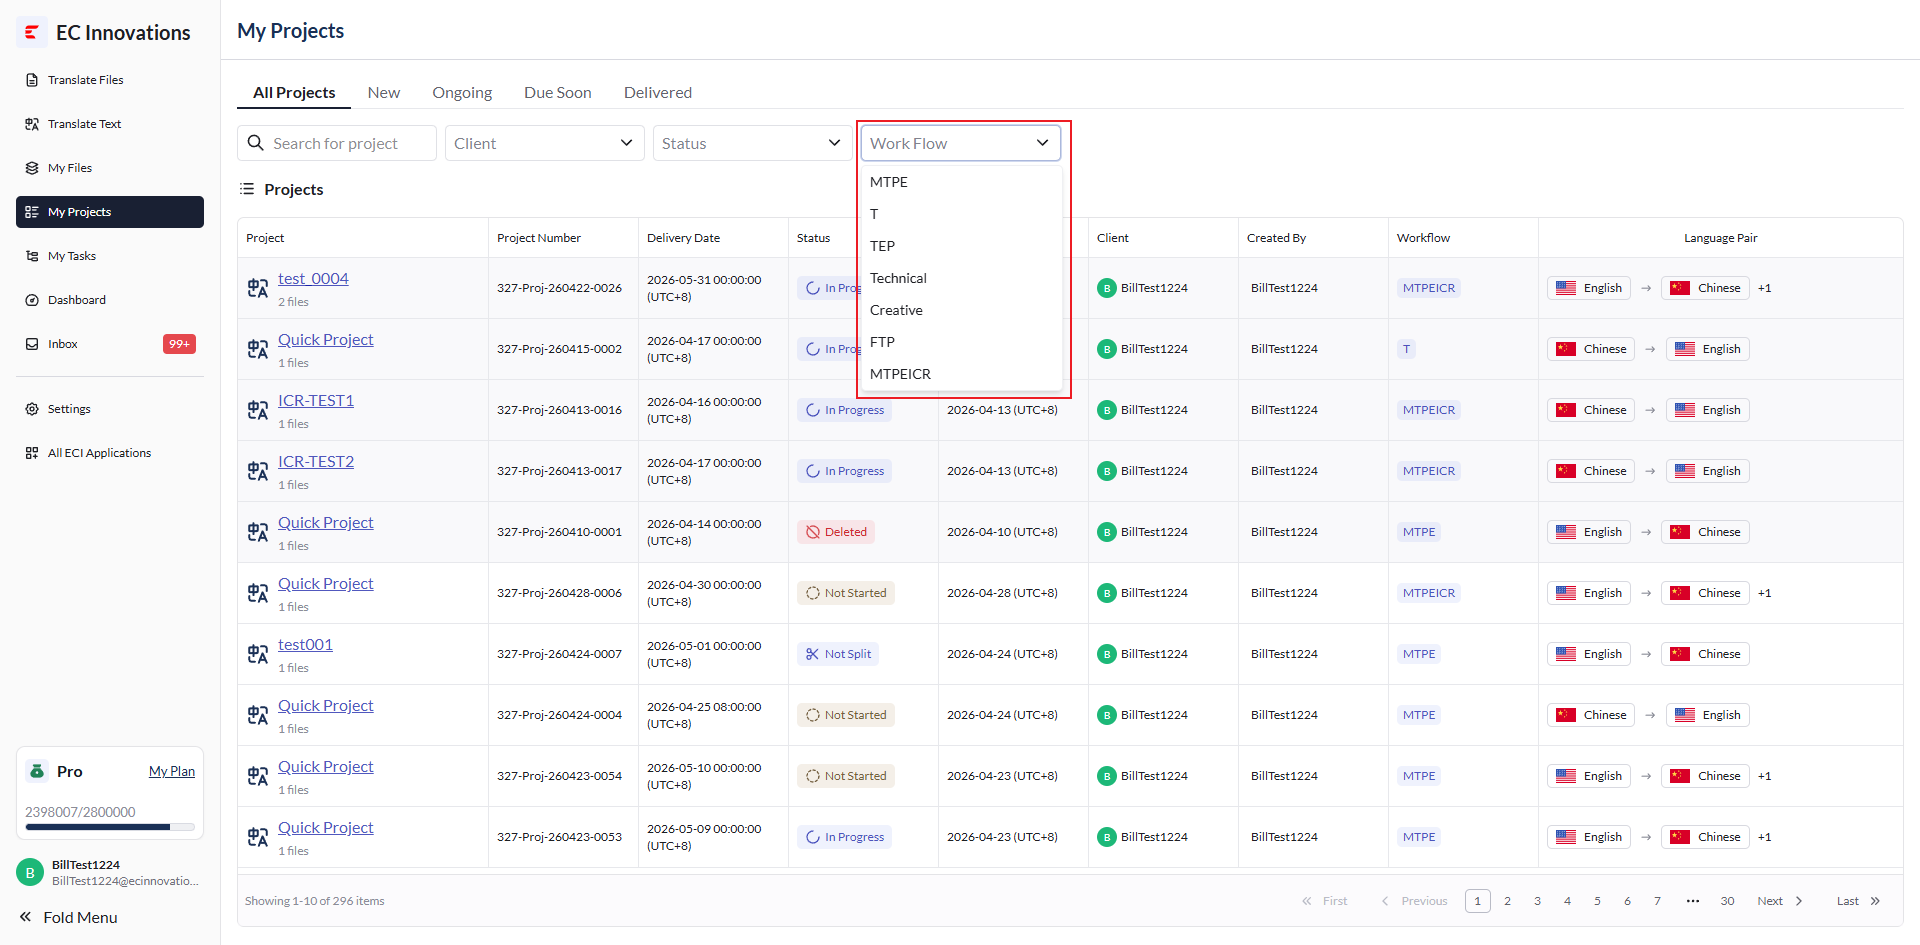
Filters: ‘Search’ / ‘Client’ / ‘Status’ / ‘Work Flow’
‘Search’: Filter by project name or project number.
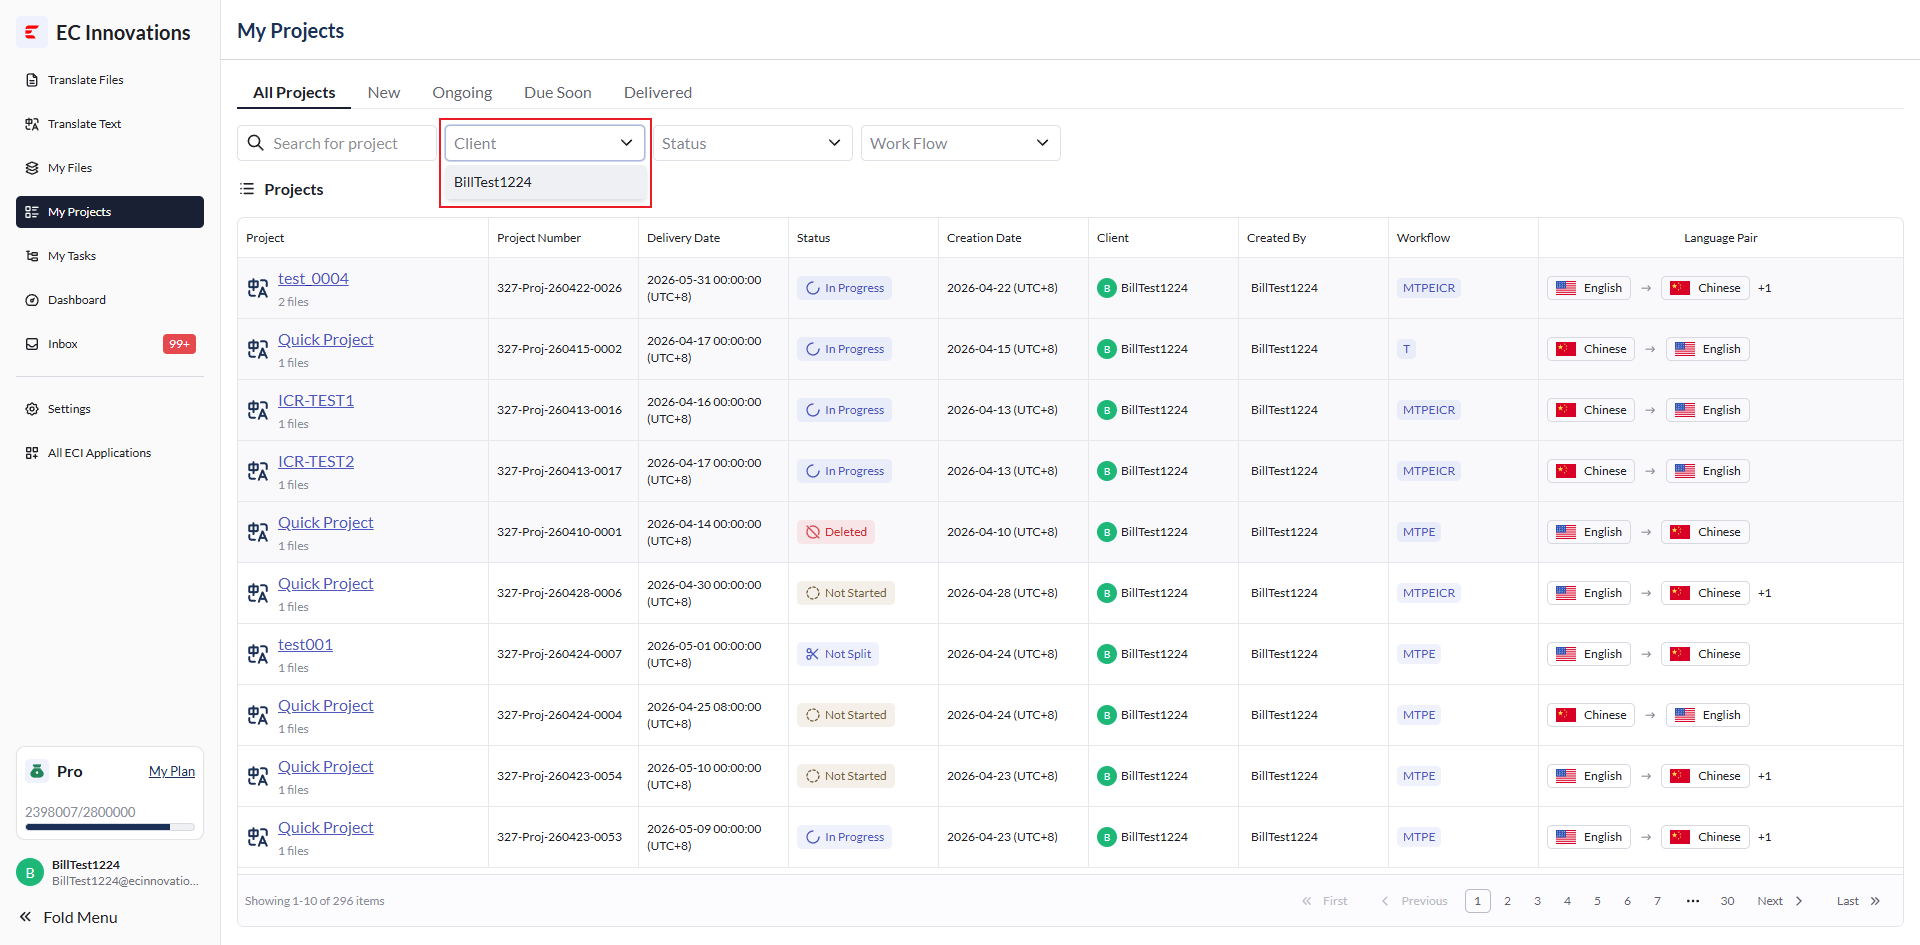
‘Client’: Filter by user.
‘Status’: Filter by project status.
‘Work Flow’: Filter by workflow.
Project Details
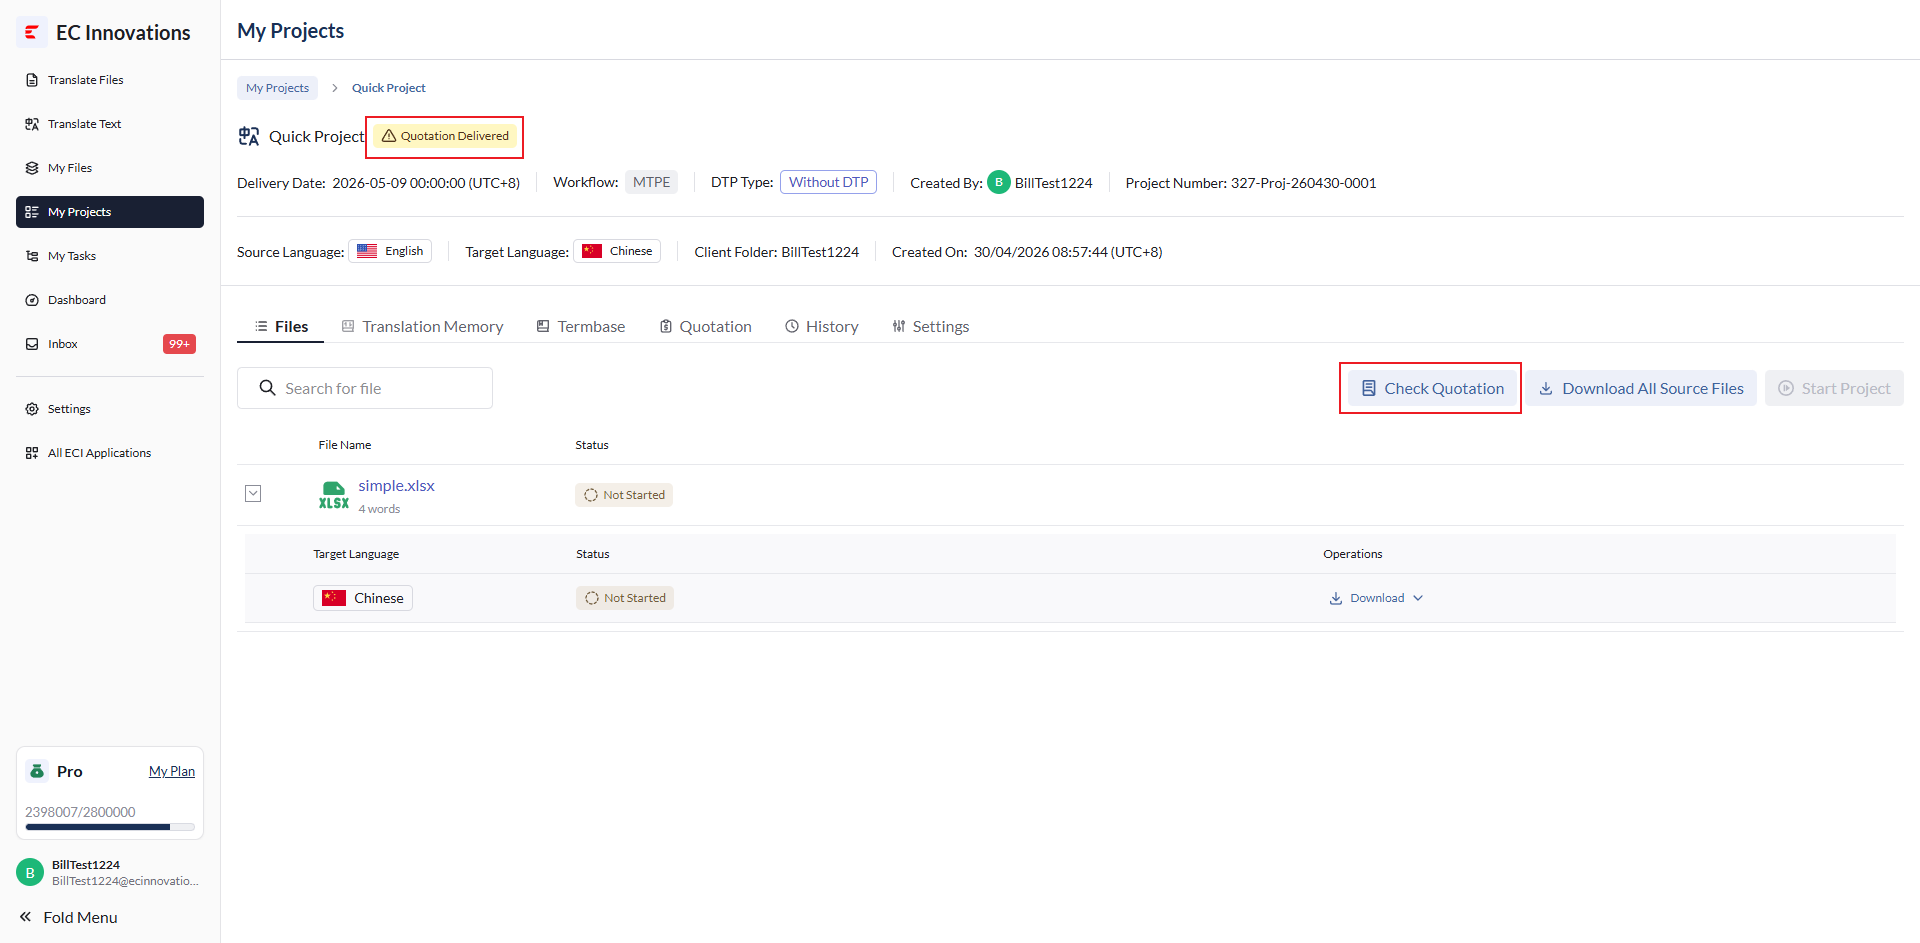
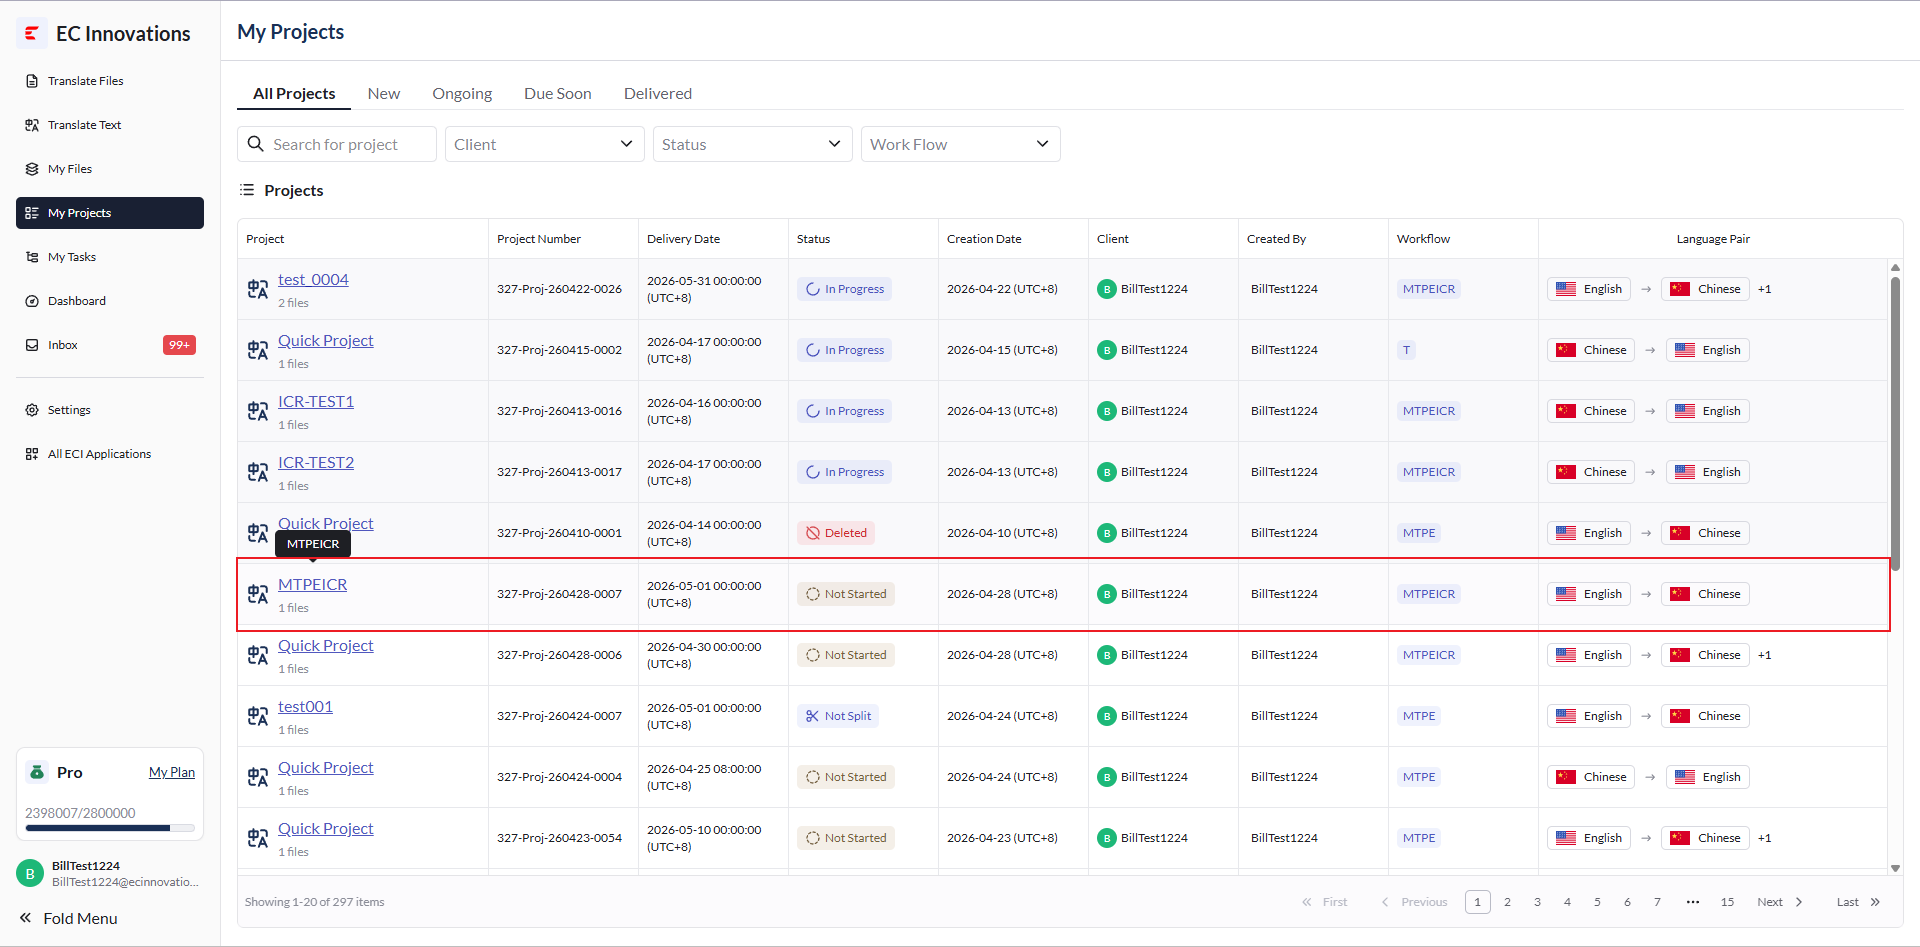
Click the project name.
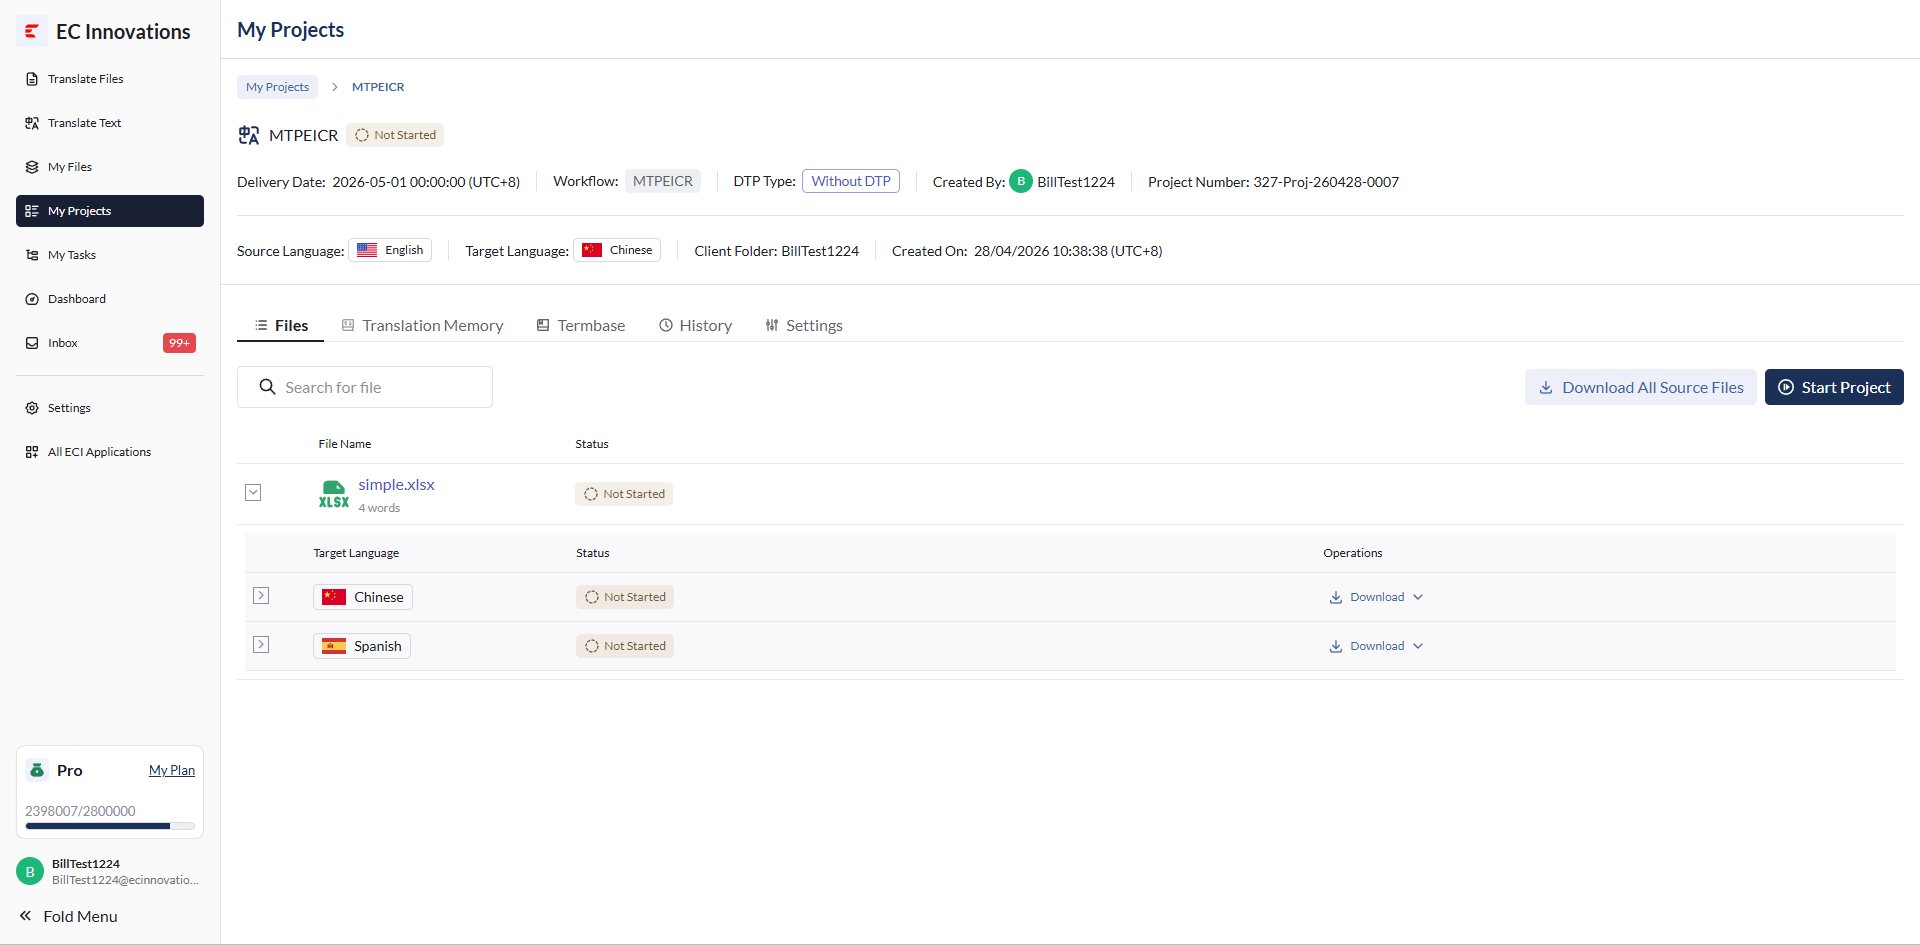
Go to the project details page.
Project Tabs
Below the project information, there are six tabs: ‘Files’, ‘Translation Memory’, ‘Termbase’, ‘History’, ‘Quotation’, and ‘Settings’.
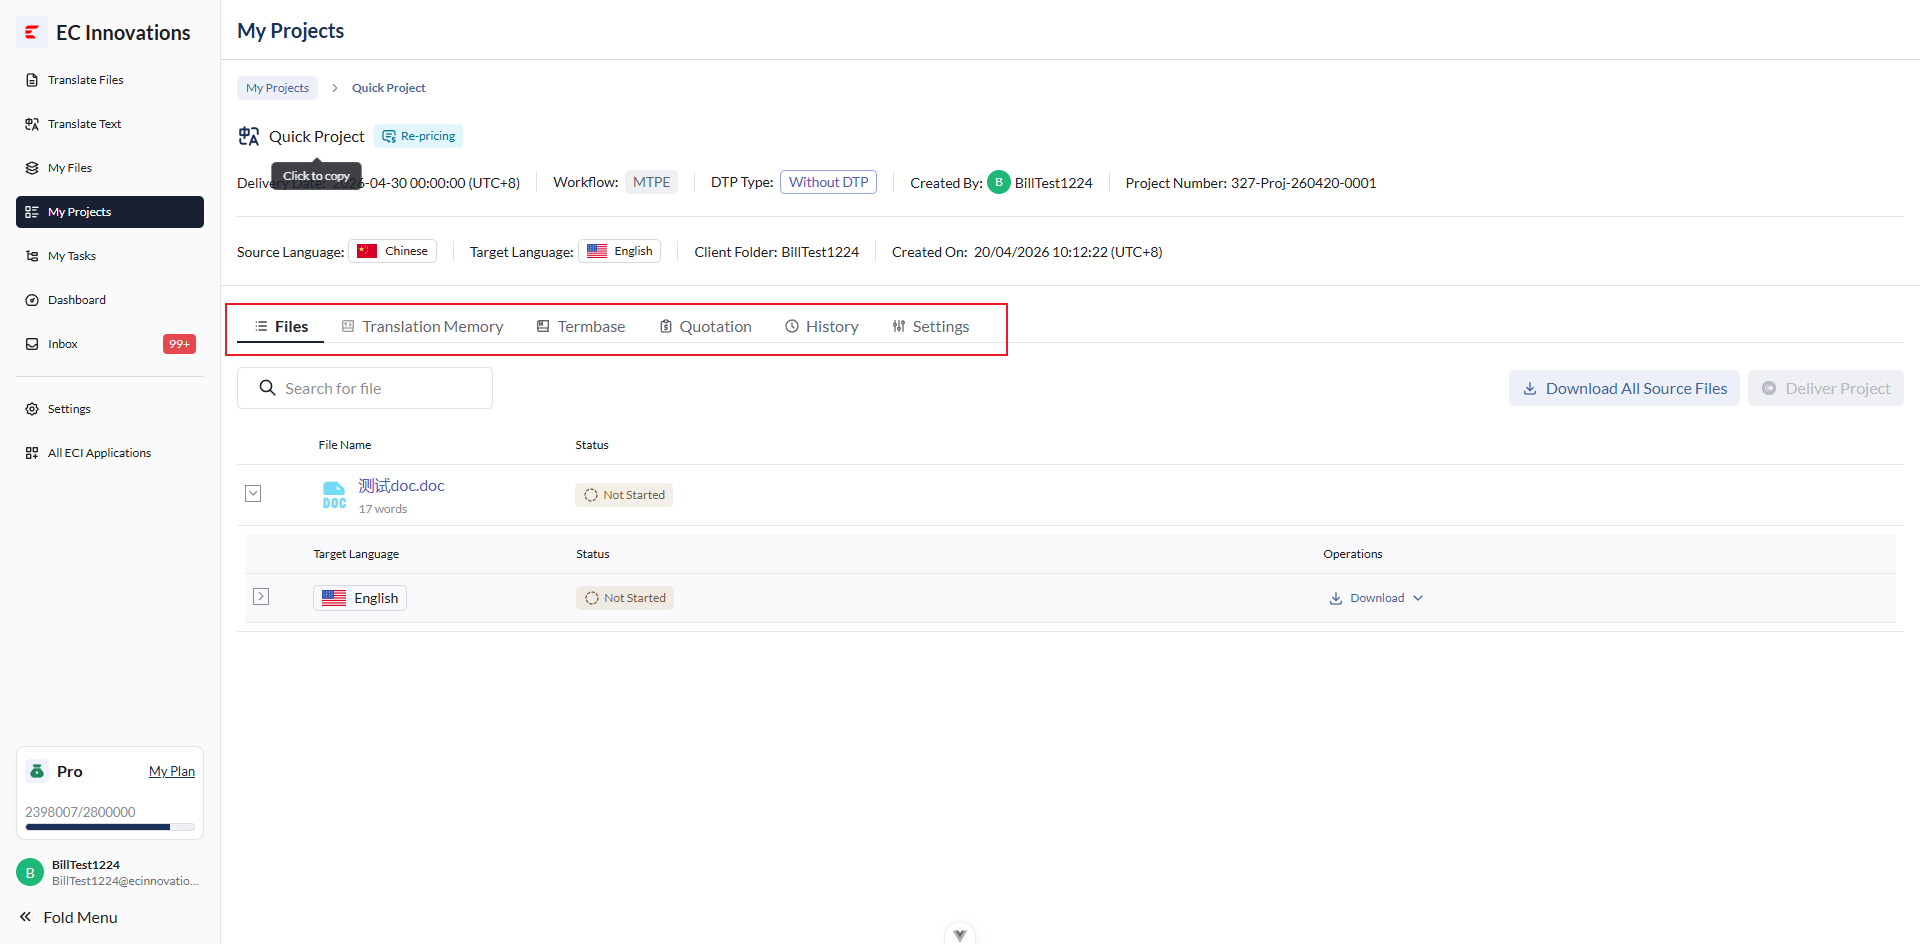
Files
View the list of files under the project.
Top Action Buttons
The following actions are available:
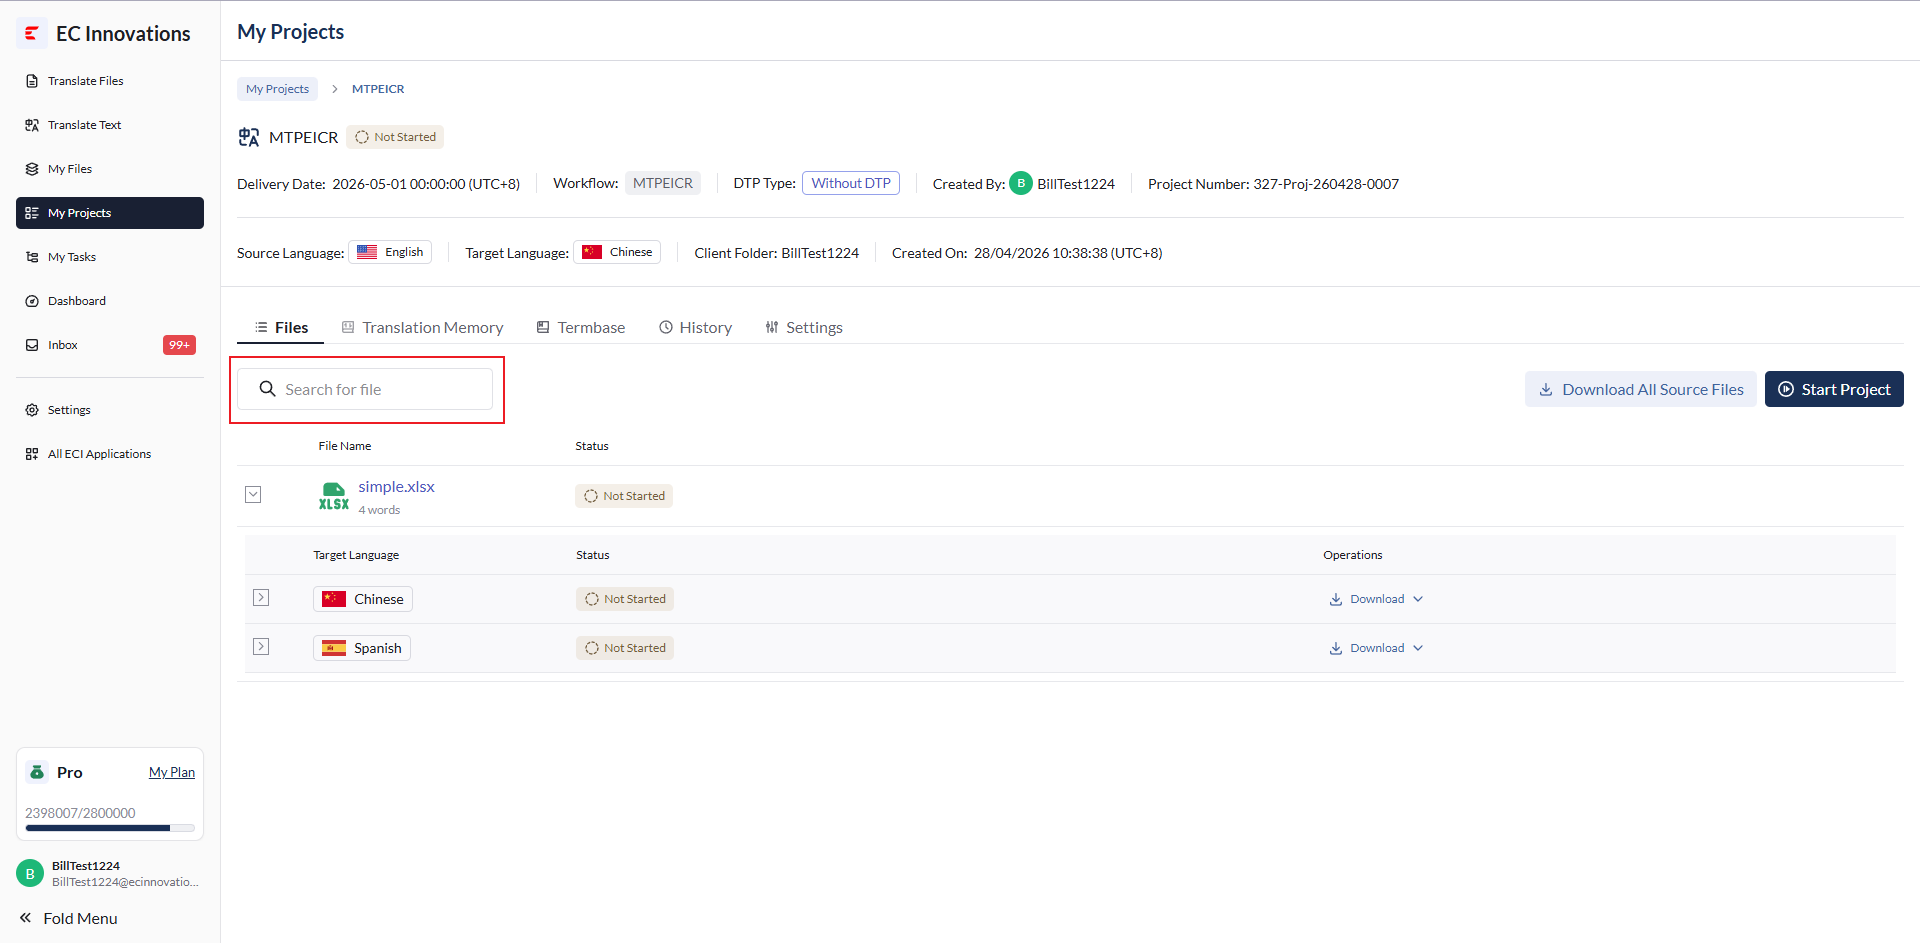
‘Search’: Filter by file name.
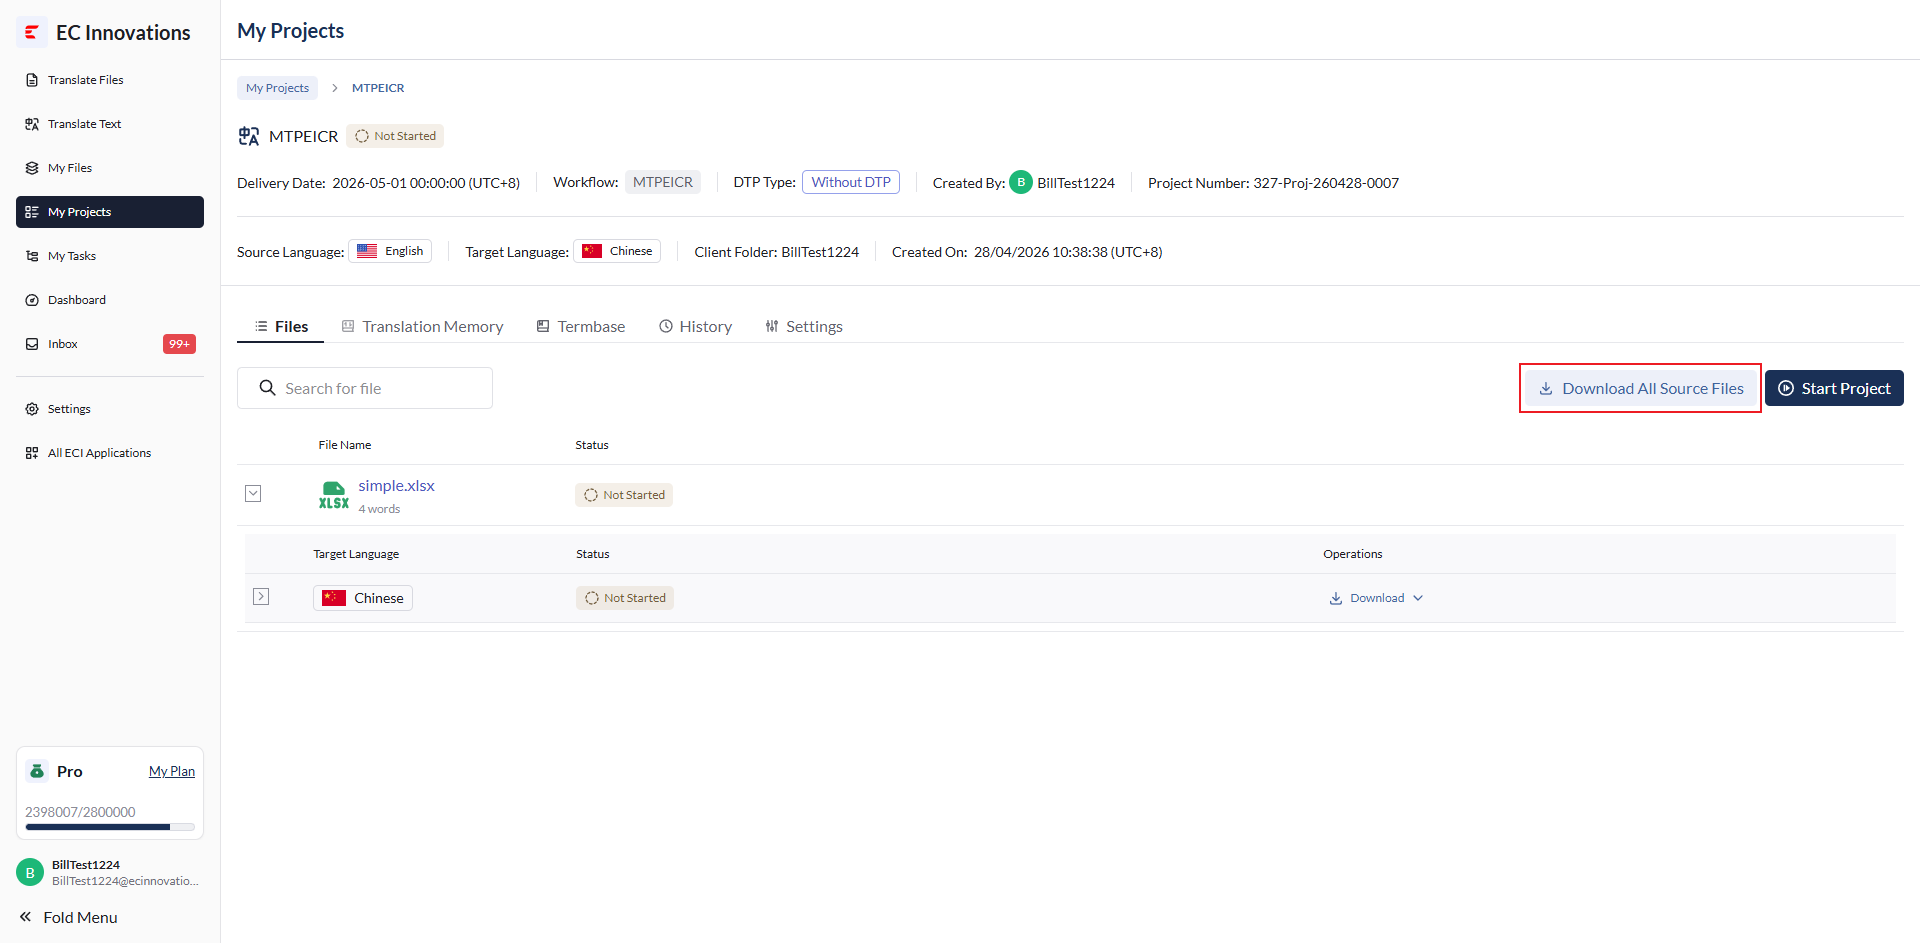
‘Download All Source Files’: Download all source files in the project.
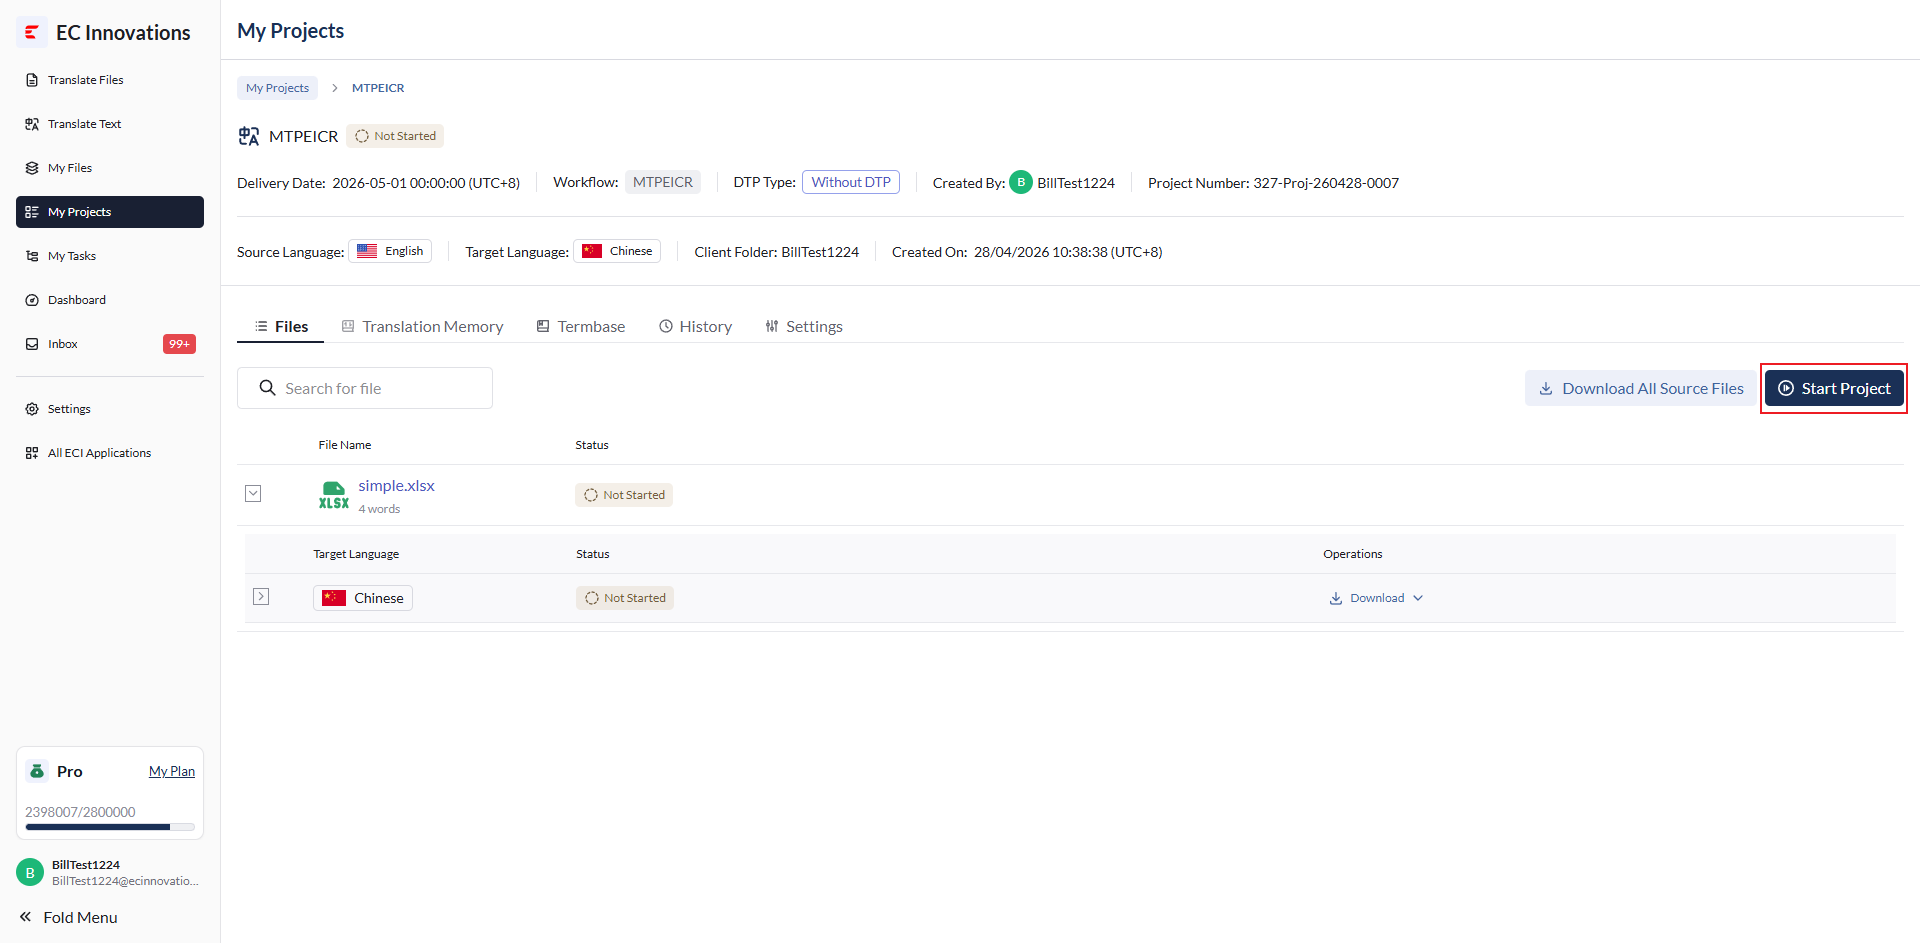
‘Start Project’: Start the project.
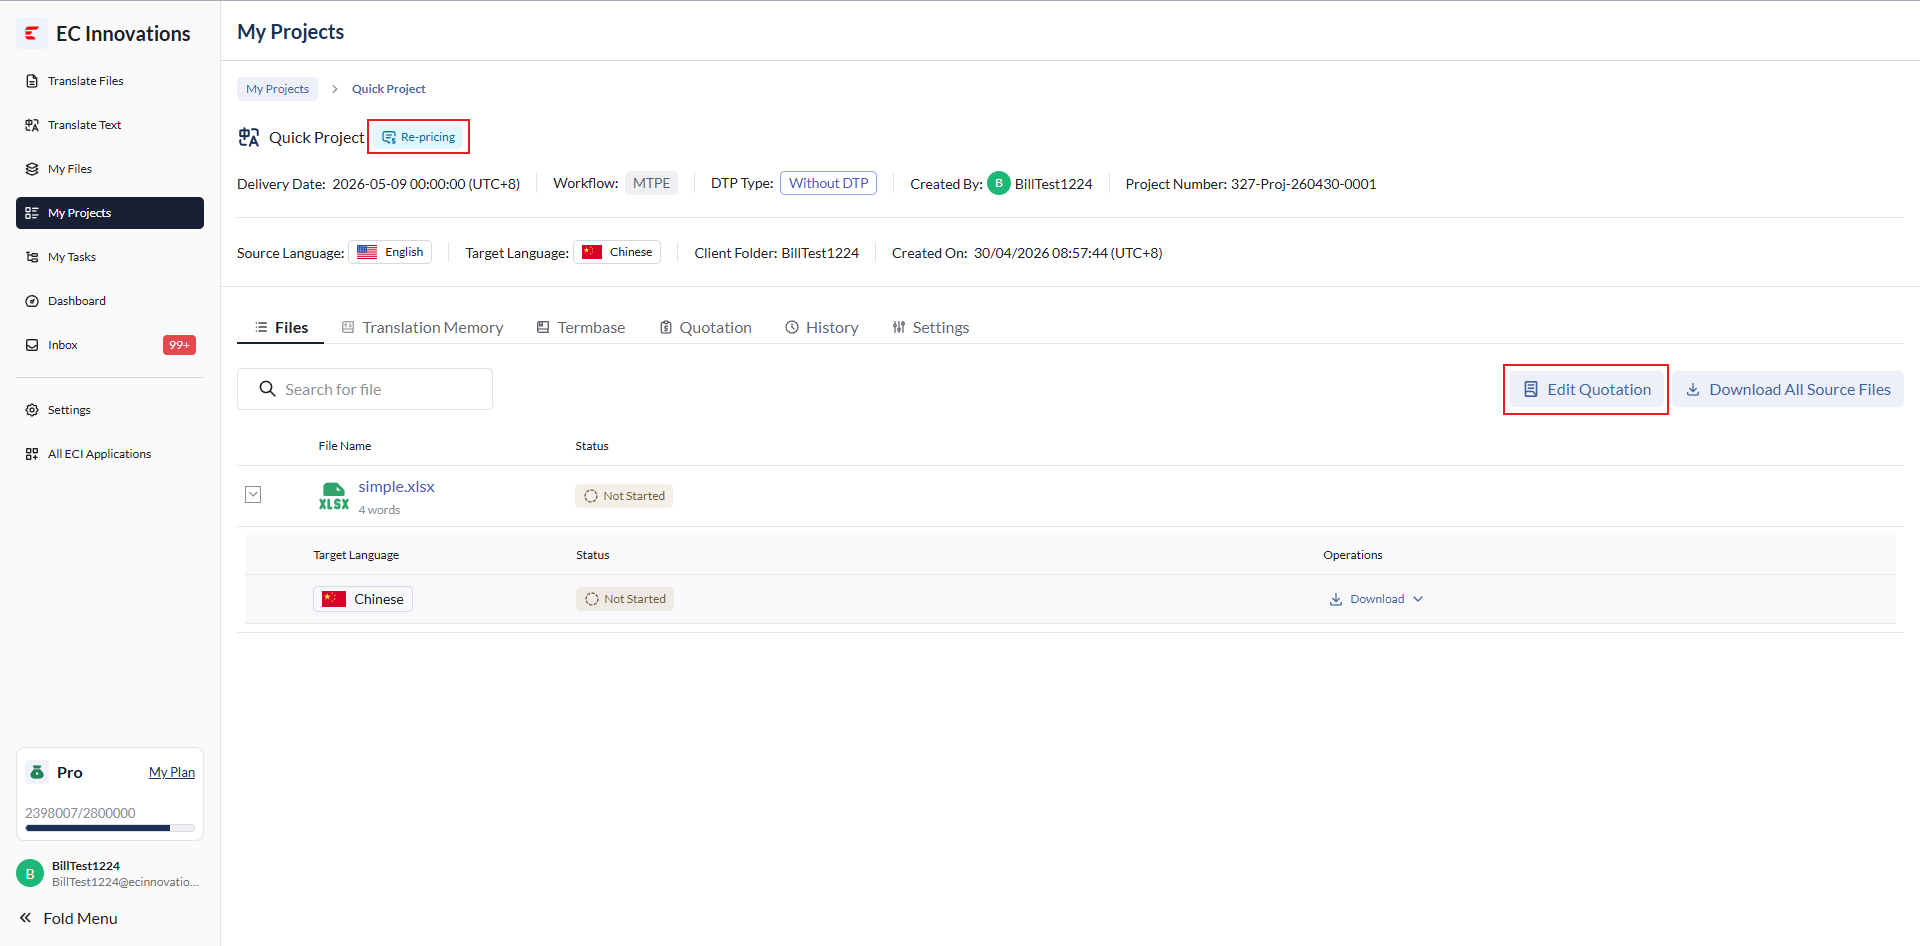
‘Edit Quotation’: Edit quotation details. This is only shown for projects under price negotiation.
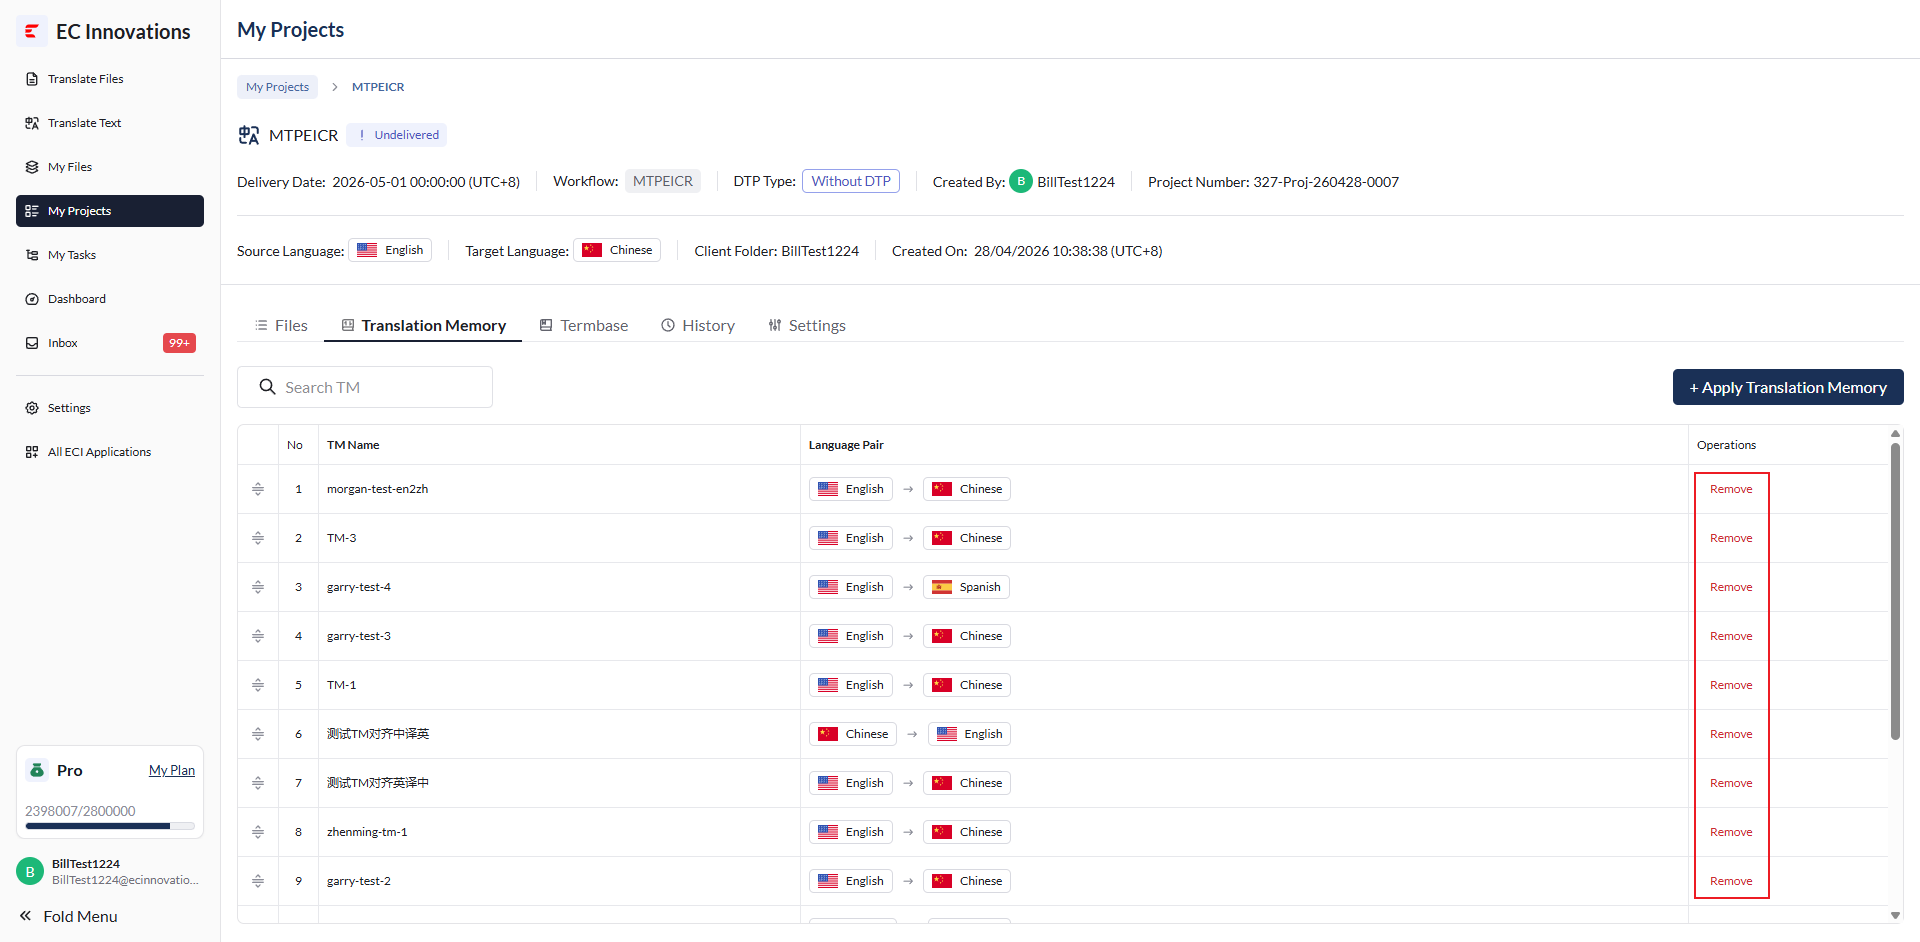
Translation Memory
The following actions are available:
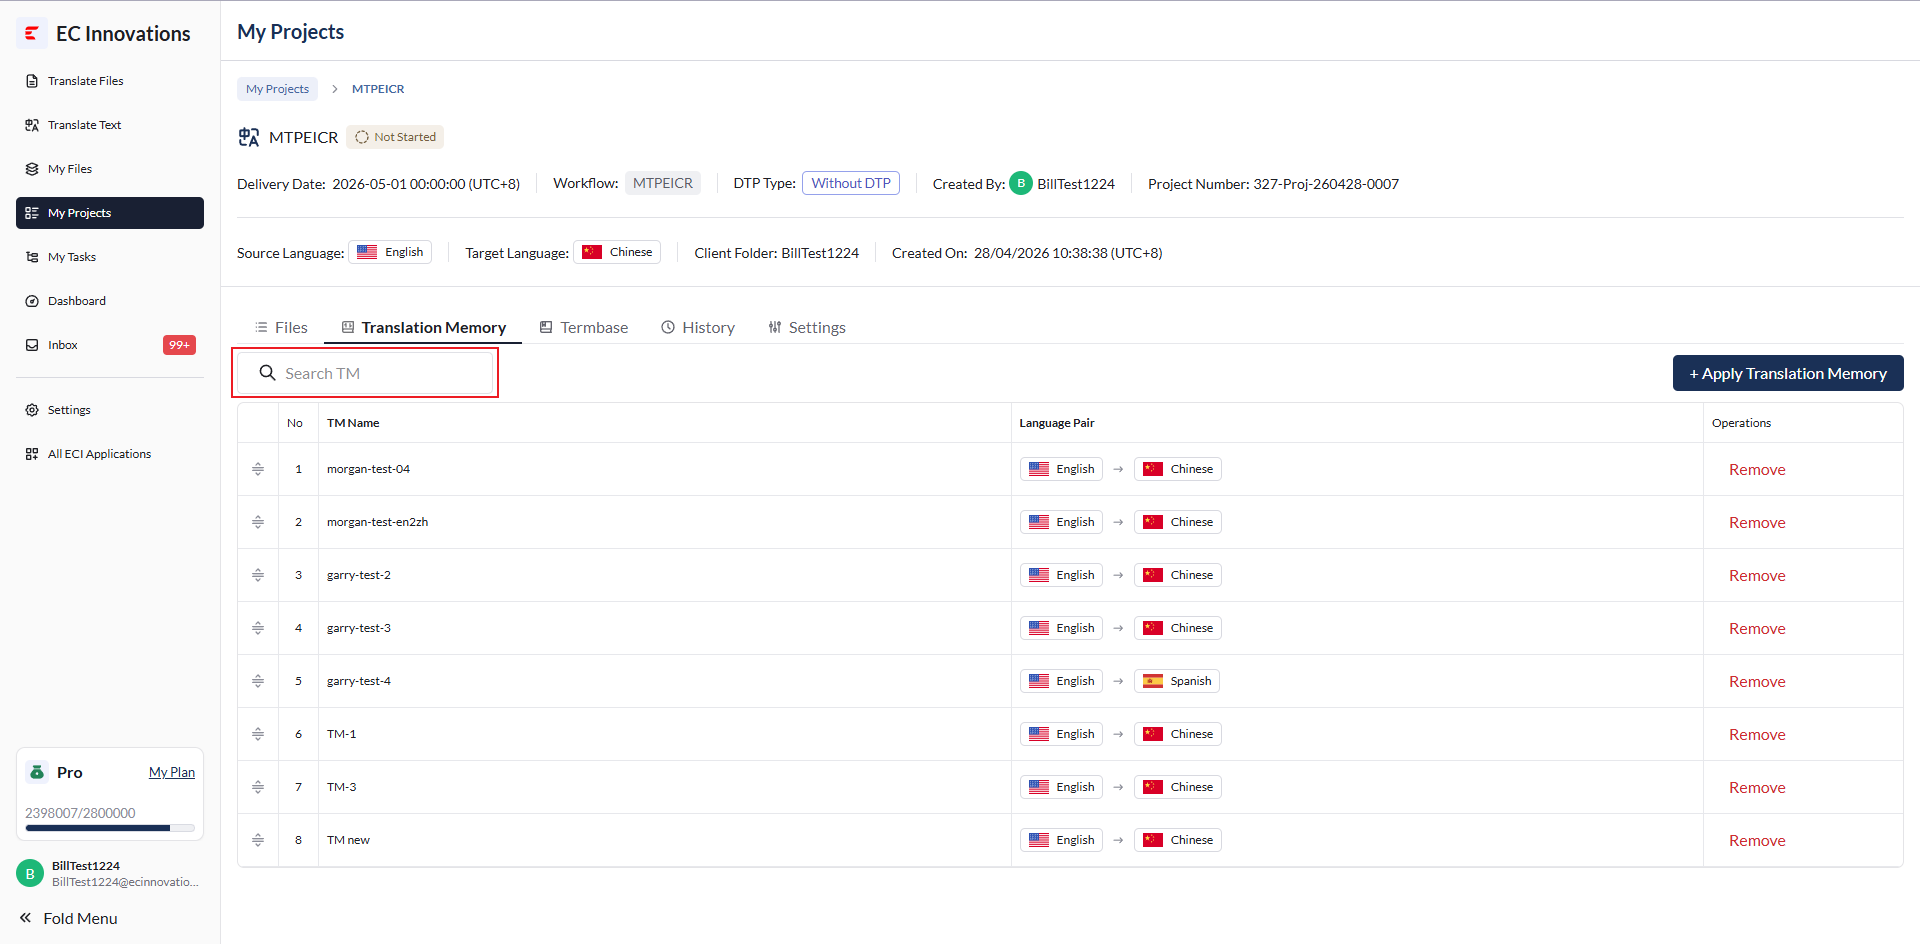
‘Search’: Filter by file name.
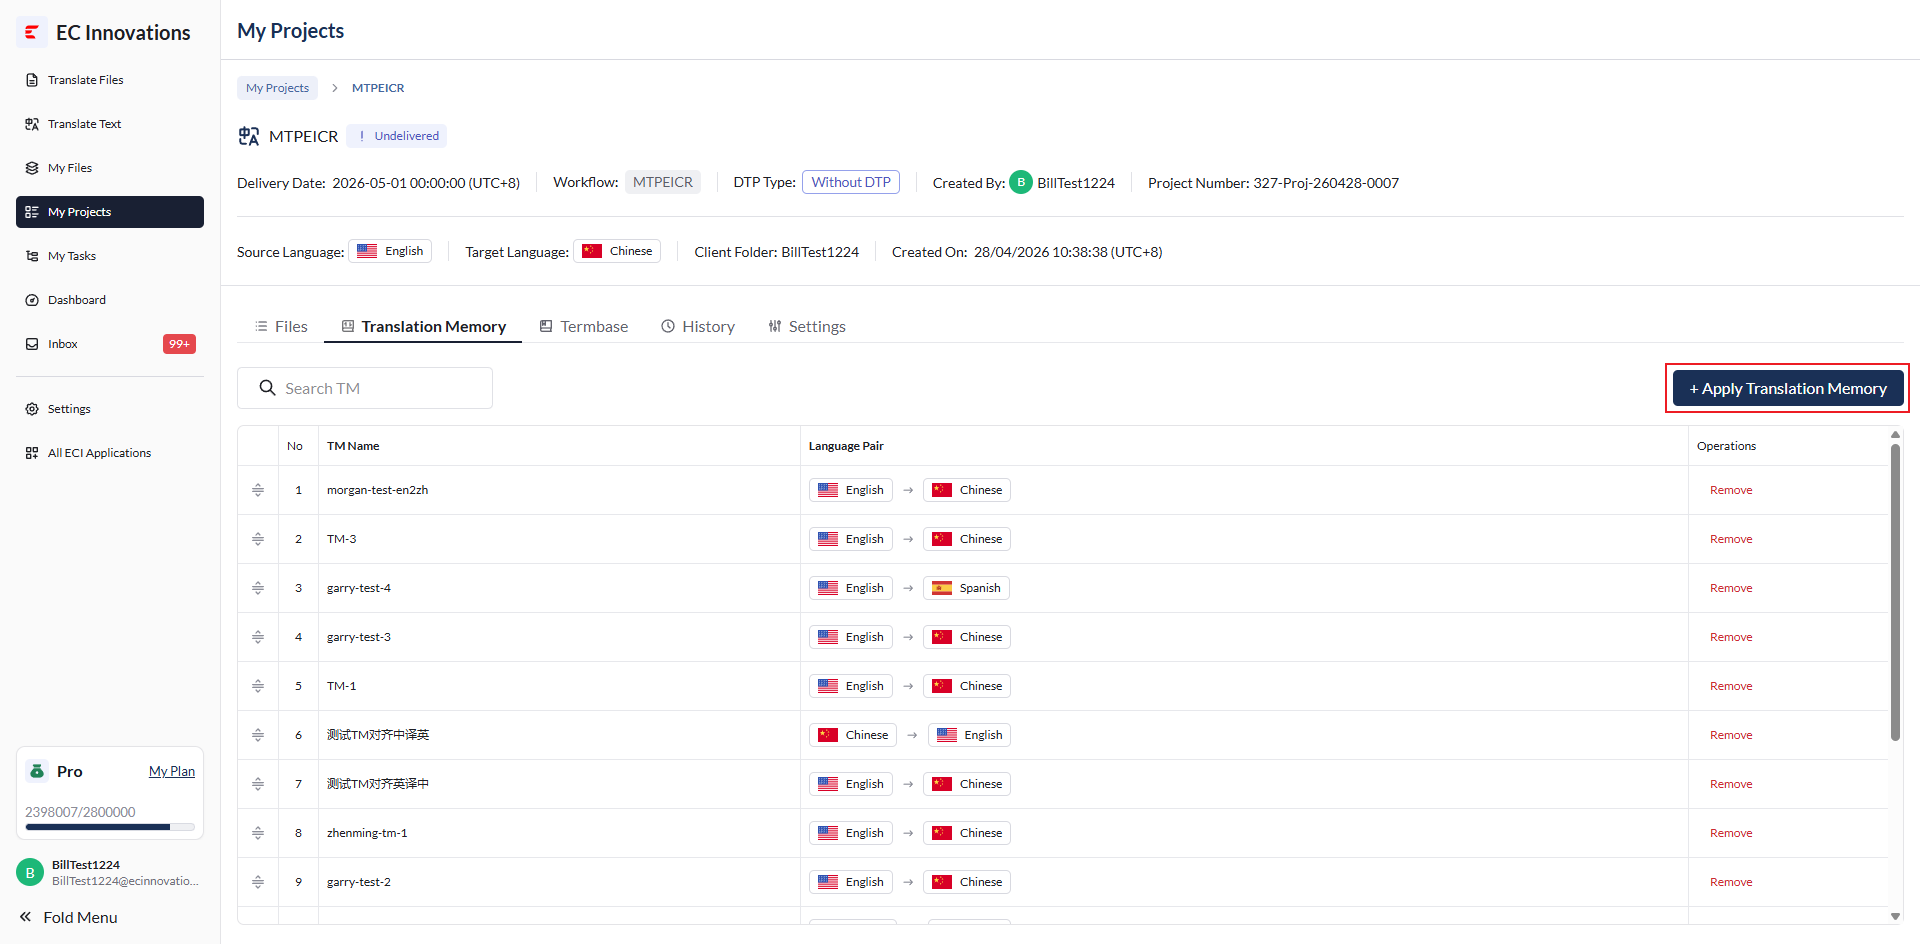
‘+Apply Translation Memory’:
Click the button to open a pop-up.
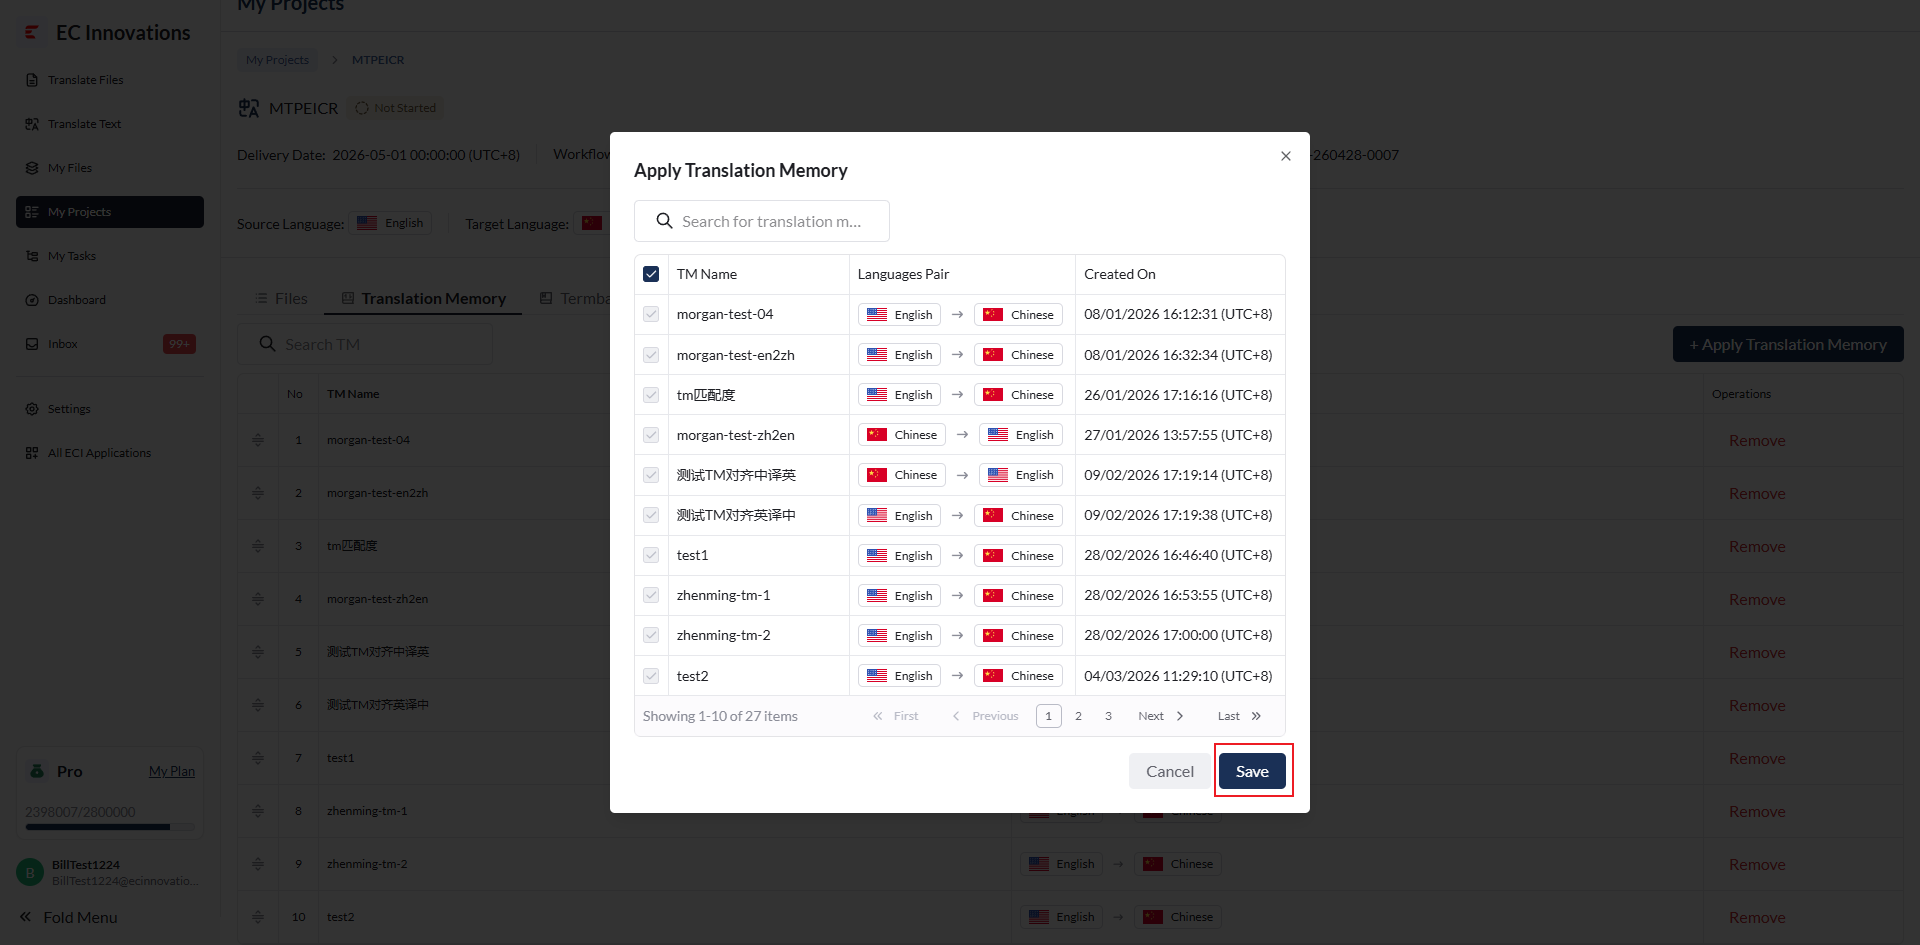
Select a TM in the pop-up, then click ‘Save’ to add it.
‘Remove’: Remove a TM.
Termbase
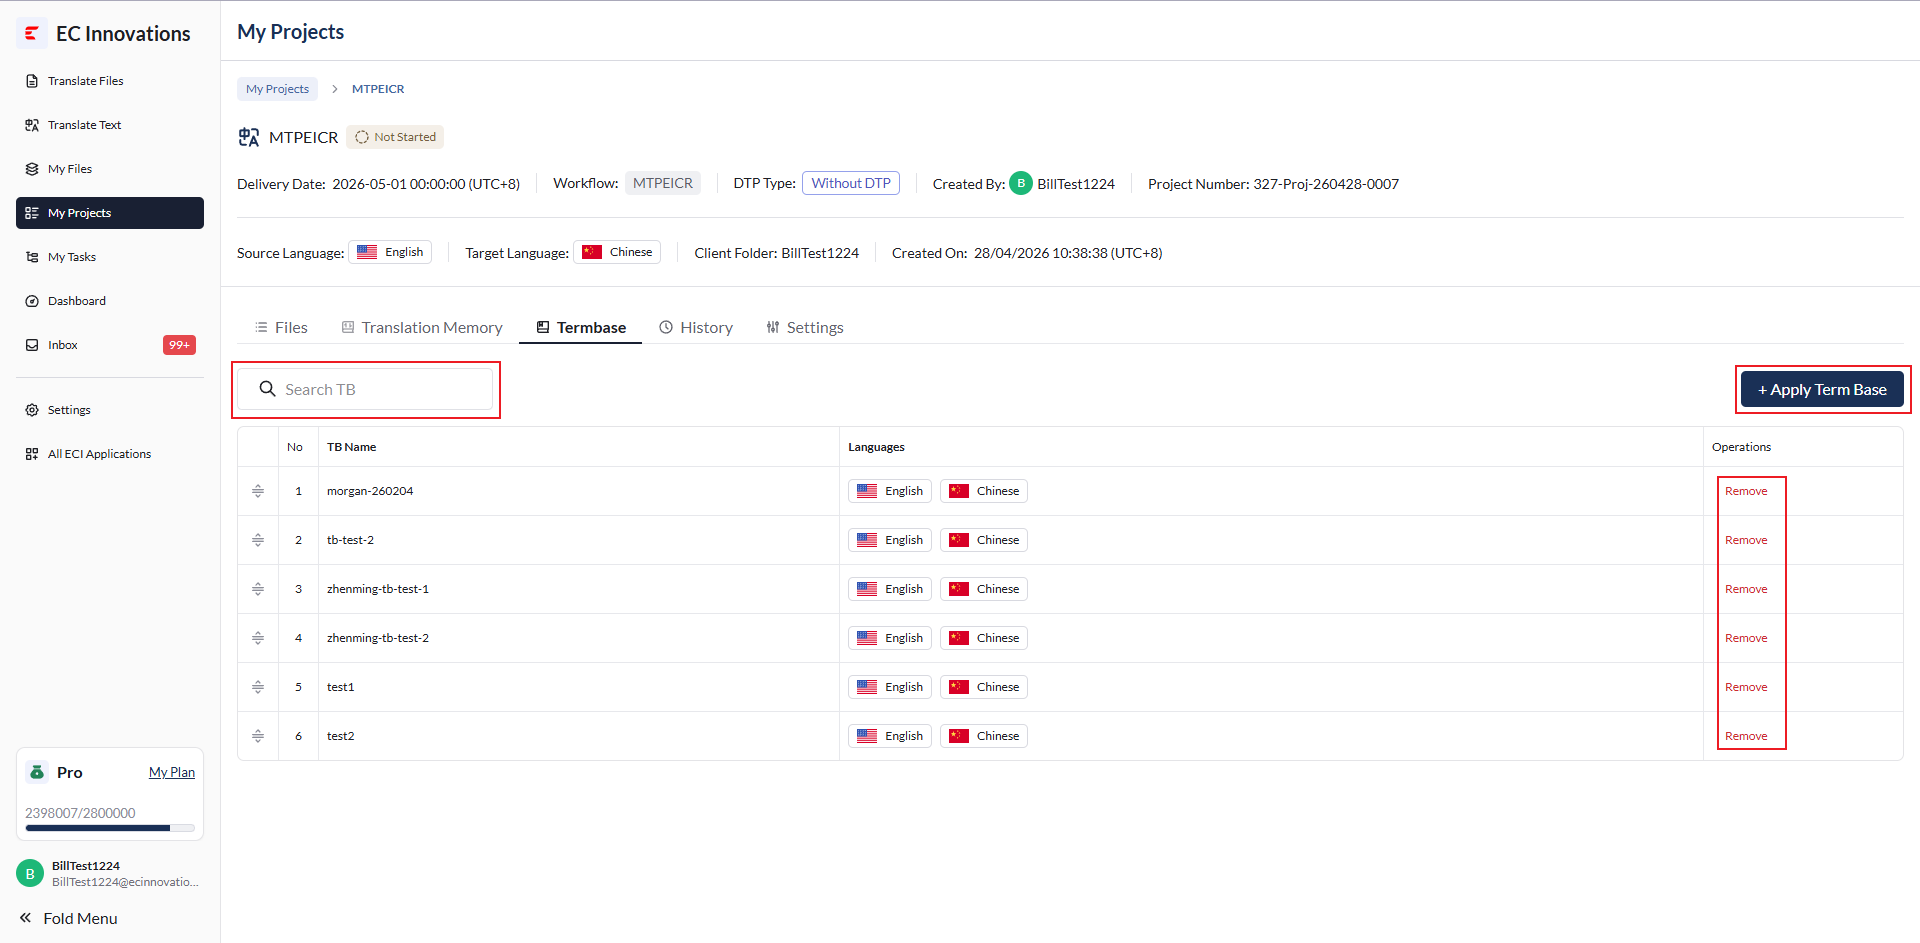
The available features and actions are the same as those for Translation Memory:
‘Search’: Filter by file name.
‘+Apply Termbase’: Click the button, select a TB in the pop-up, then click ‘Save’ to add it.
‘Remove’: Remove a TB.
History
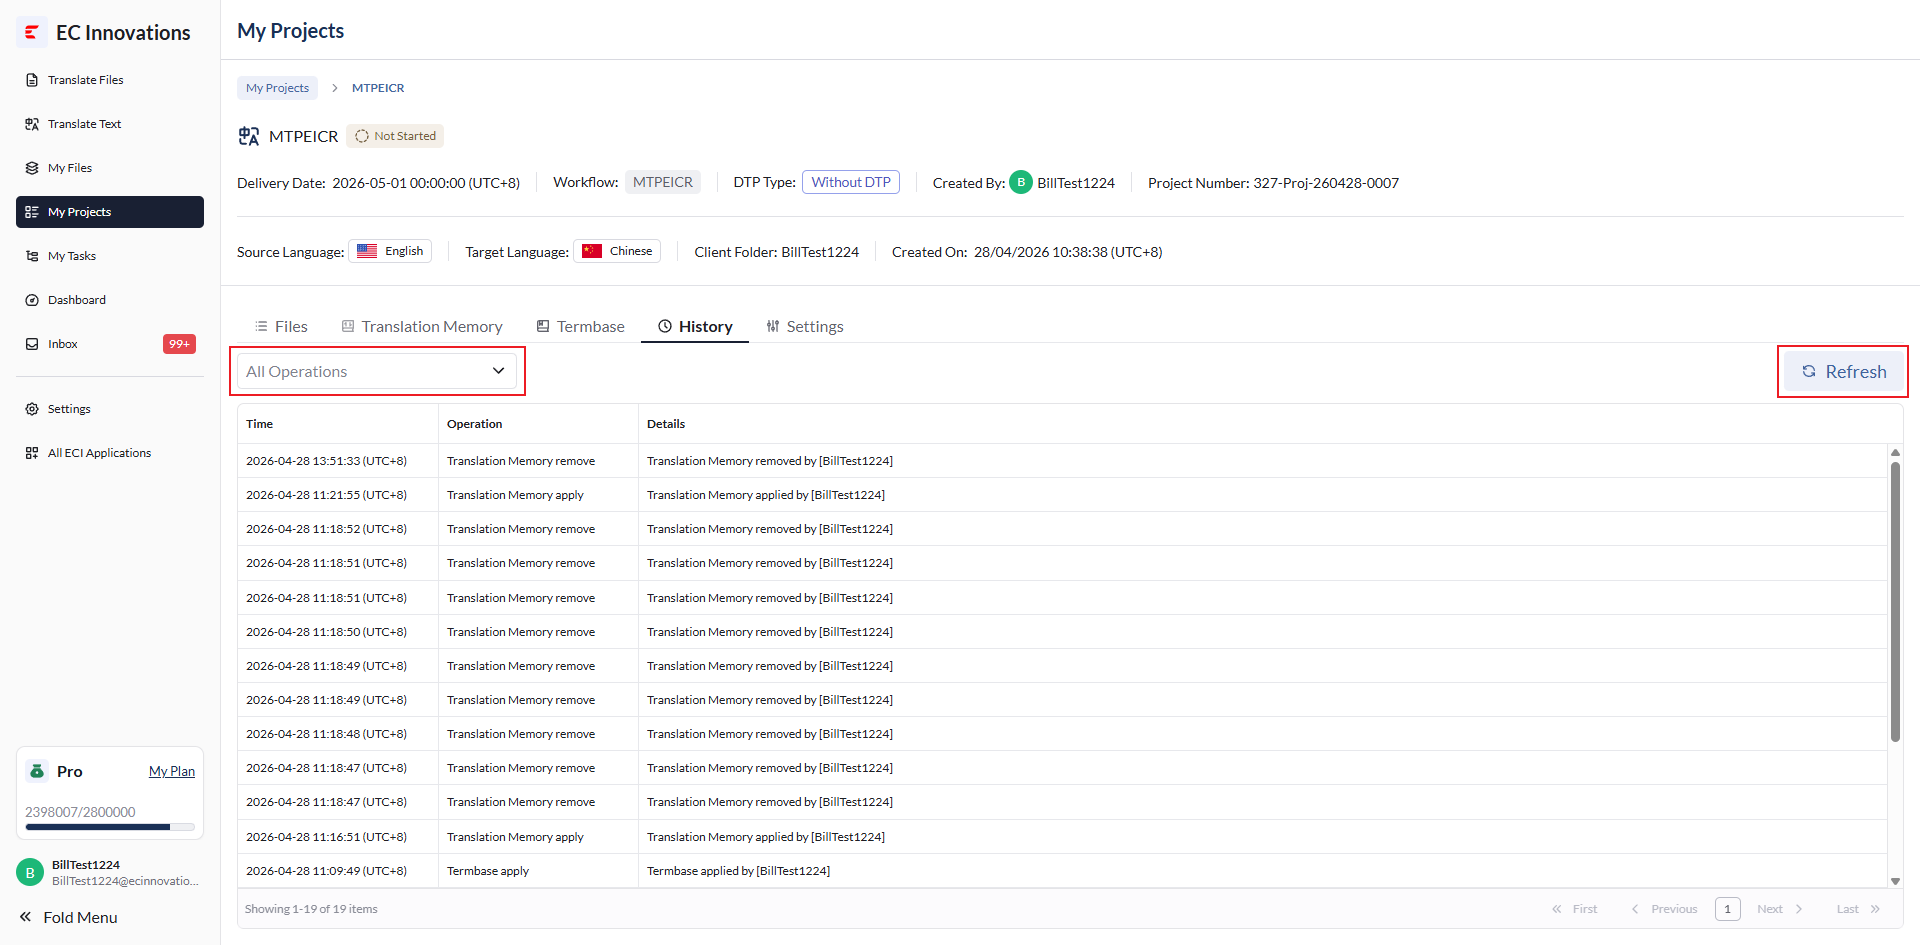
The following actions are available:
‘Search’: Filter by operation type.
‘Refresh’: Refresh the history list.
Quotation
The following action is available:
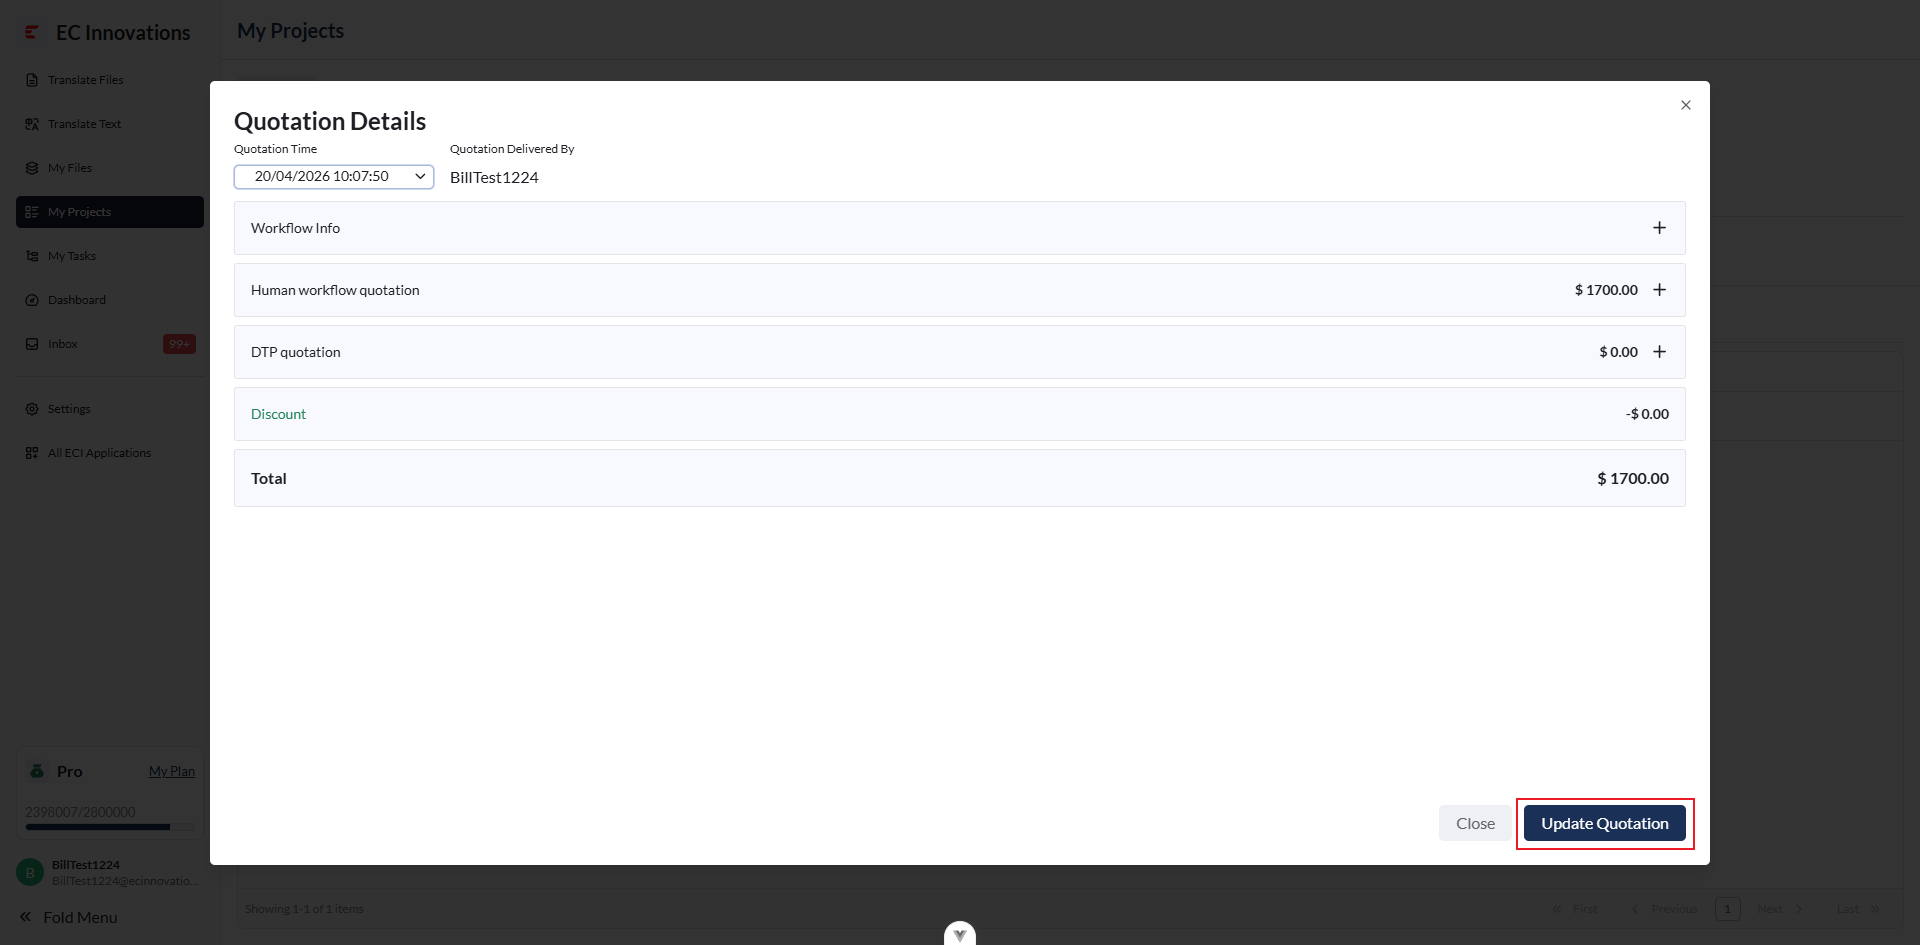
‘Quotation Details’: View the quotation details pop-up.
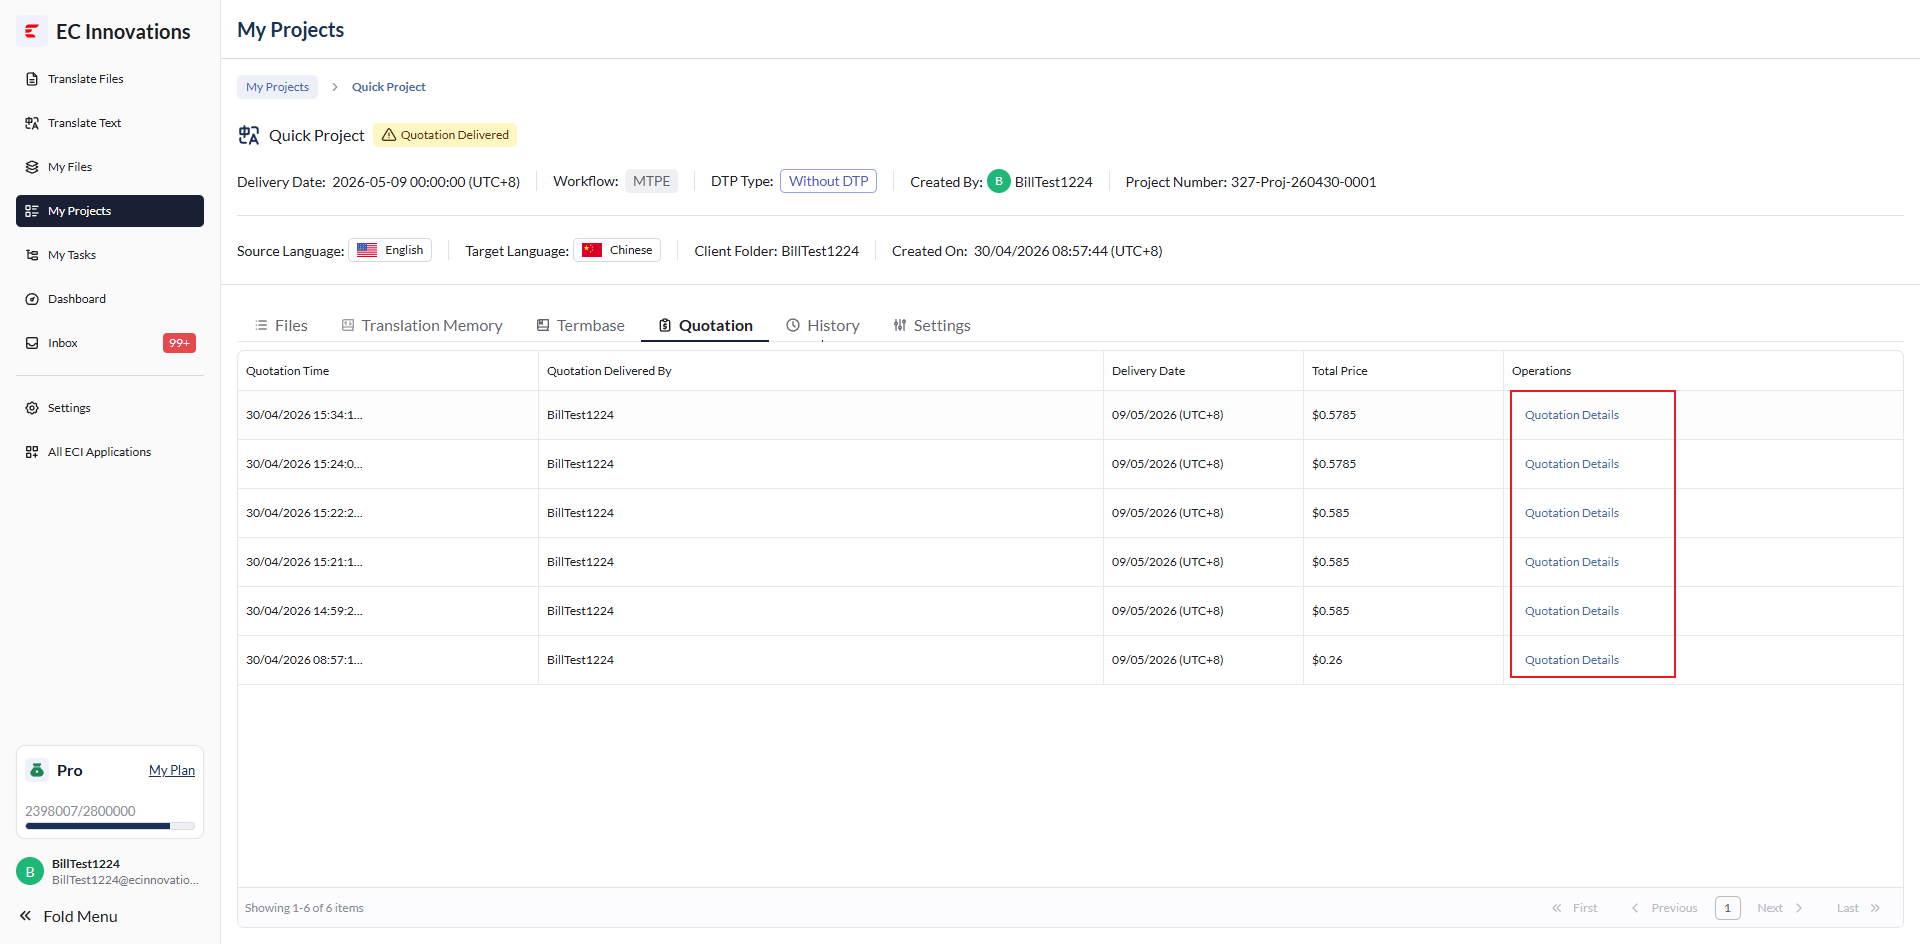
In the pop-up, click ‘Update Quotation’ to update the quotation.
Settings
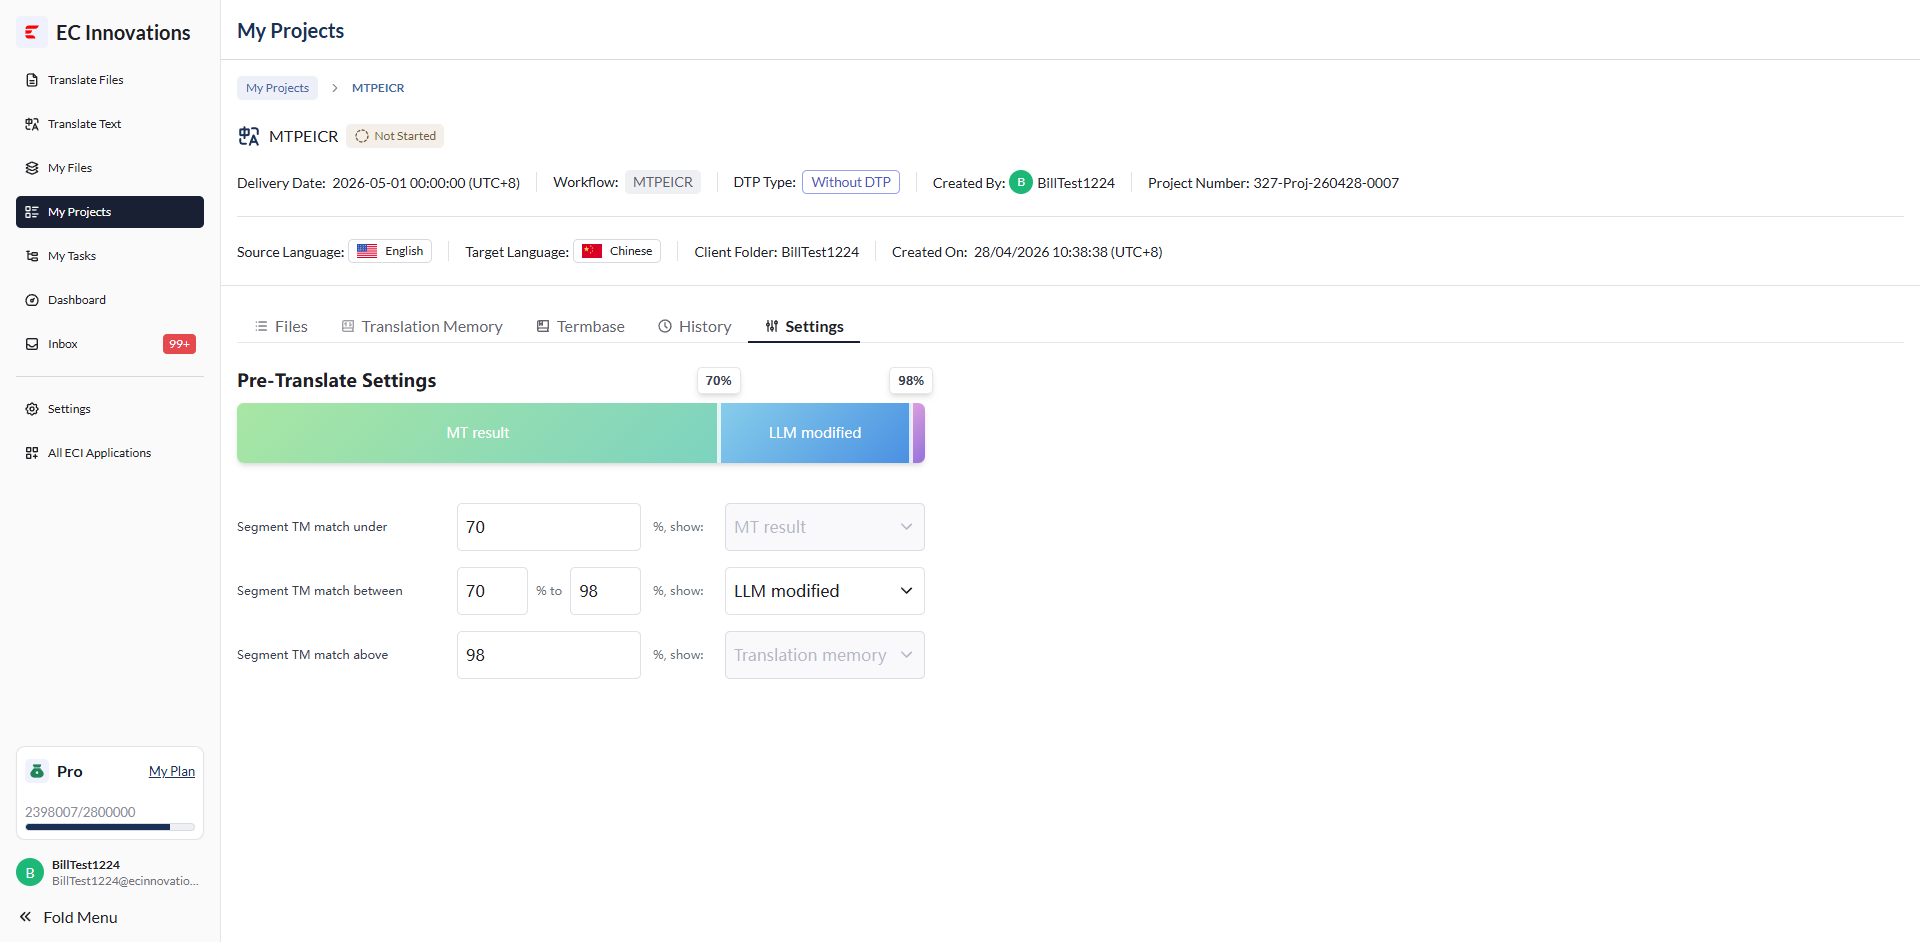
During the pre-translation stage, you can adjust the range values for three modes:
- Source segments with a TM match below 70% will be processed by the machine translation model.
- Source segments with a TM match between 70% and 98% will be optimized by the LLM.
- Source segments with a TM match above 98% will generally use the TM result directly.
Start Project
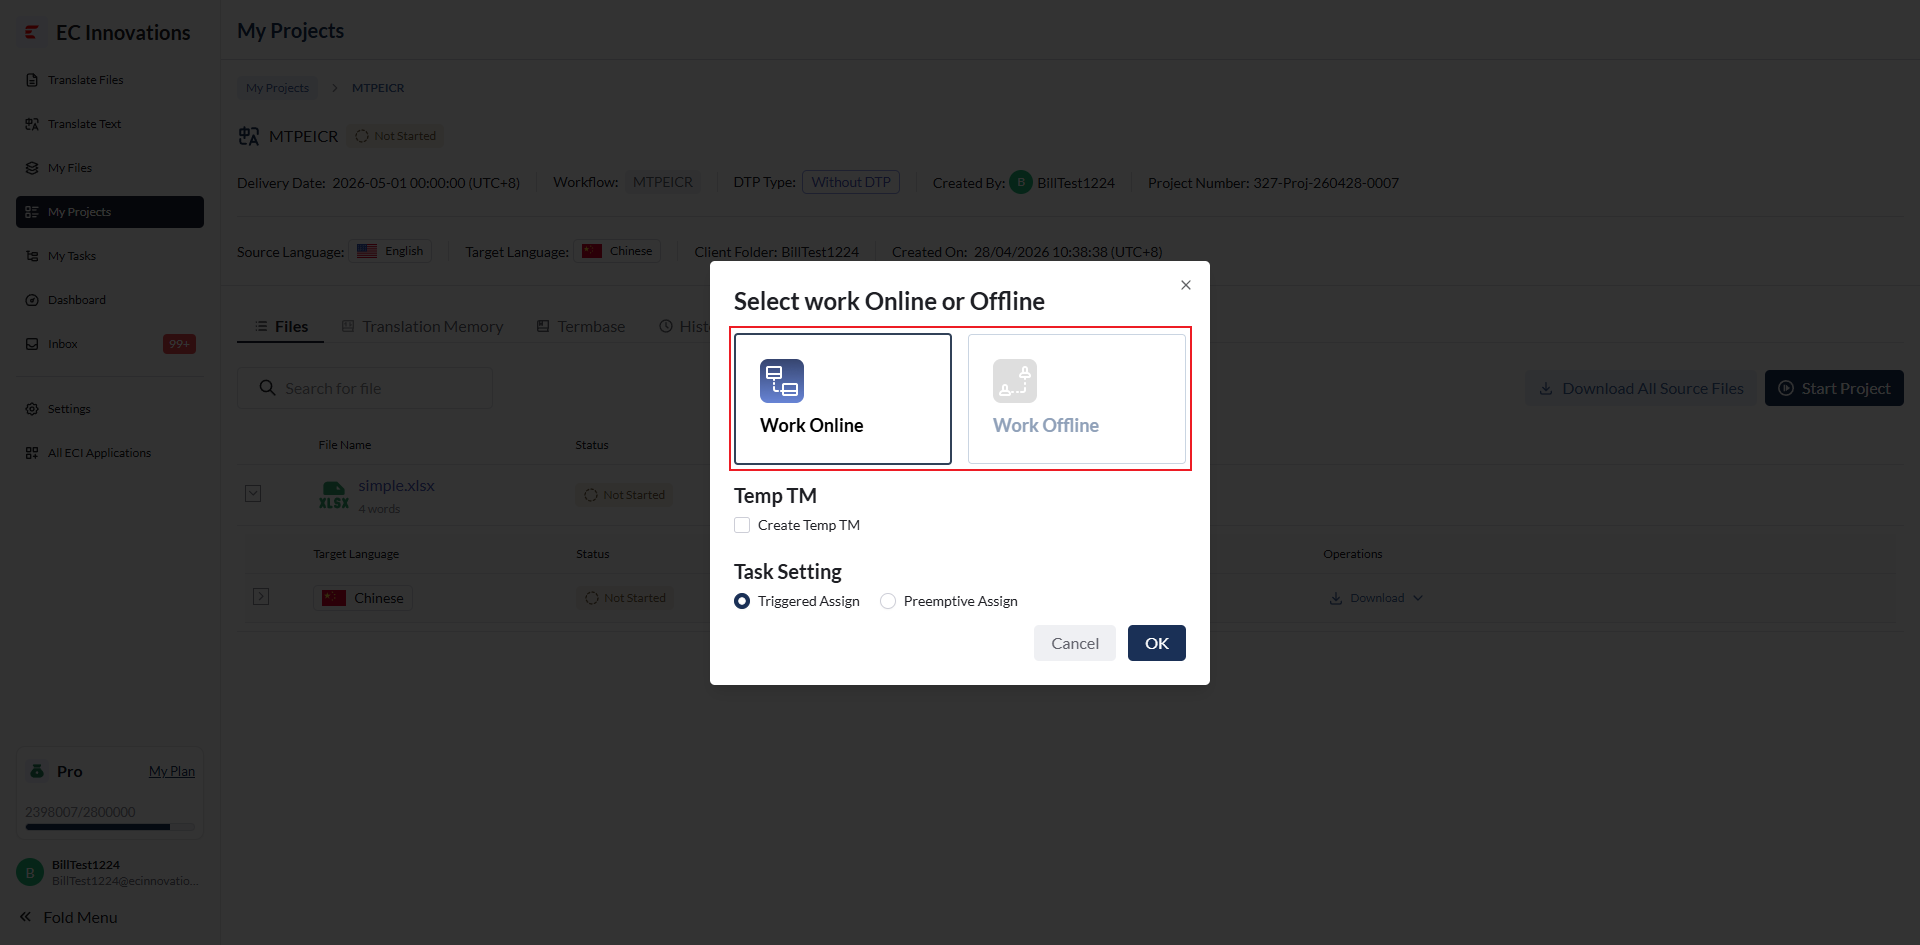
Click ‘Start Project’ to start the translation project. A project configuration pop-up will appear.
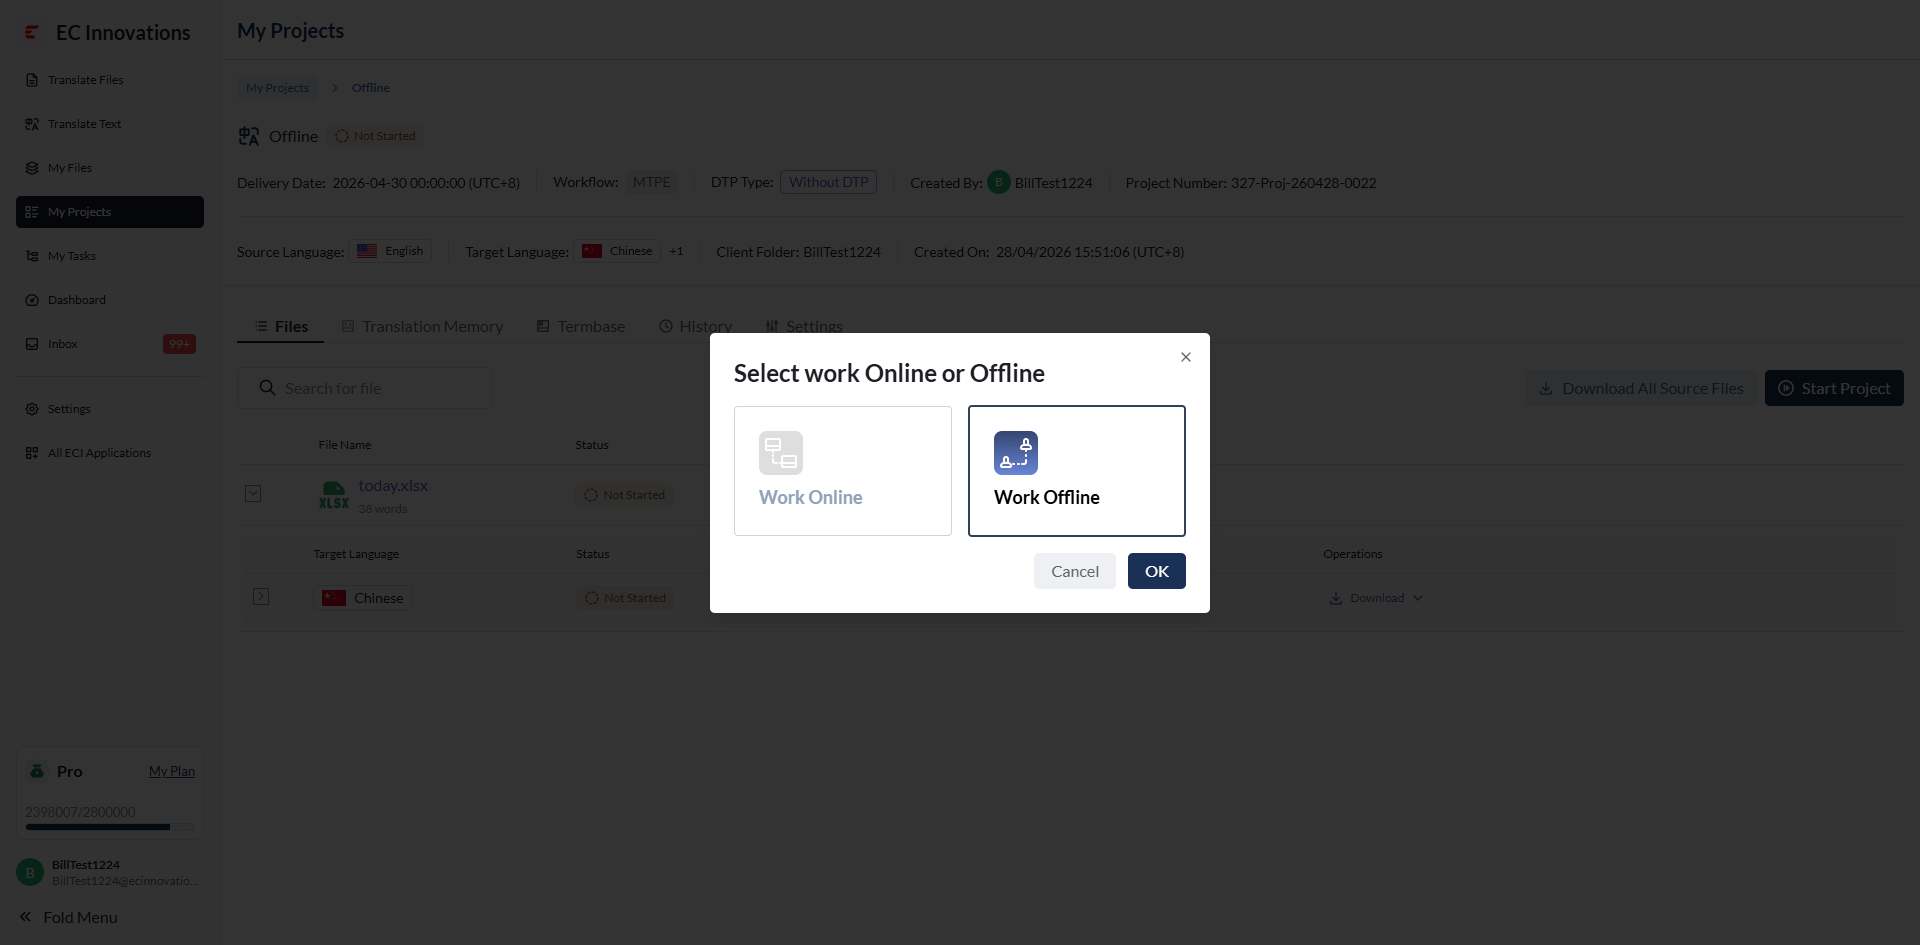
Select whether to run the project online or offline.
Work Online: Translate directly online without downloading project files.
Work Offline: Download the project files first, translate them offline, and then upload the translated files.
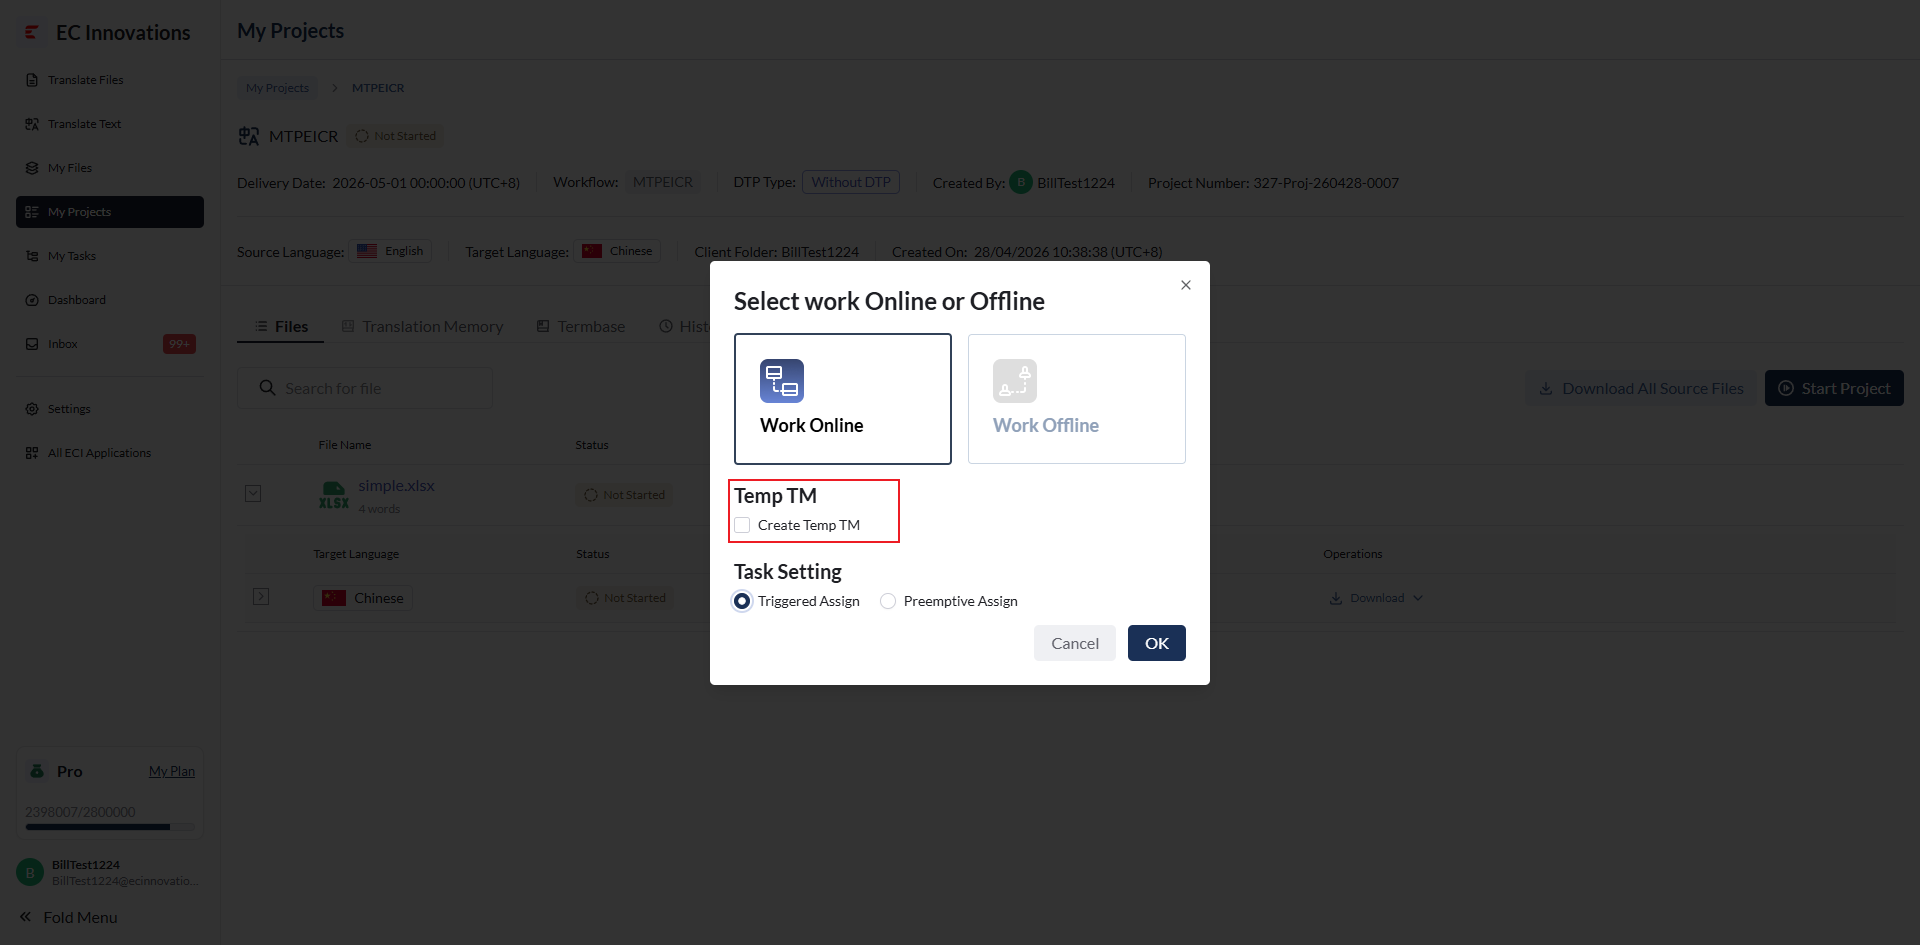
Choose whether to create a temporary TM. If selected, the translation can be synced to a TM under the ‘Translation Memory’ tab after the project is delivered.
Choose triggered assignment or preemptive assignment.
Triggered Assign: Tasks can only be assigned when the project reaches a specific workflow step after the project starts.
Preemptive Assign: Tasks for all workflow steps can be manually assigned before the project starts.
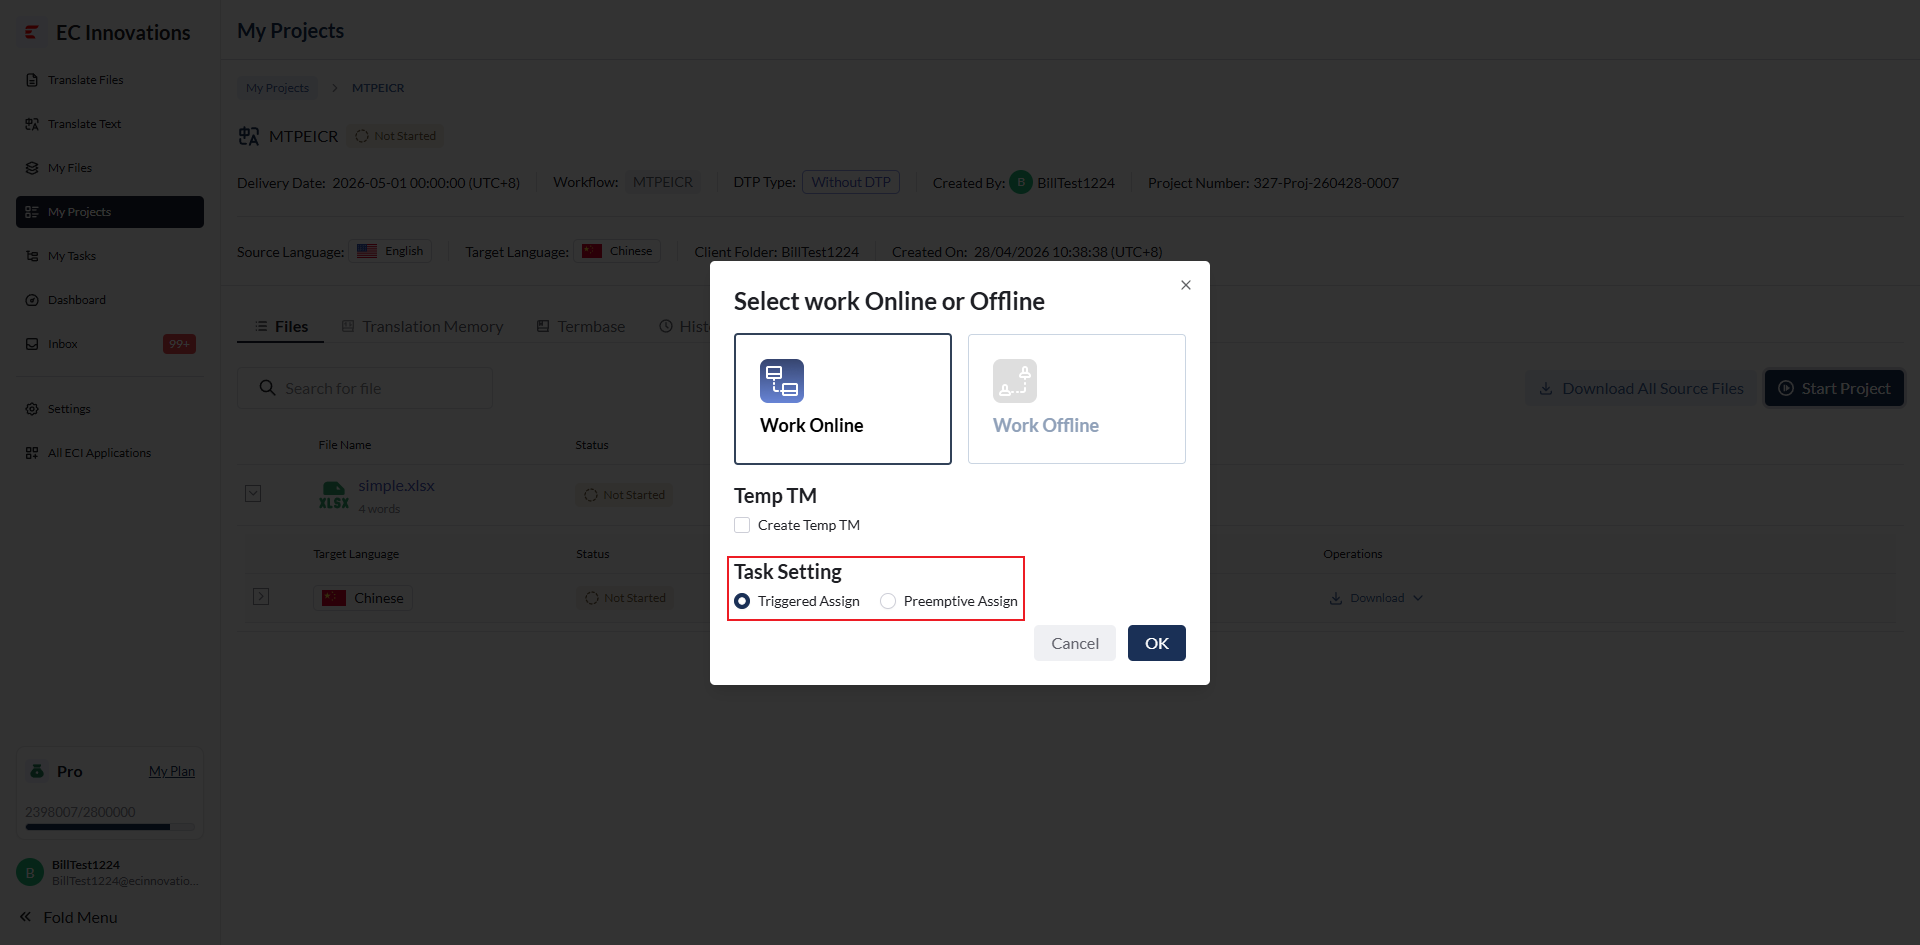
Click ‘OK’ to start the project.
Work Online: Triggered Assign
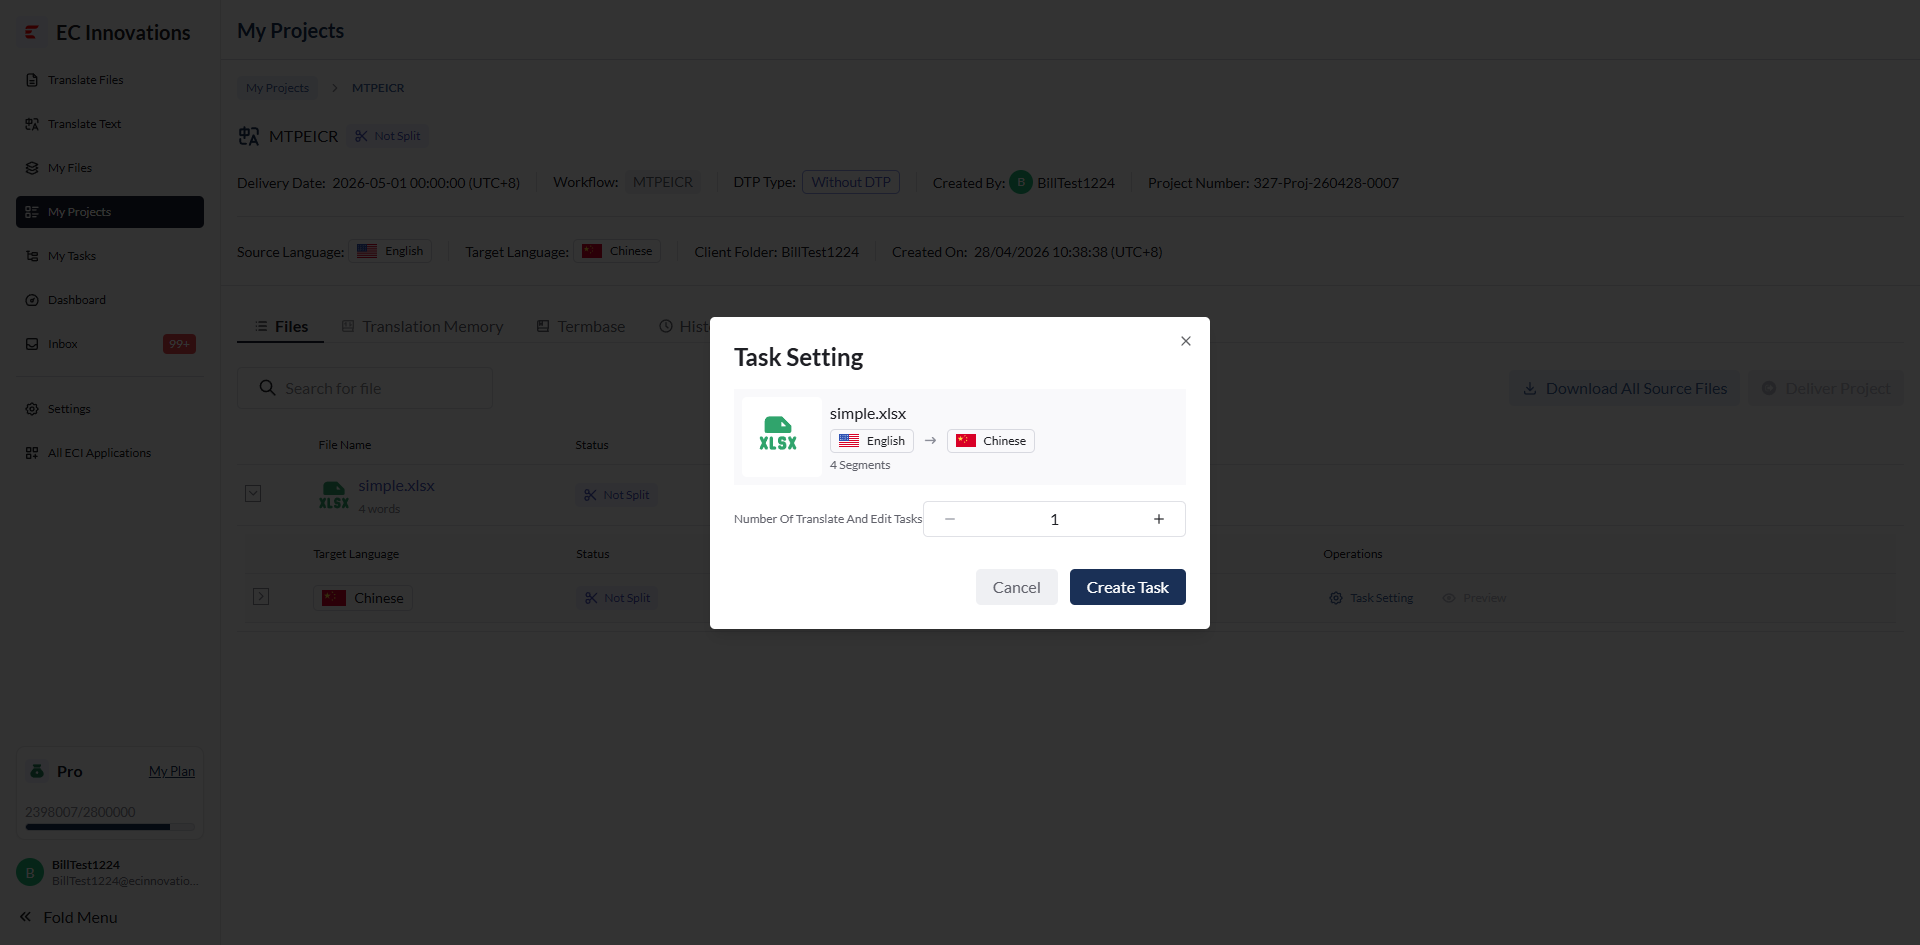
After the project starts, you can split the project. Click ‘Task Setting’ to begin splitting the project.
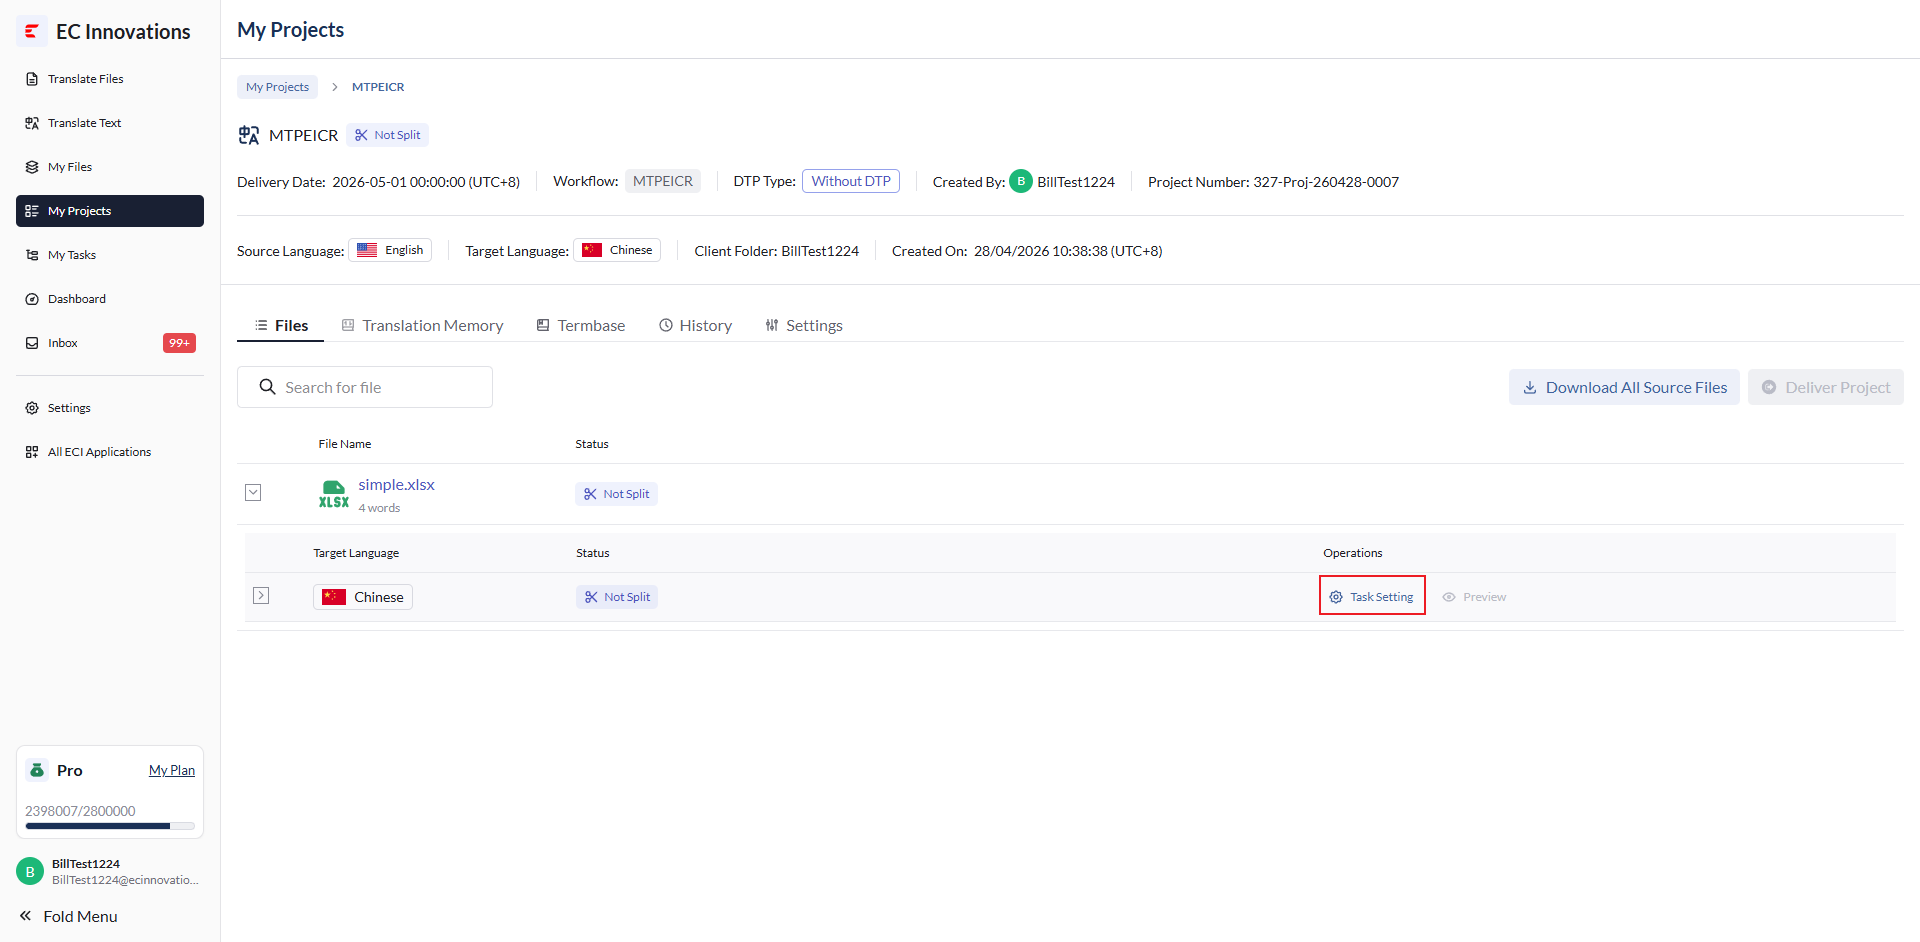
Before splitting the project, you can run pre-translation. Click ‘Pre-Translate Settings’ to configure pre-translation.
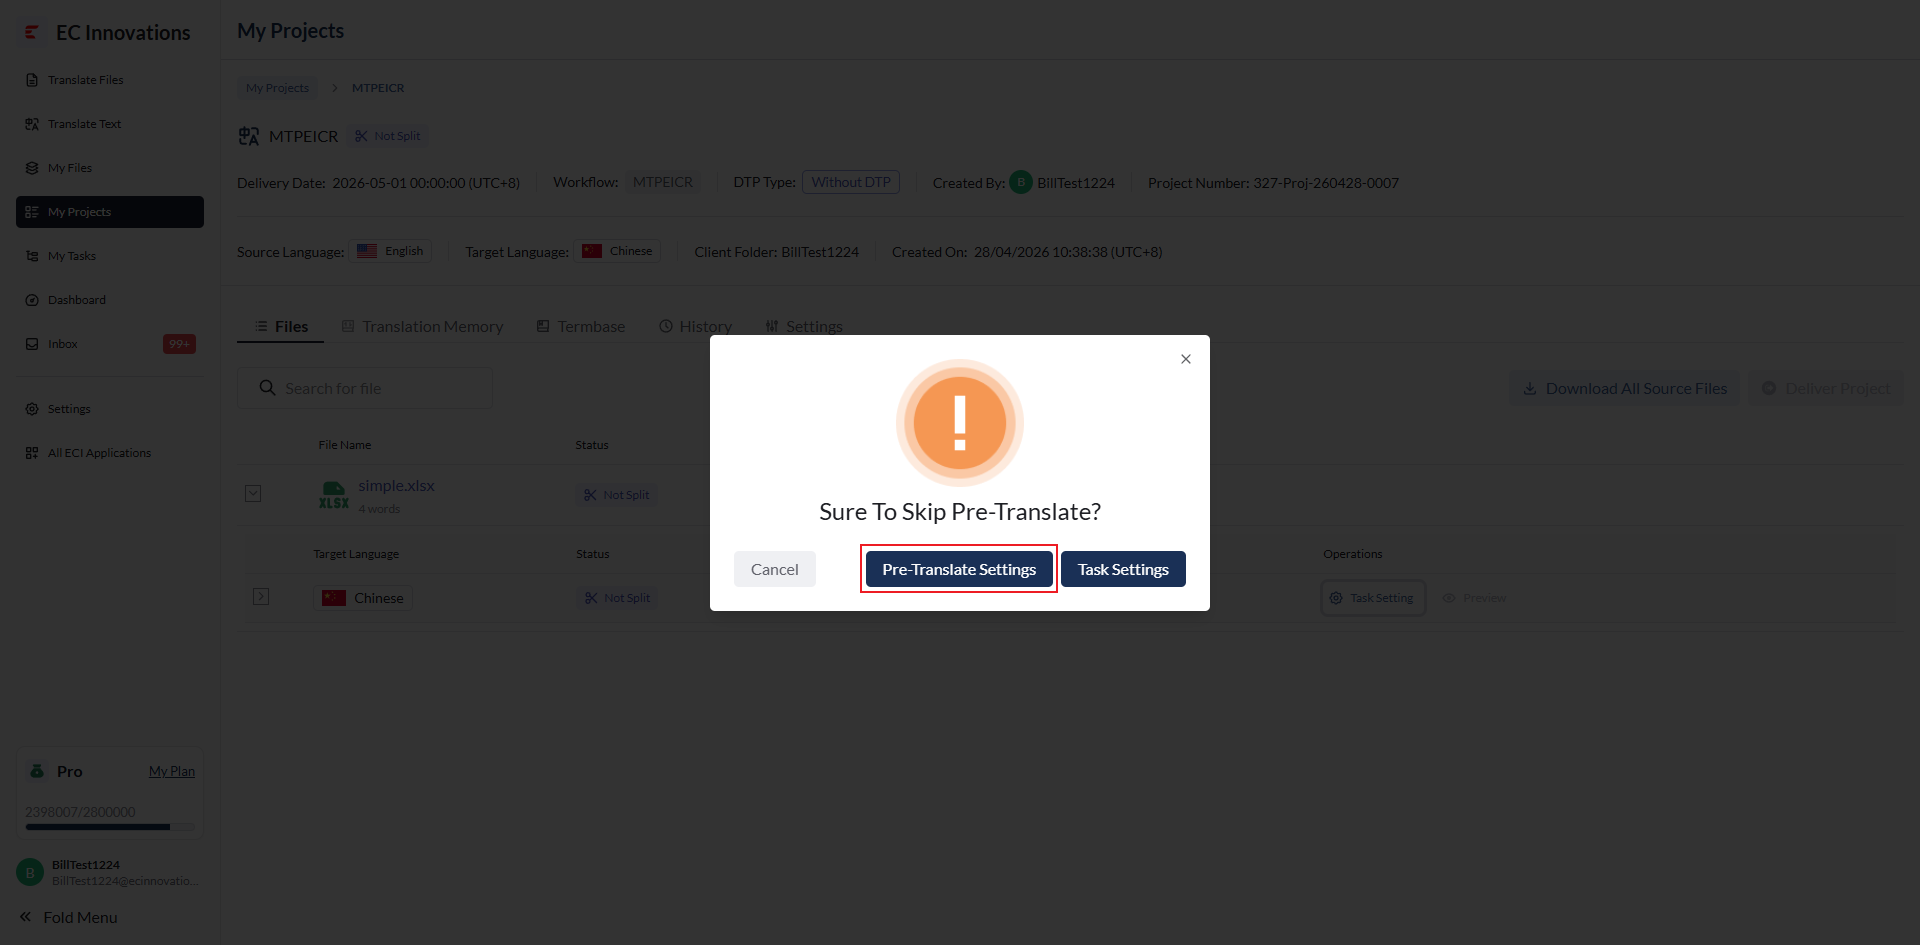
Click ‘Pre-Translate Settings’ to go to the Settings page and configure pre-translation. Two main settings are added:
Permission Setting: Whether Linguists are allowed to modify source files.
Domain Model Selection: Select the domain model for pre-translation.
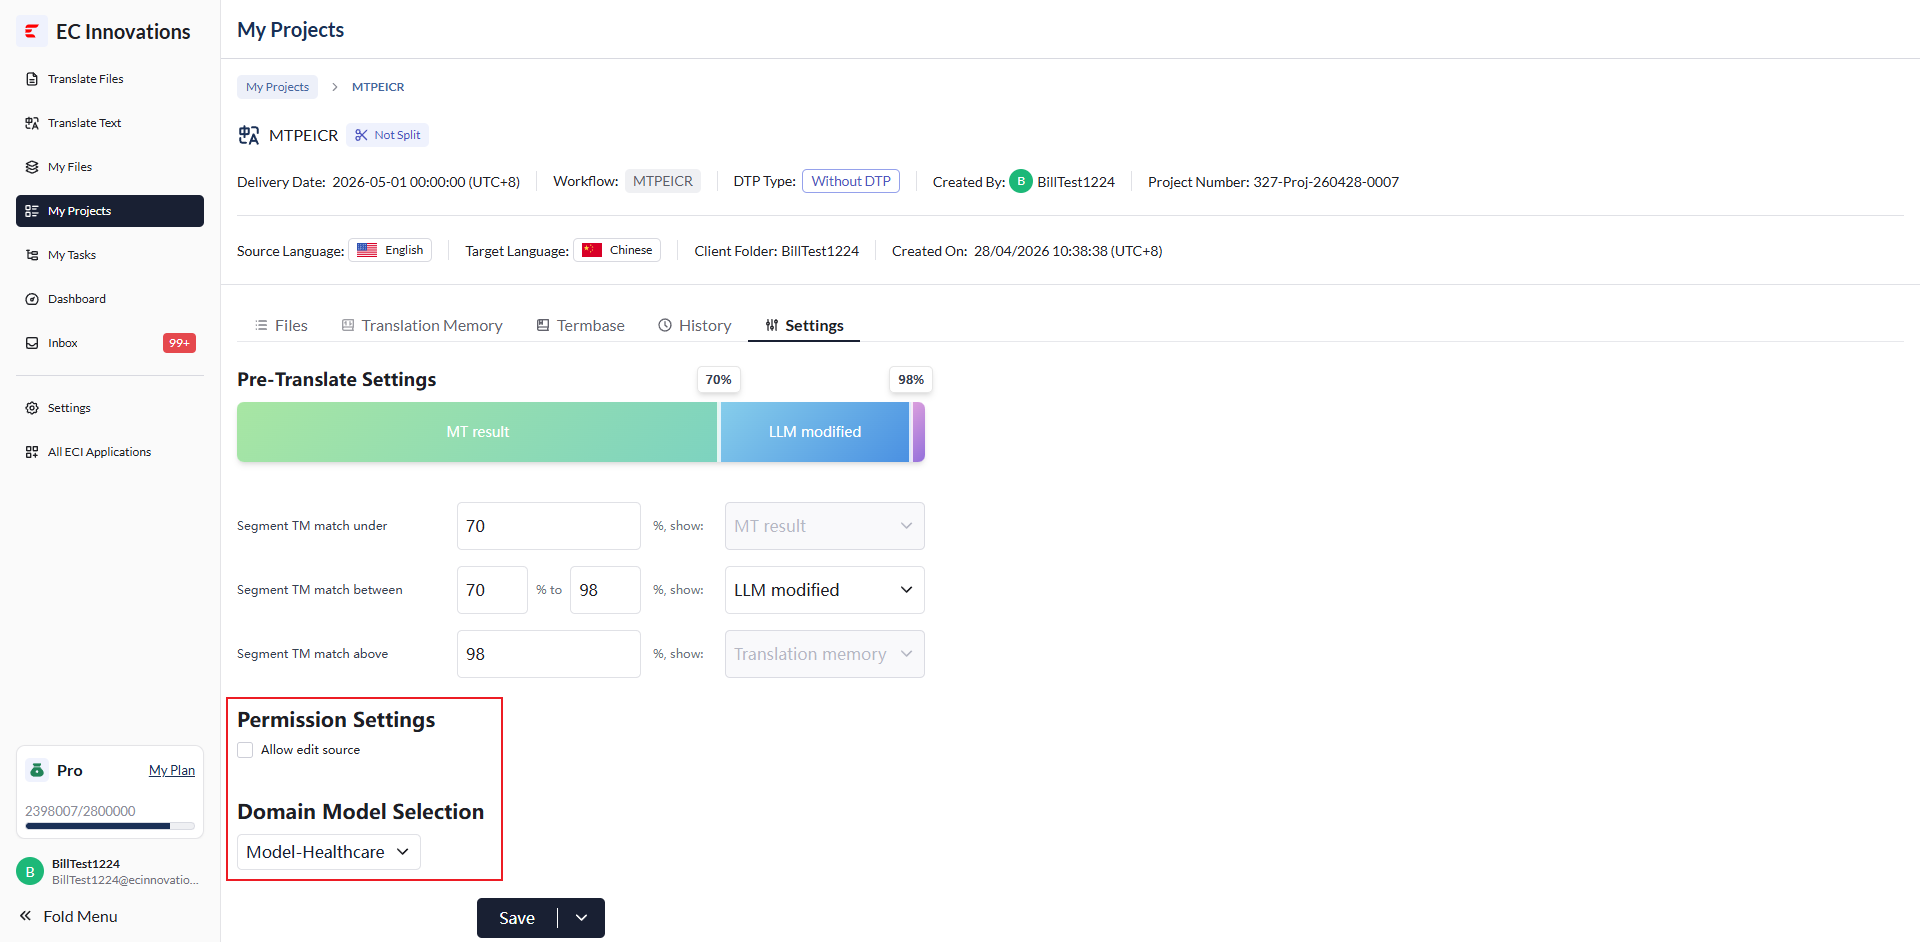
After configuration, click ‘Save’ to save the settings. Alternatively, click the arrow, then click ‘Run Pre-Translate’ to start pre-translation.
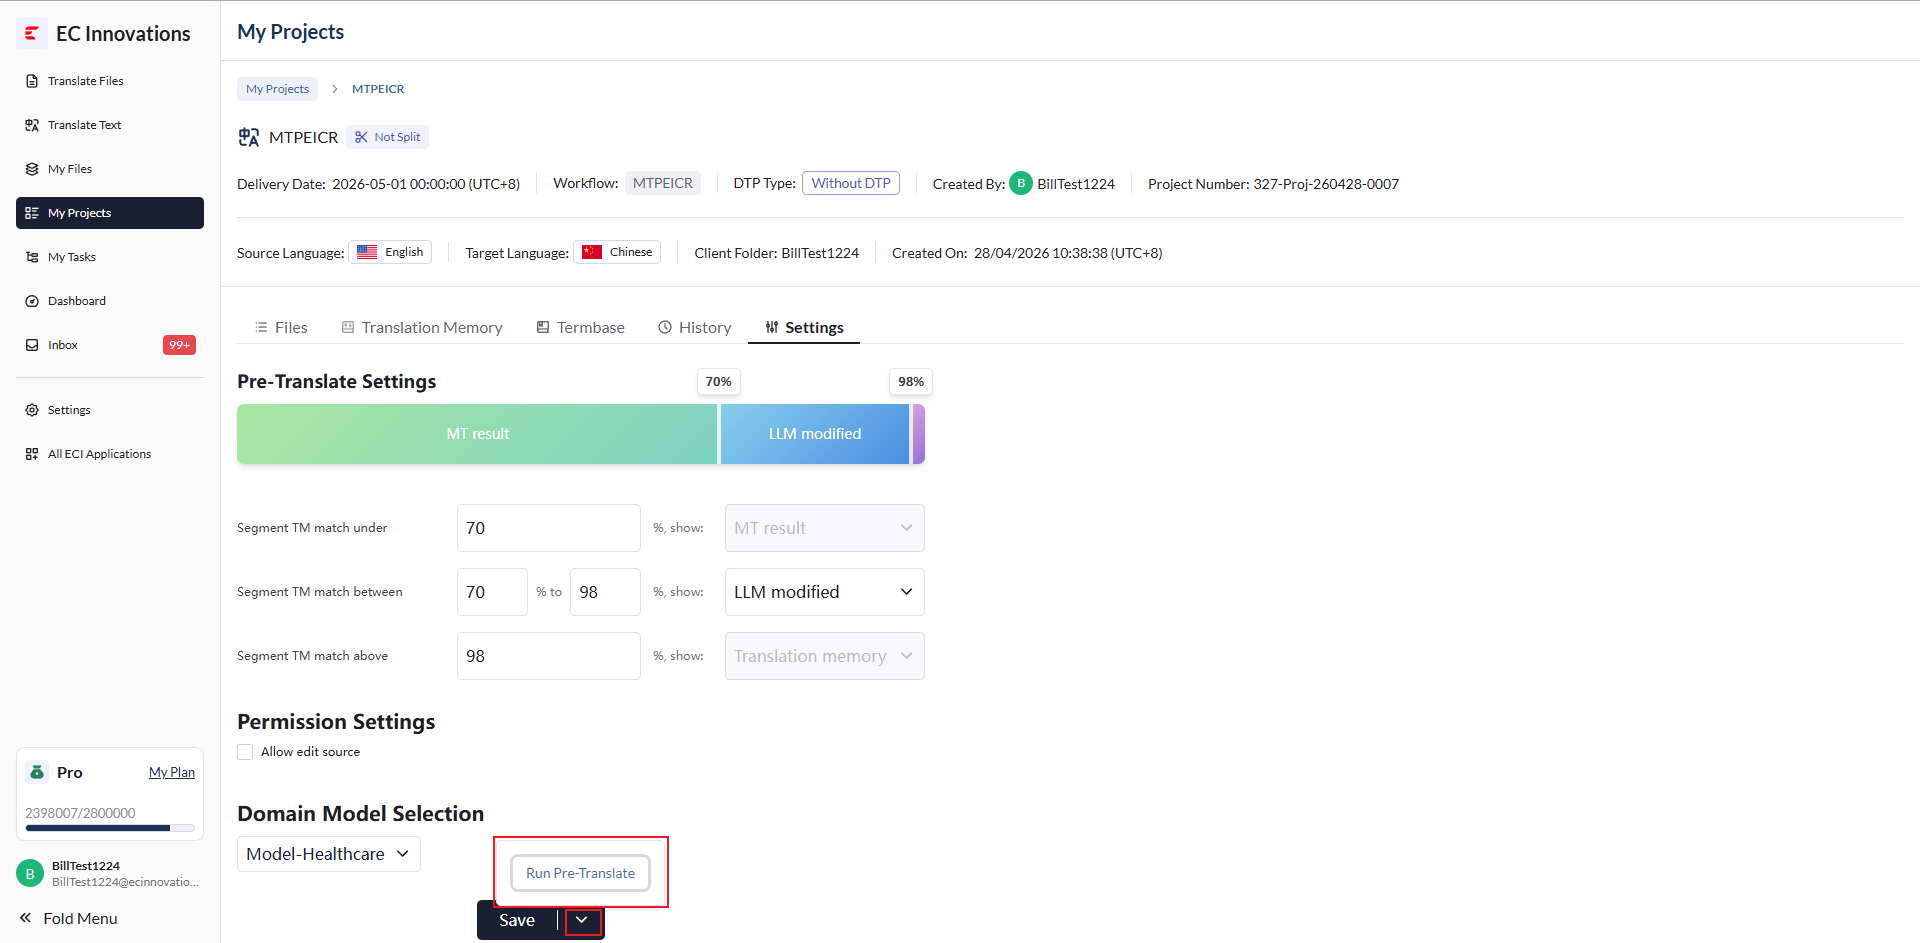
Note: After the project is submitted, pre-translation runs automatically. The PM can adjust the pre-translation settings again here to achieve better translation results.
Click ‘Task Setting’, or wait until pre-translation is complete, to start splitting the project. Select the number of splits, then click ‘Create Task’ to create tasks.
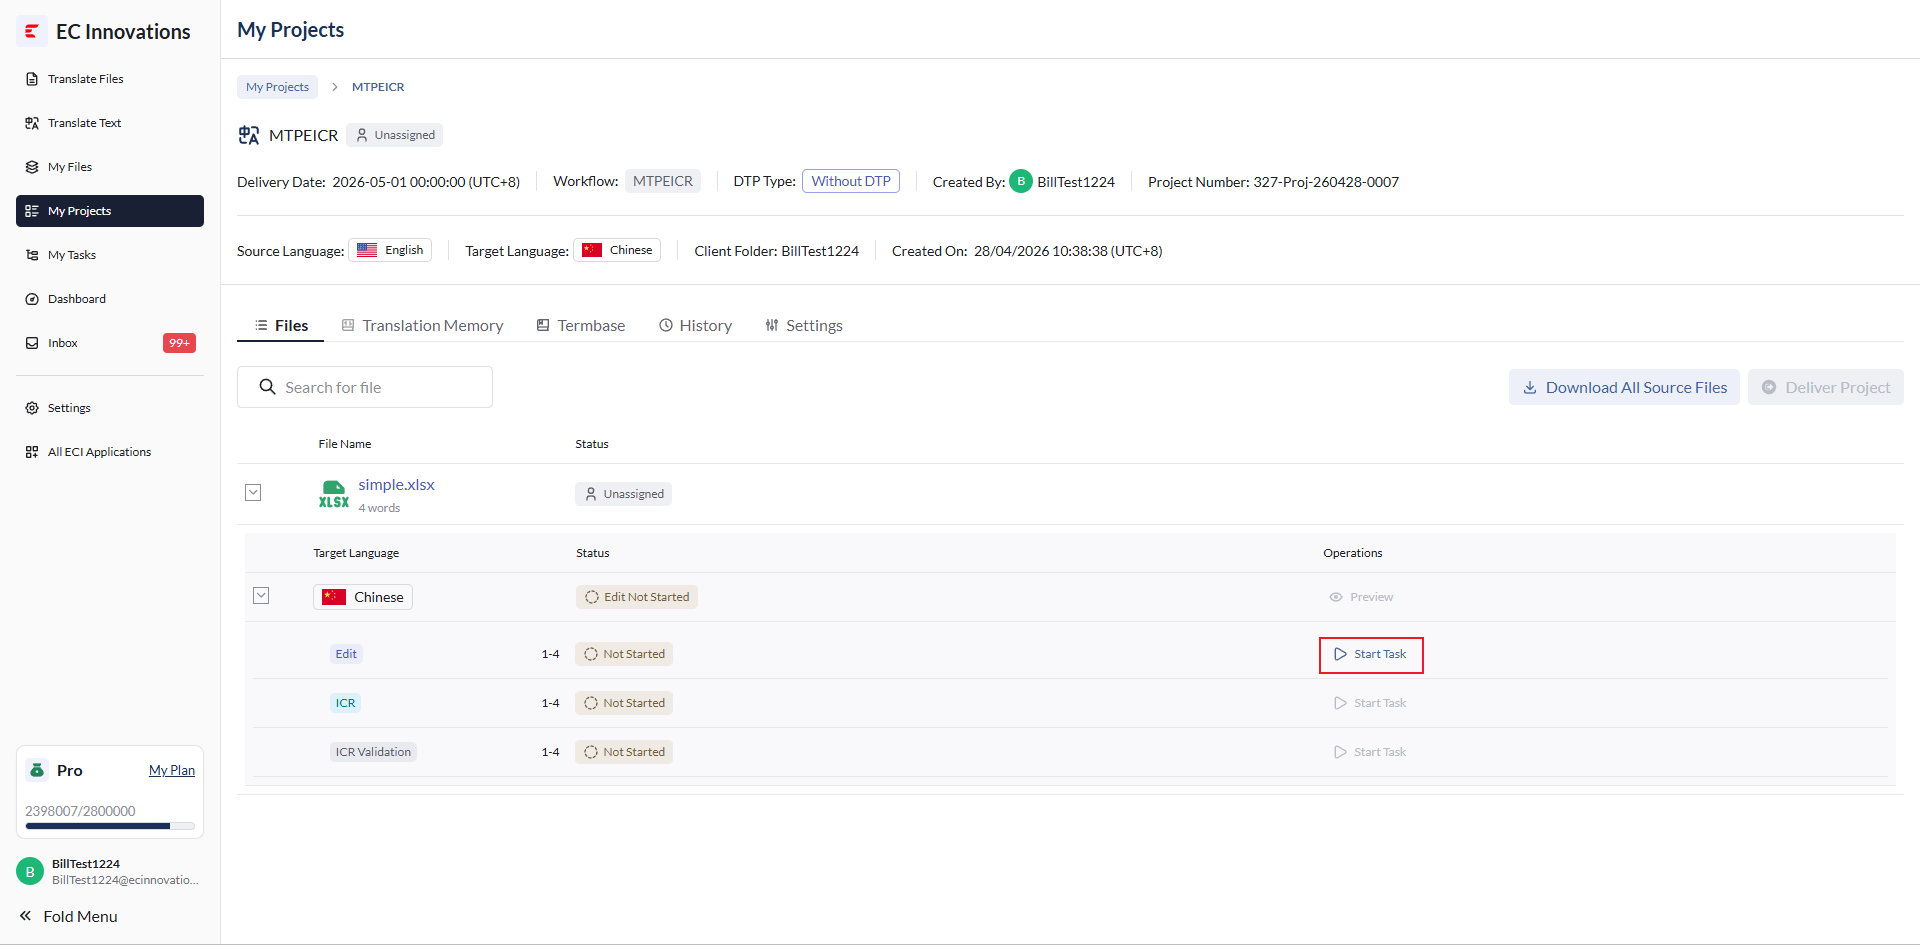
After tasks are created successfully, click ‘Start Task’ to start translation.
The task assignment pop-up opens automatically.
Select the delivery time.
Select the state of the sentence segment in CAT:
- Confirm Segment by Segment:: In CAT, all segments are set to Unconfirmed by default, meaning the translator needs to confirm each segment’s translation.
- Confirm All by Default:: In CAT, all segments that require confirmation are set to Confirmed by default.
Select the translator.
Click ‘Assign’ to assign the task.
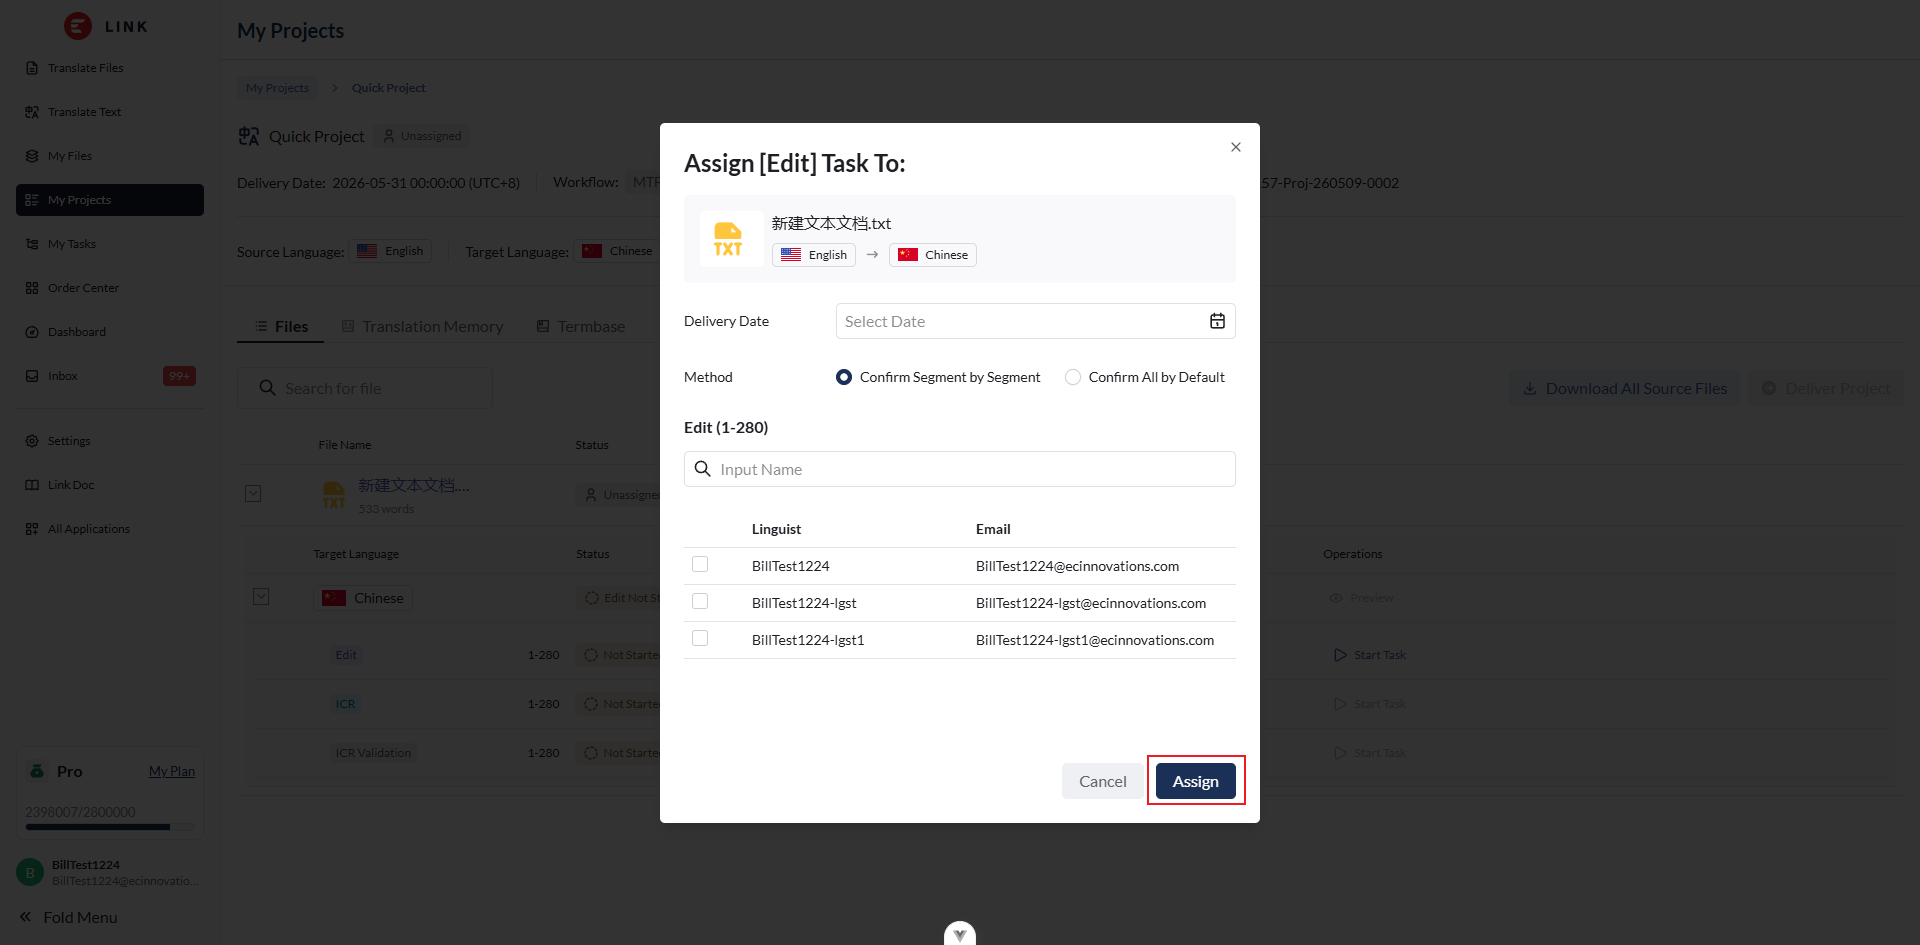
After the task is assigned successfully, the Linguist can start working on the translation task.
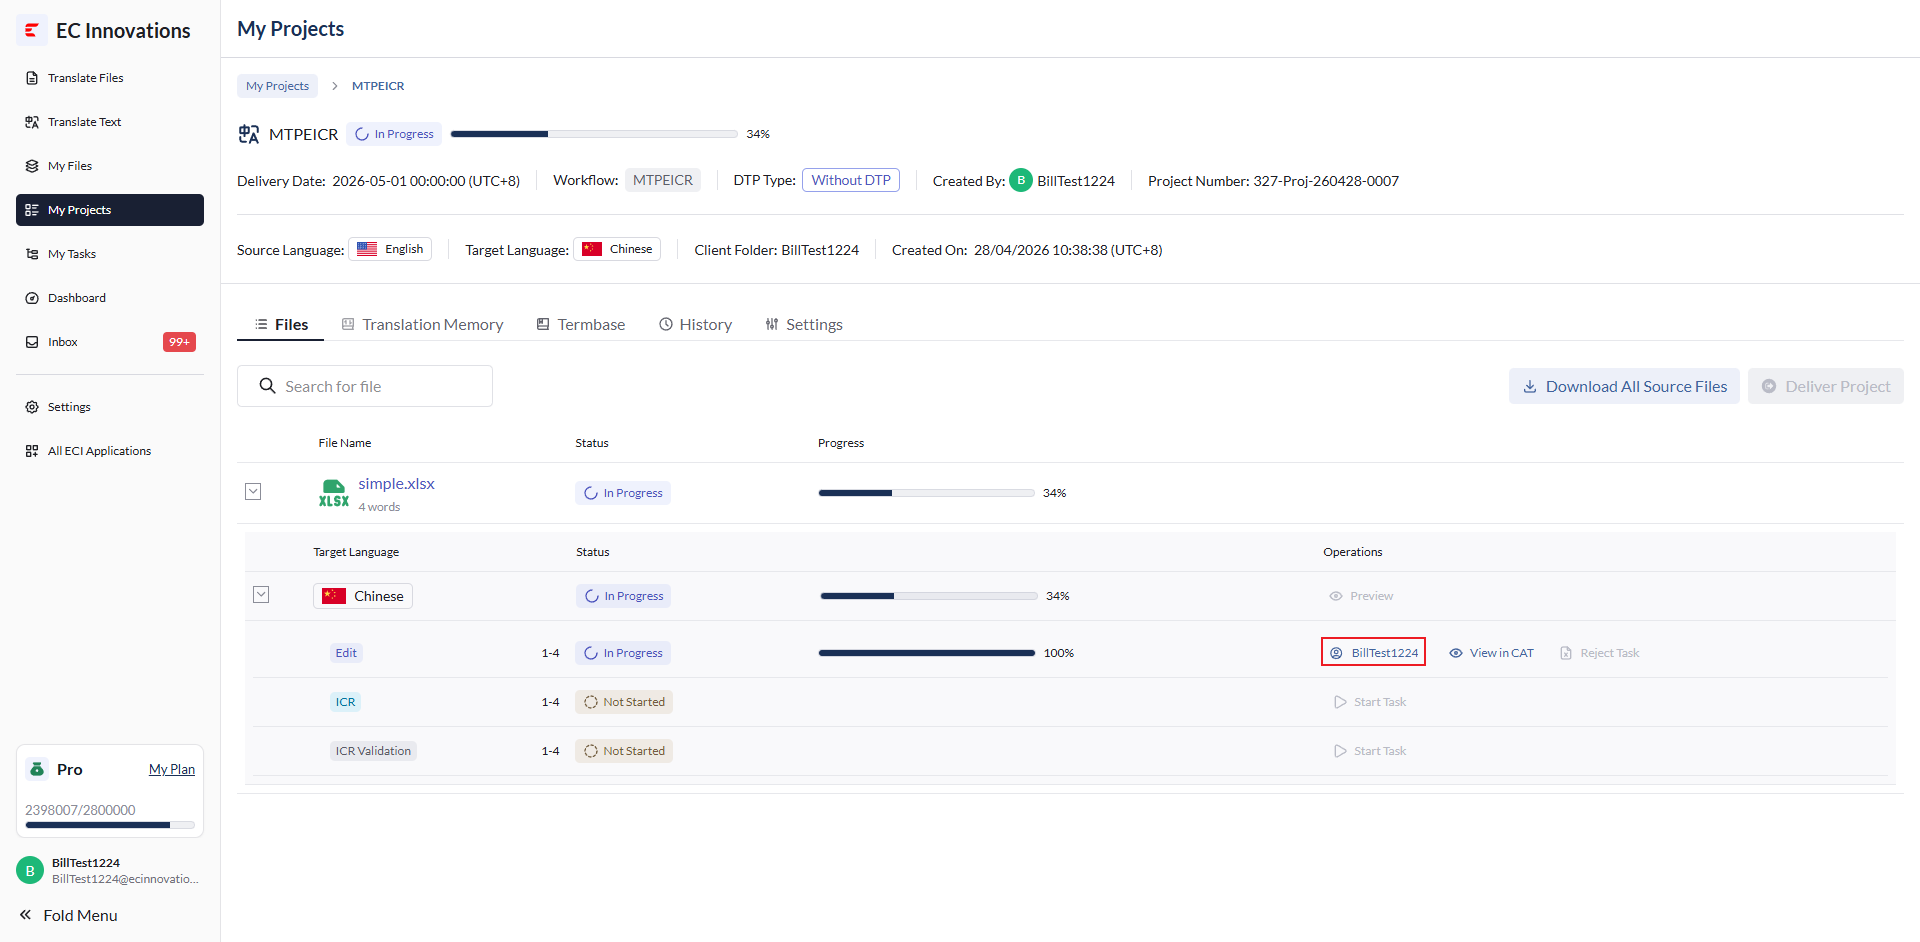
Before the Linguist submits the task, the PM can modify the assignment by clicking the person’s name to open the task assignment pop-up.
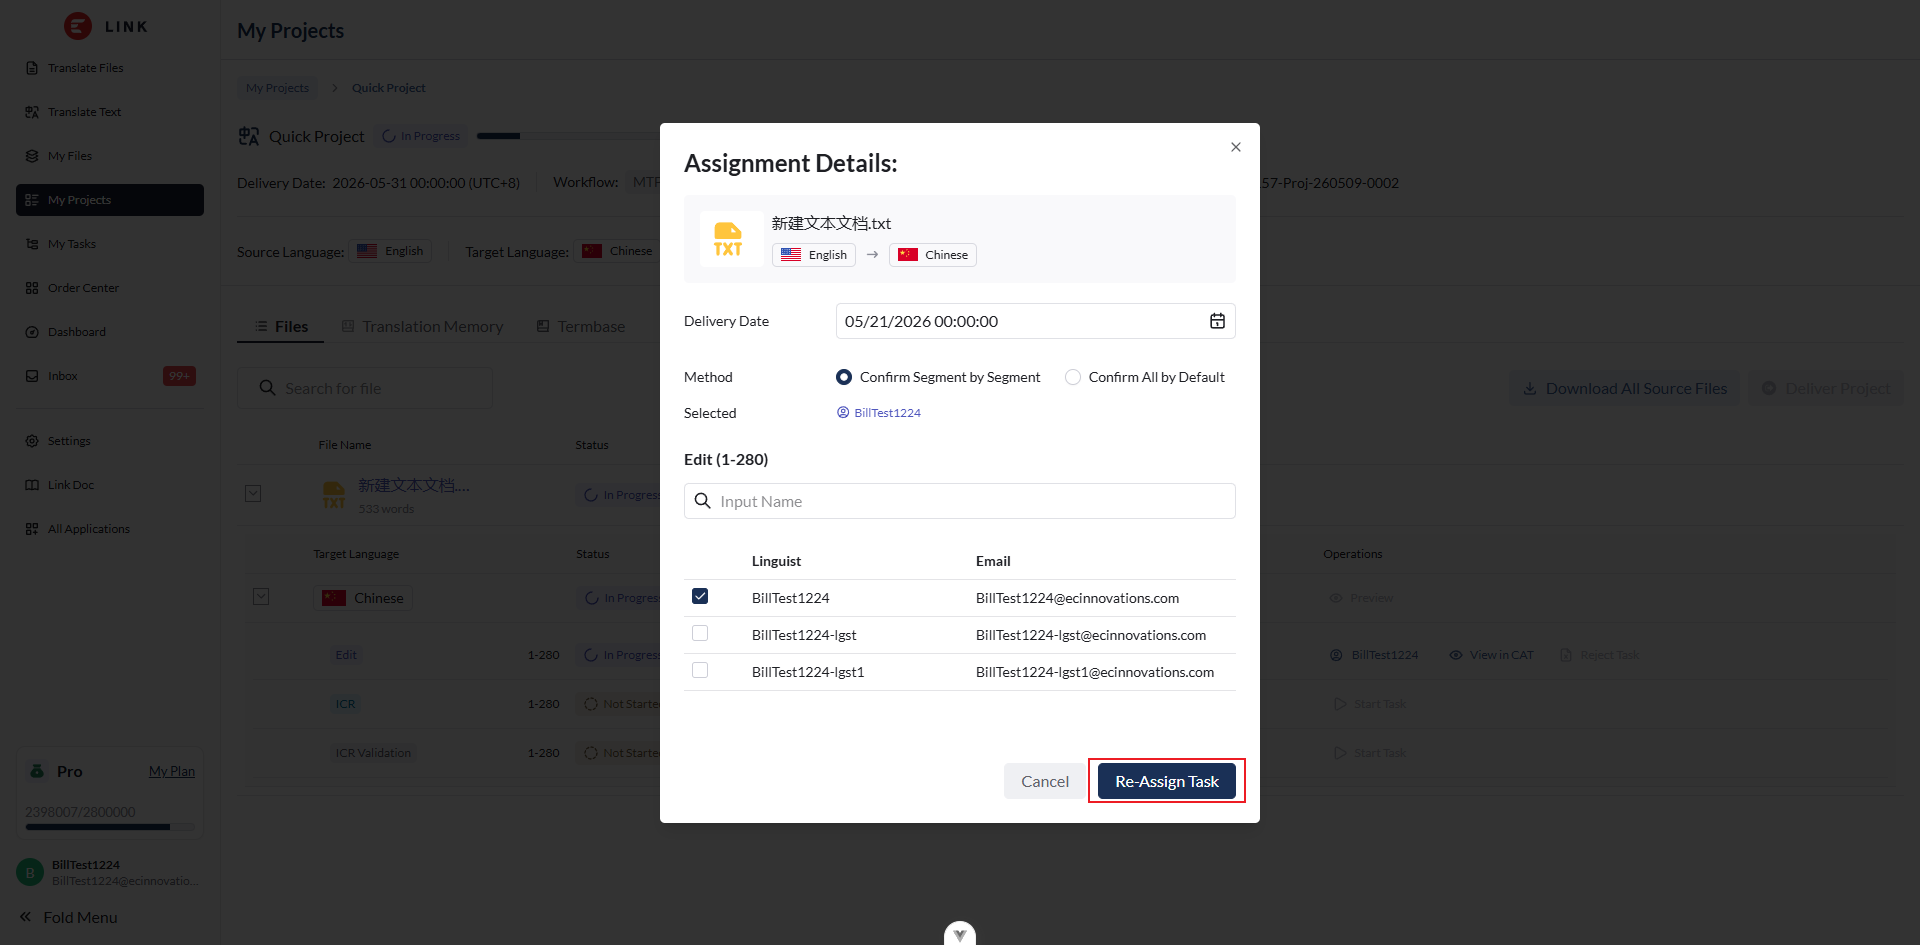
Select a new translator or update the configuration.
Click ‘Re-Assign Task’ to reassign the task.
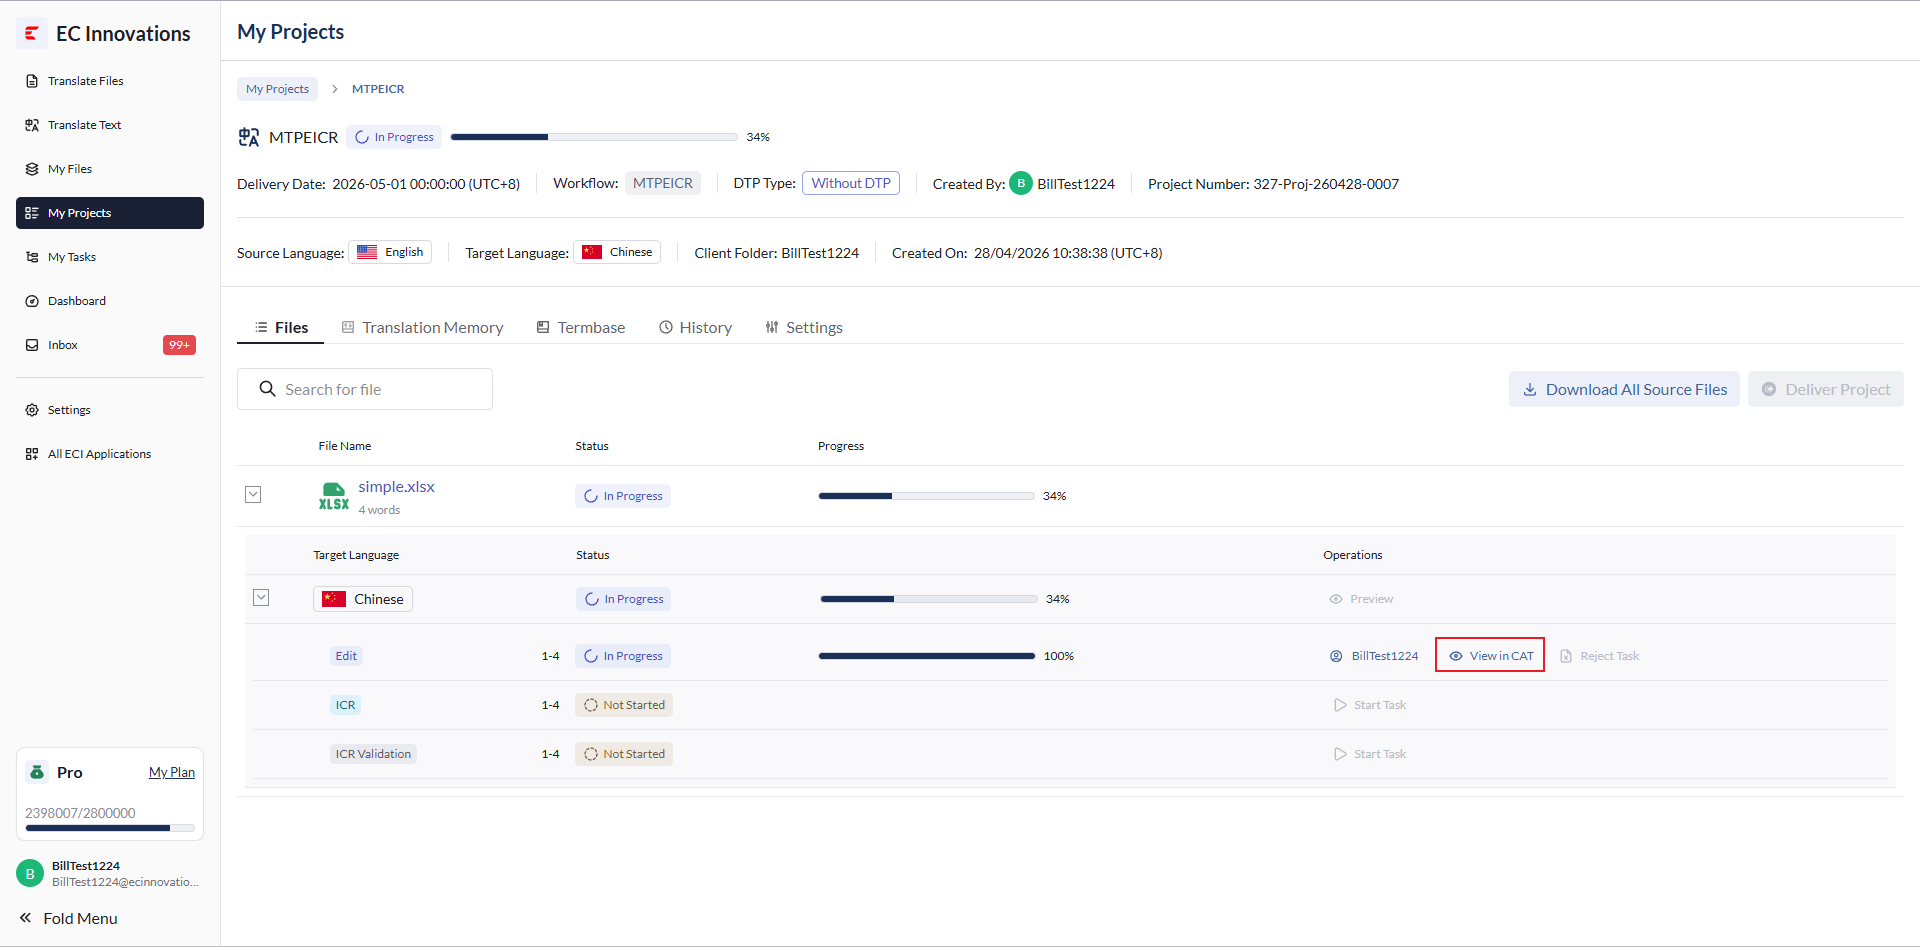
The PM can also click ‘View in CAT’ to go to the CAT page.
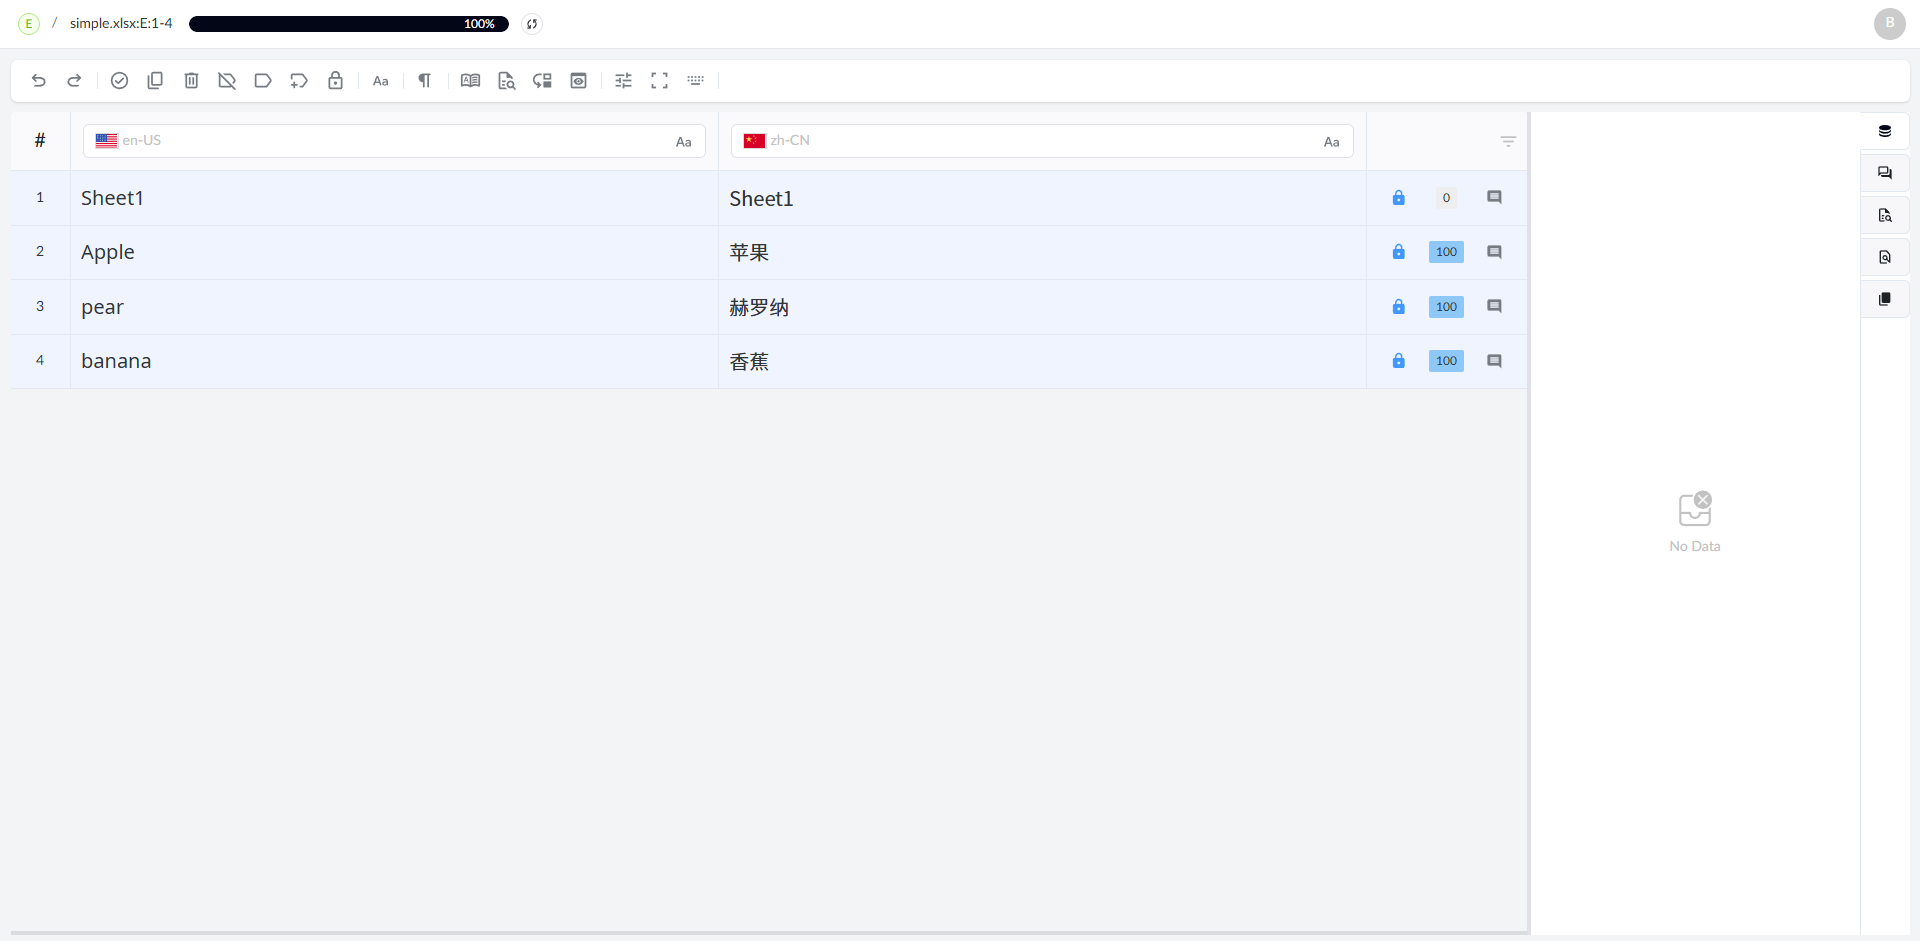
After the page opens, the PM can view the Linguist’s translation results online.
After the Linguist delivers the task, the PM can reject the task or start the next task.
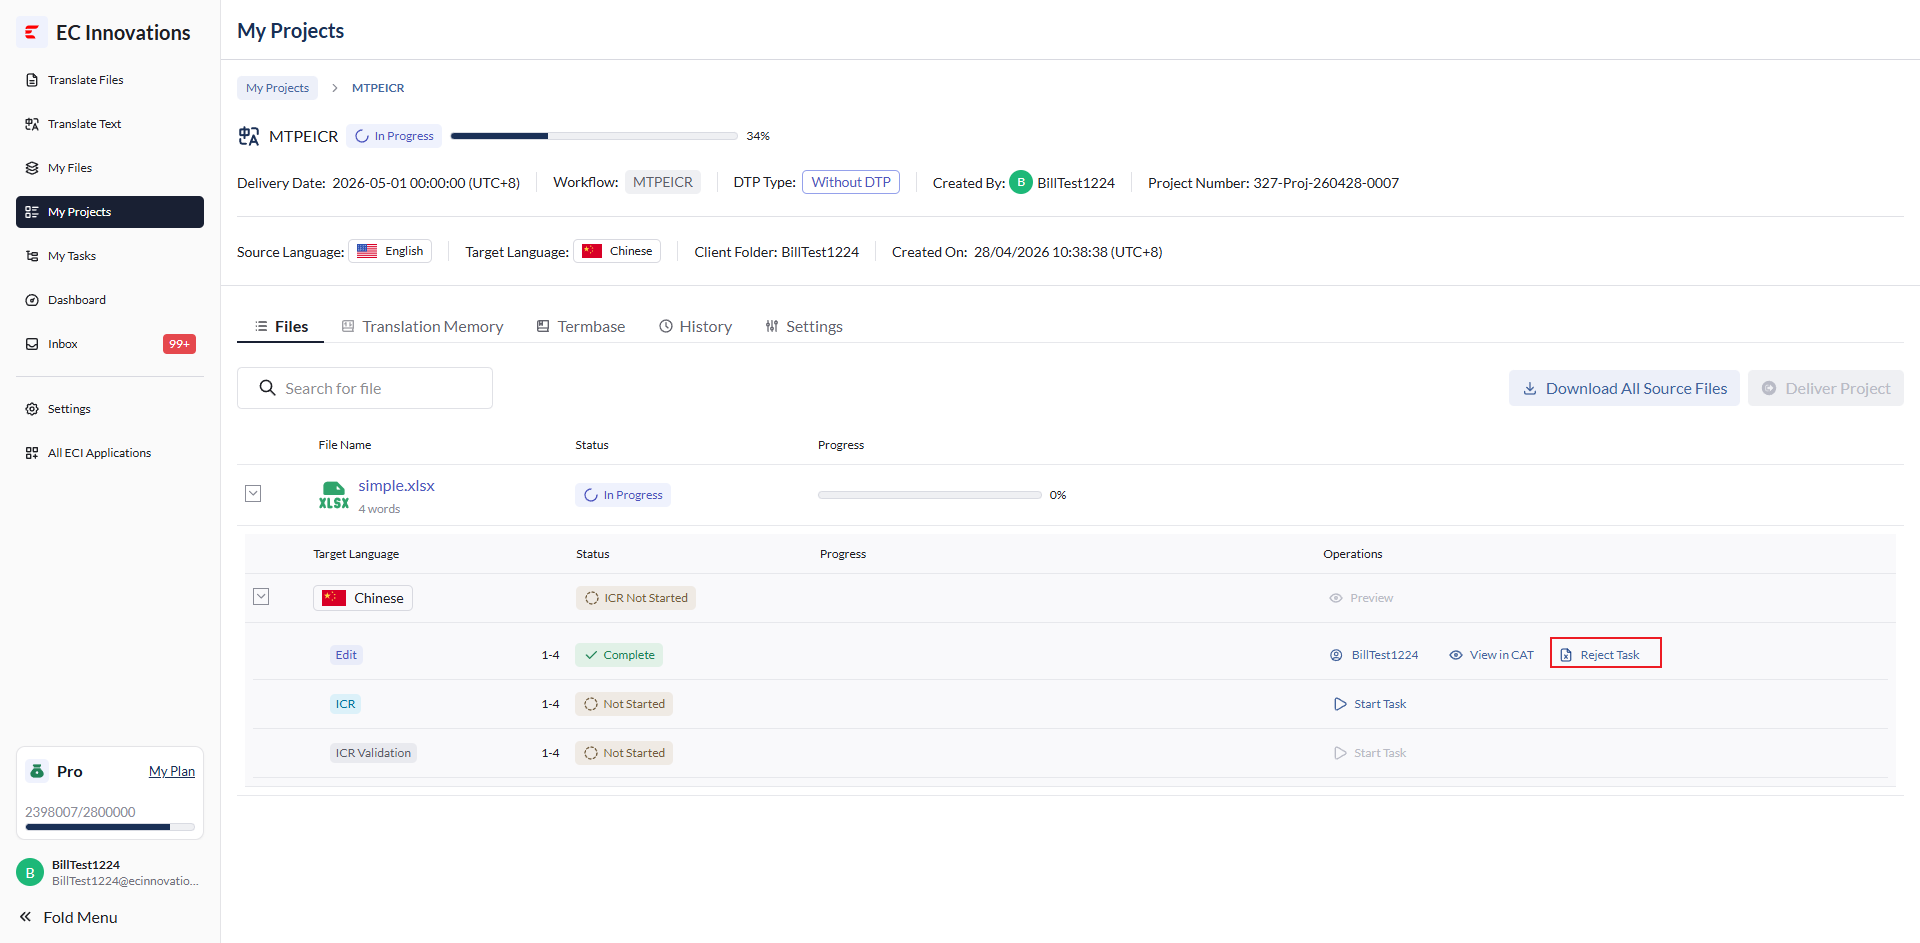
Click ‘Reject Task’ to reject the task.
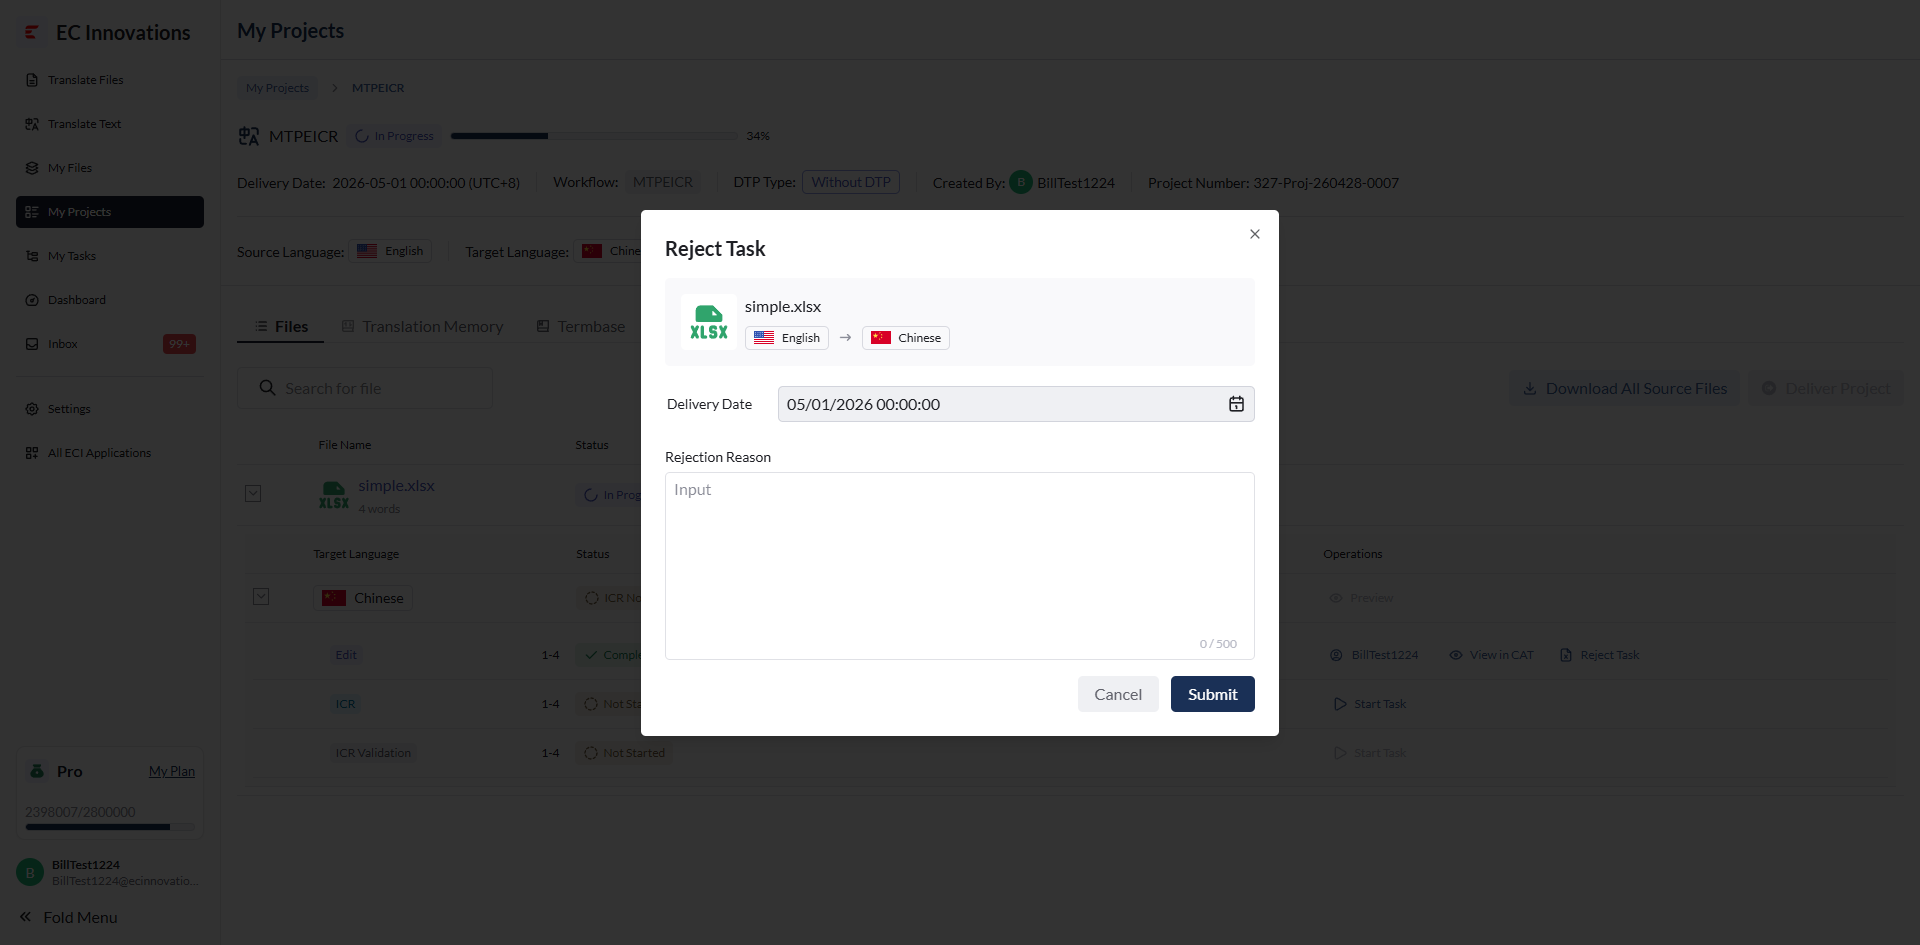
A task rejection pop-up will appear. Enter the rejection reason, then click ‘Submit’ to reject the task. The task will return to the Linguist for delivery.
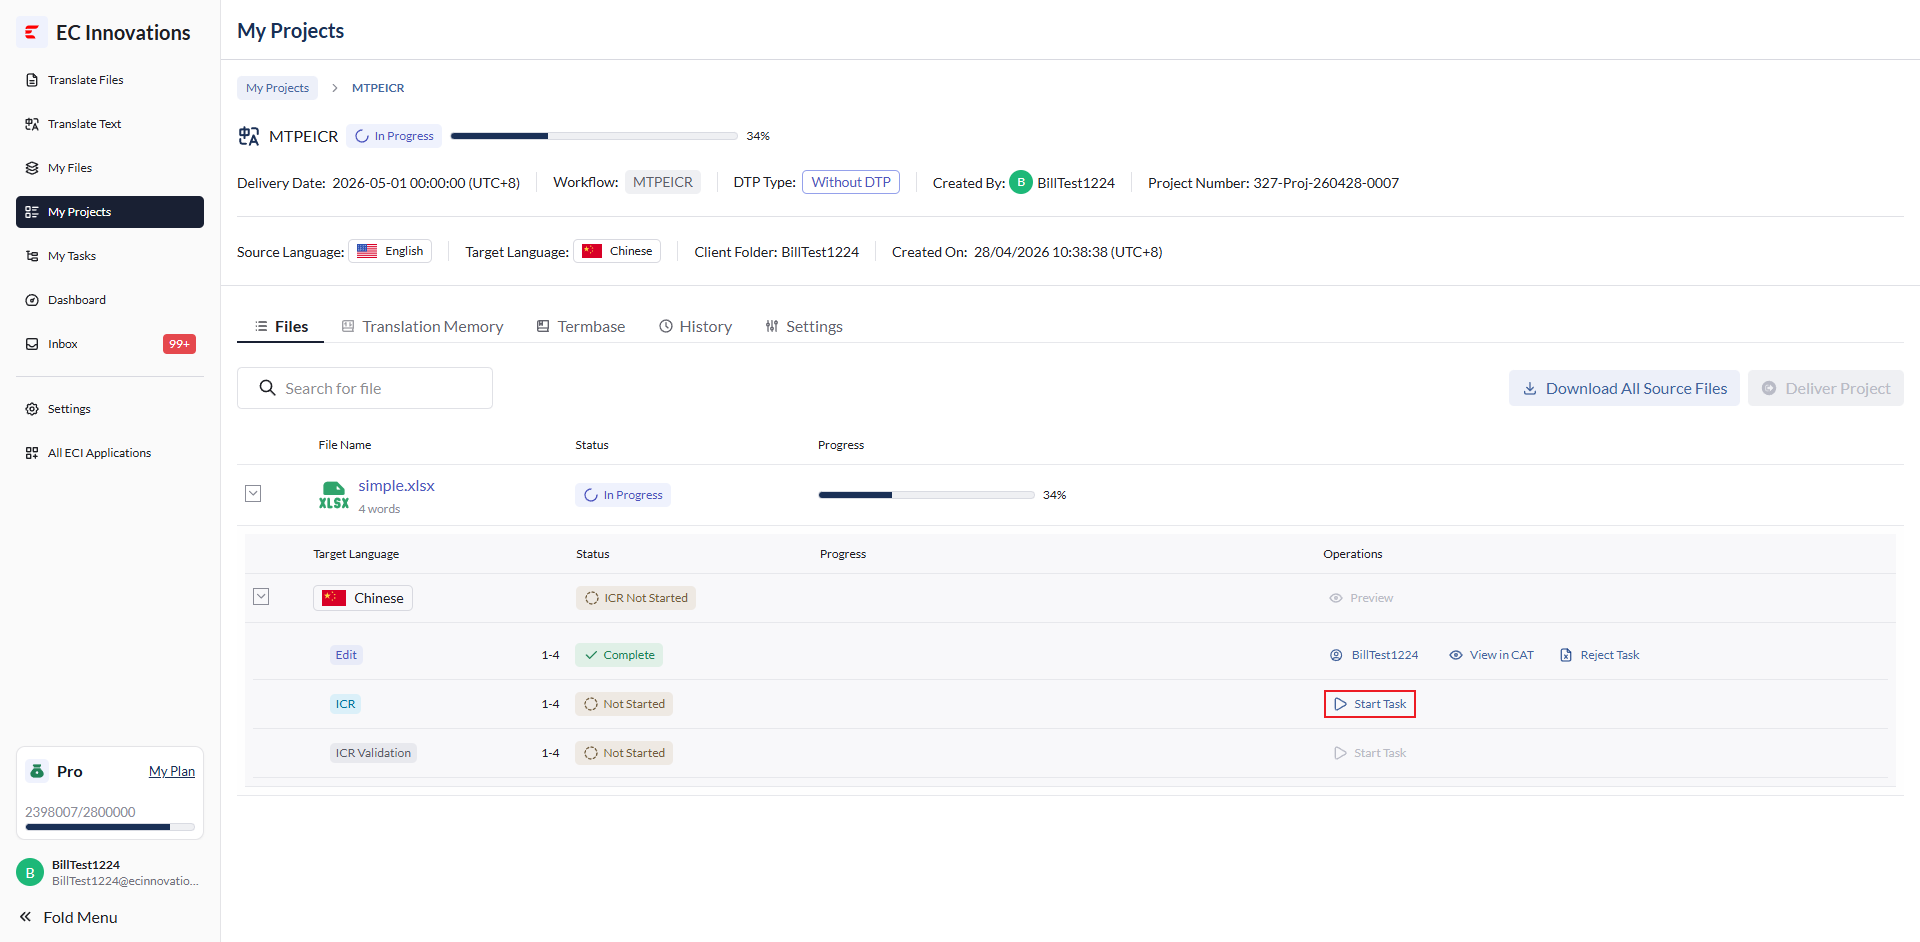
Click ‘Start Task’ to start the next task.
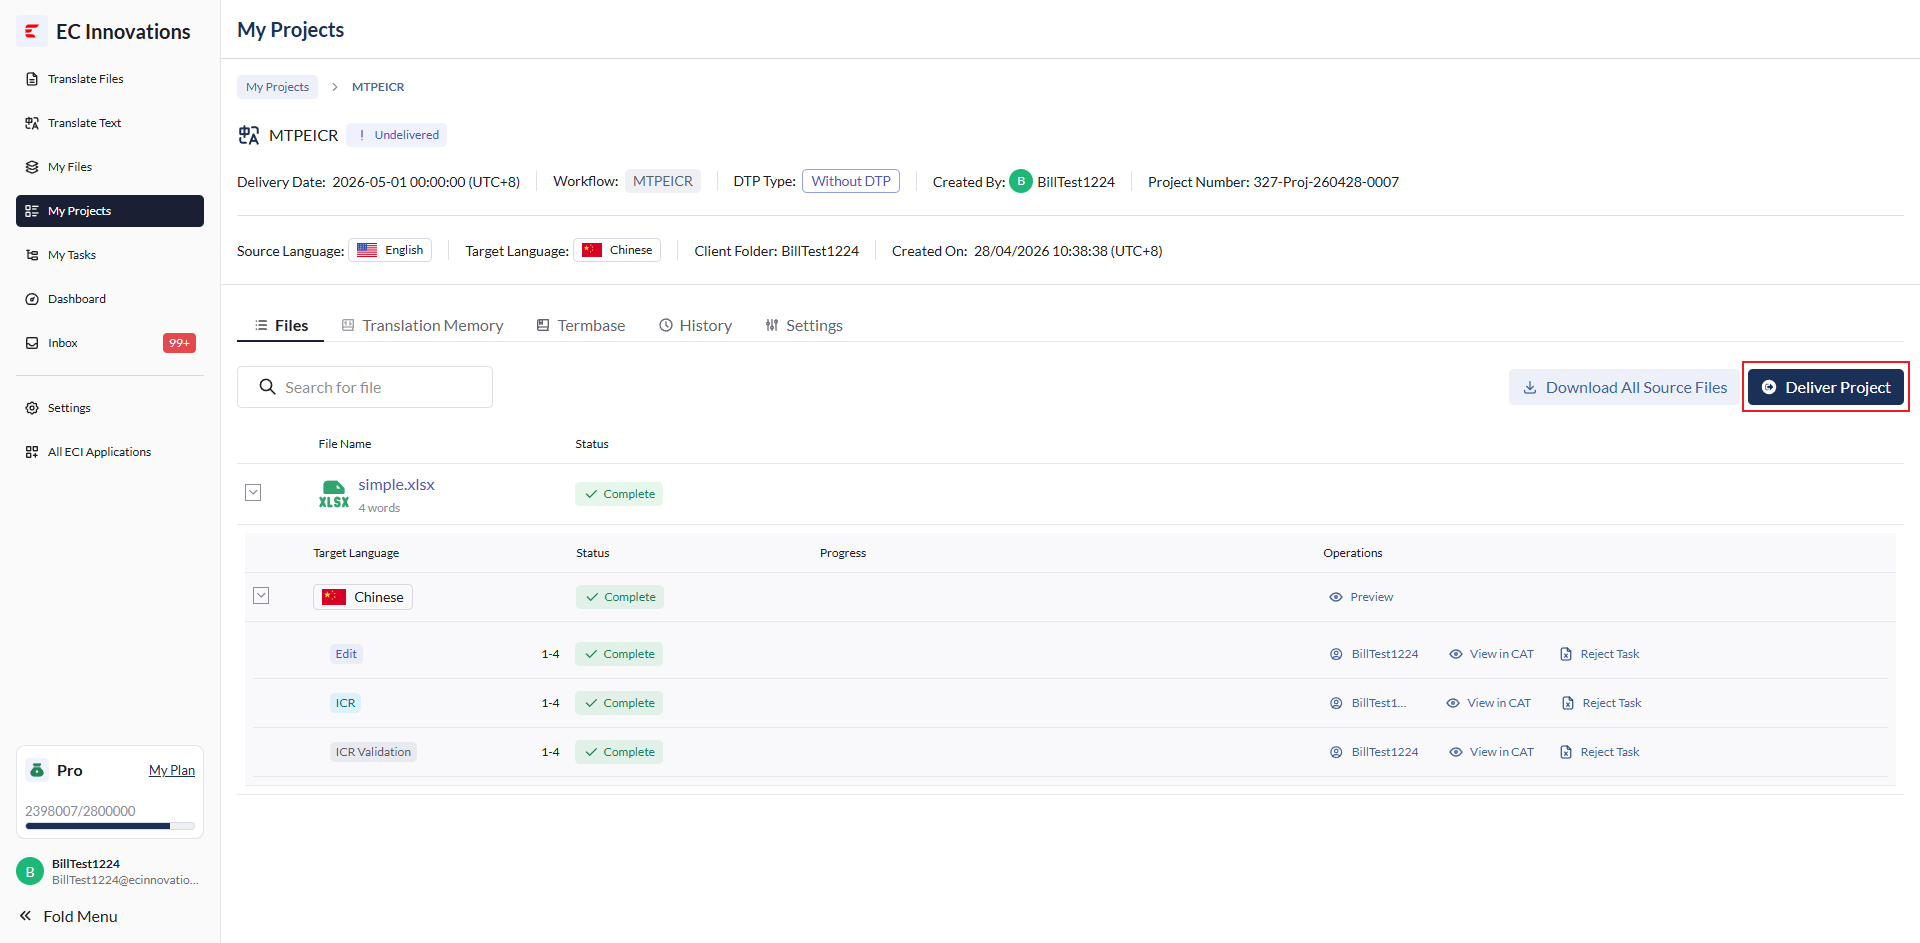
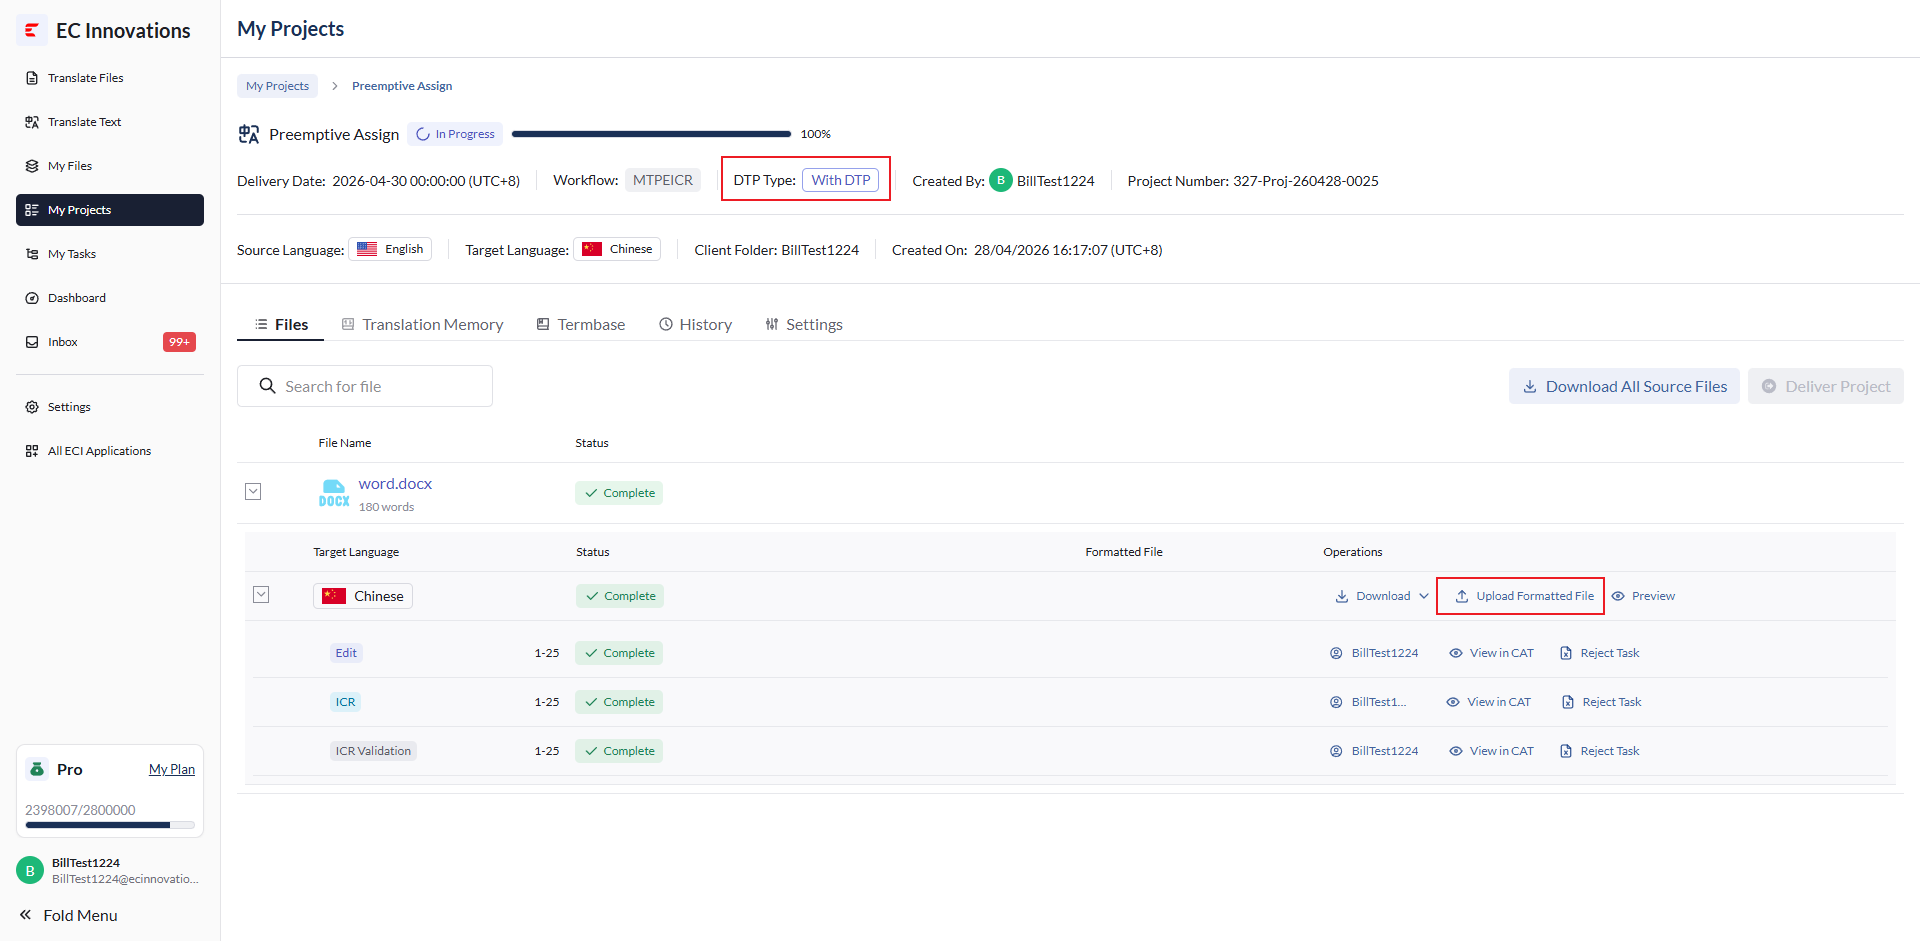
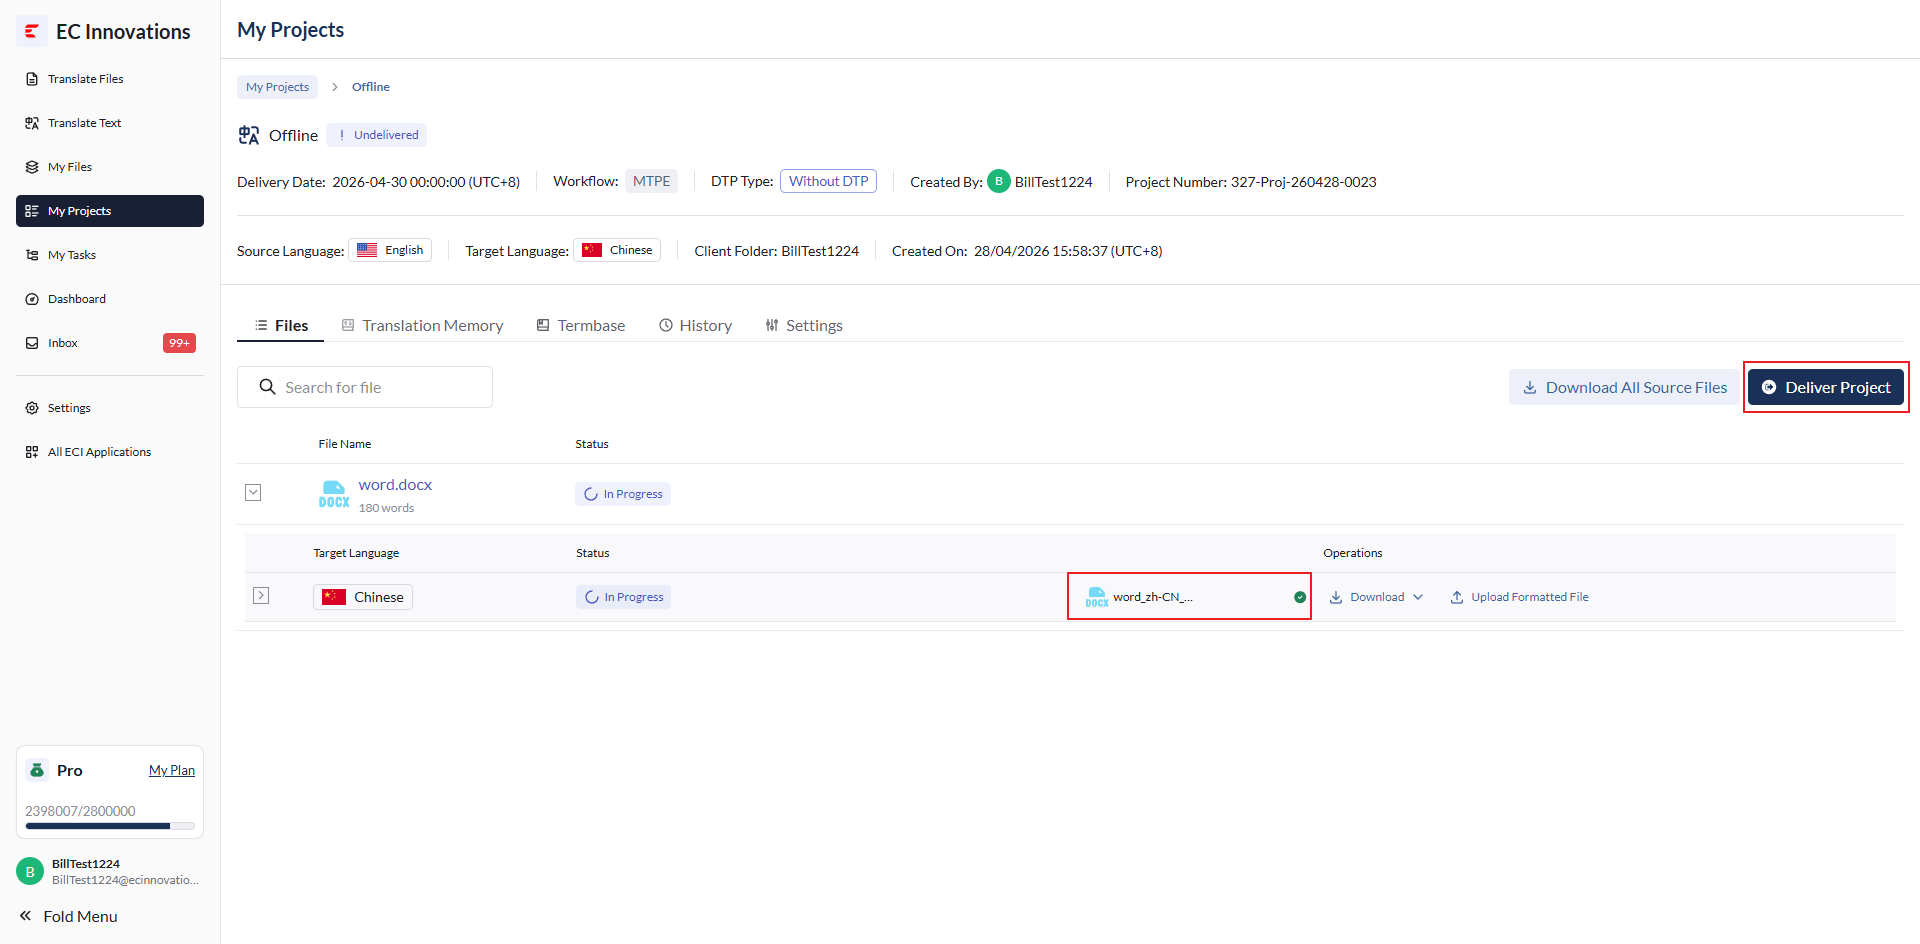
After all tasks are delivered successfully, click ‘Deliver Project’ to deliver the project.
With DTP: You need to click ‘Upload Formatted File’ and upload the formatted file before you can click ‘Deliver Project’.
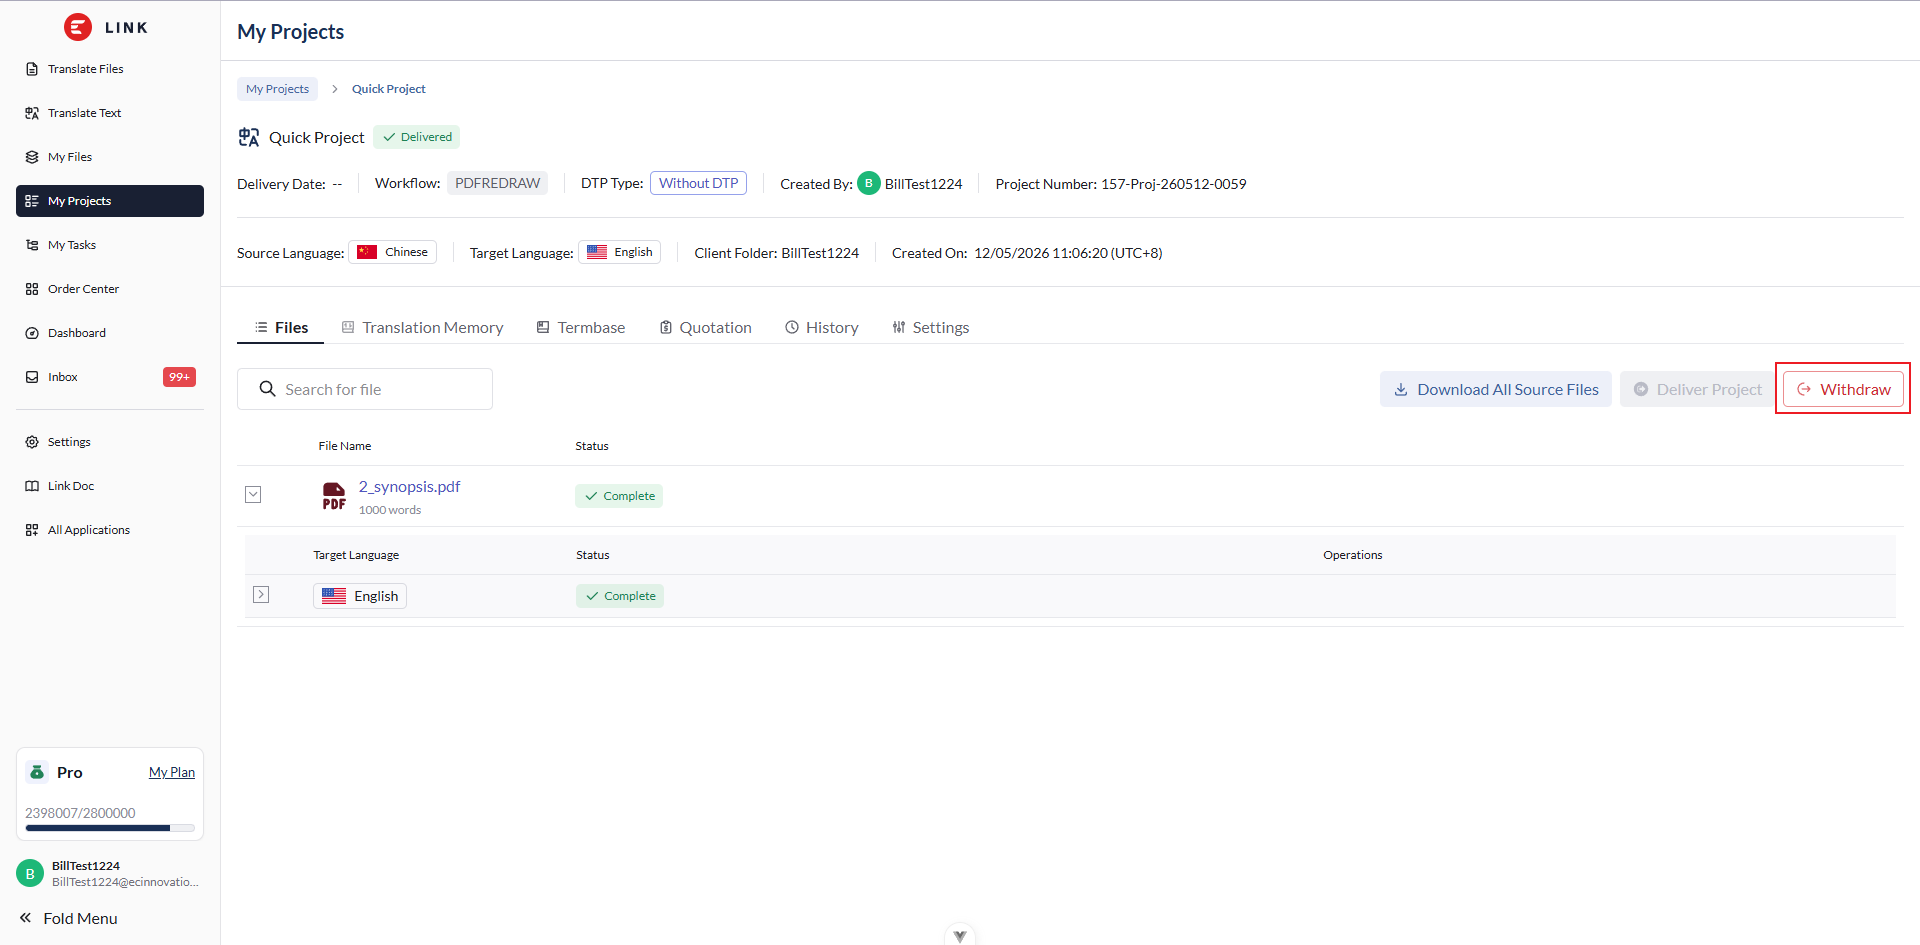
After the project is delivered, you can click Withdraw to withdraw the delivery after secondary confirmation, if needed.
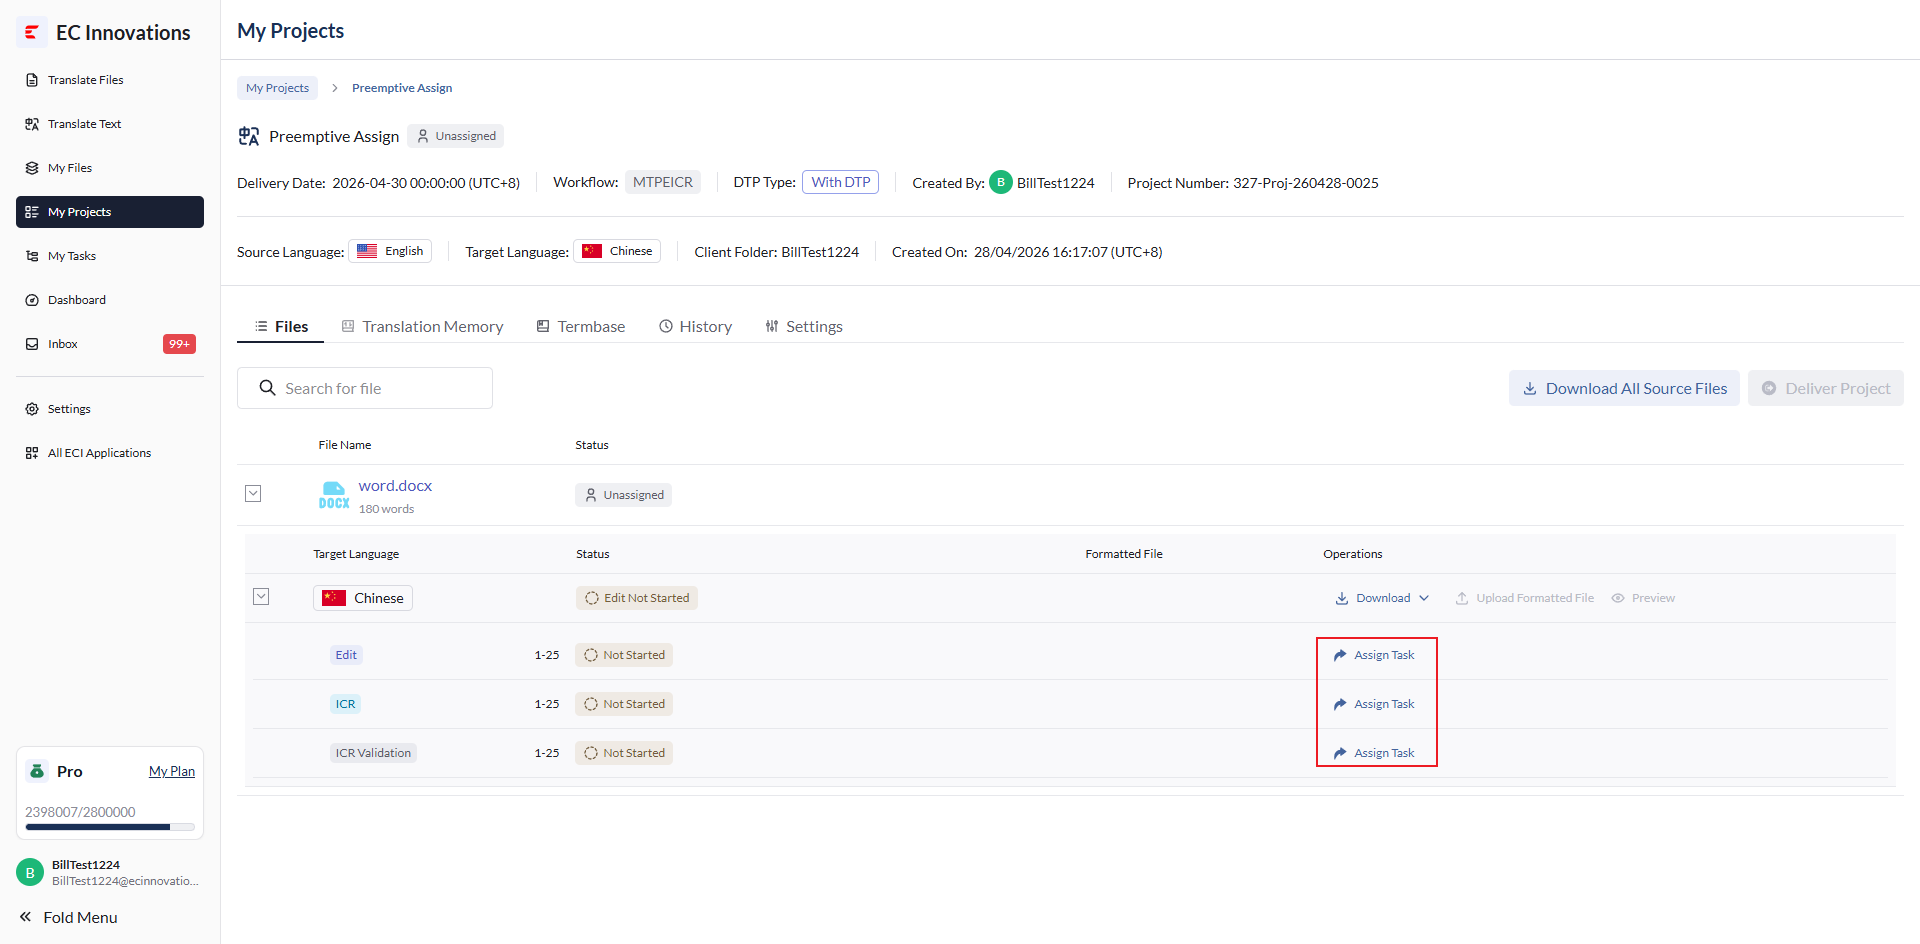
Work Online: Preemptive Assign
After the project starts and tasks are created, you can directly assign tasks at each step. The rest of the workflow is the same as Work Online: Triggered Assign.
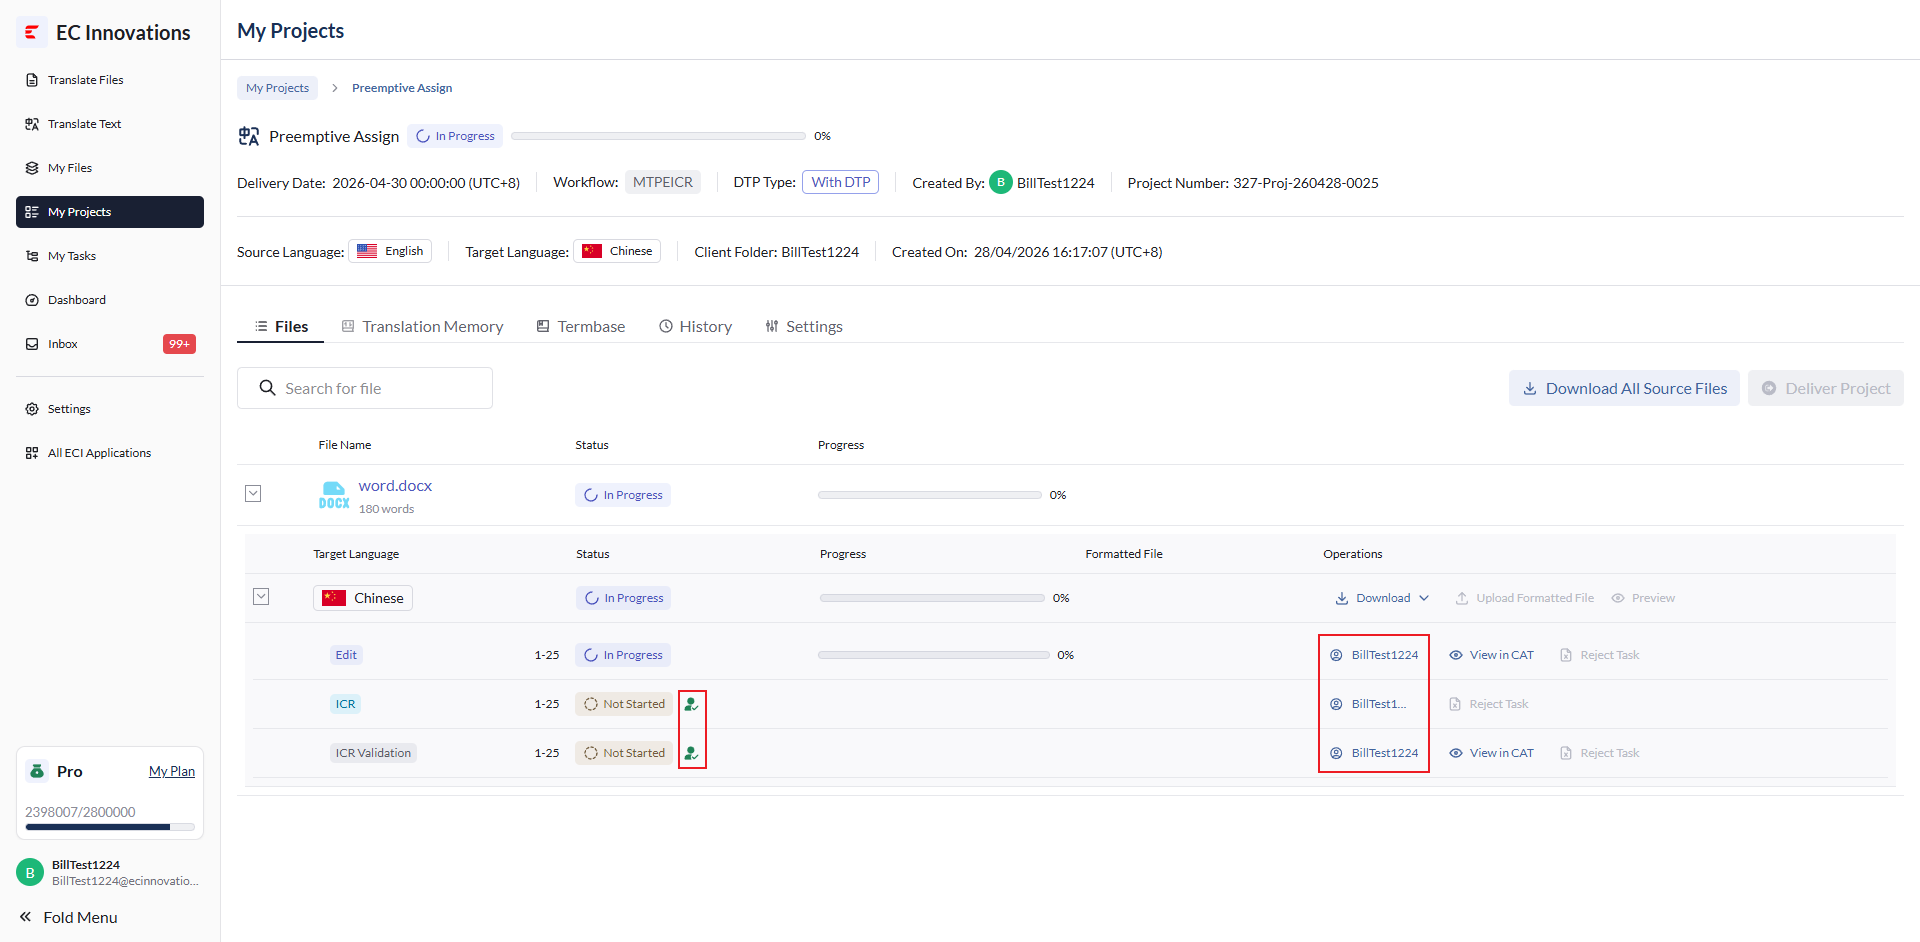
You can view the assignees and labels for subsequent workflow tasks.
Work Offline
Select 'Work Offline",then click ‘OK’ to start the project for offline translation.
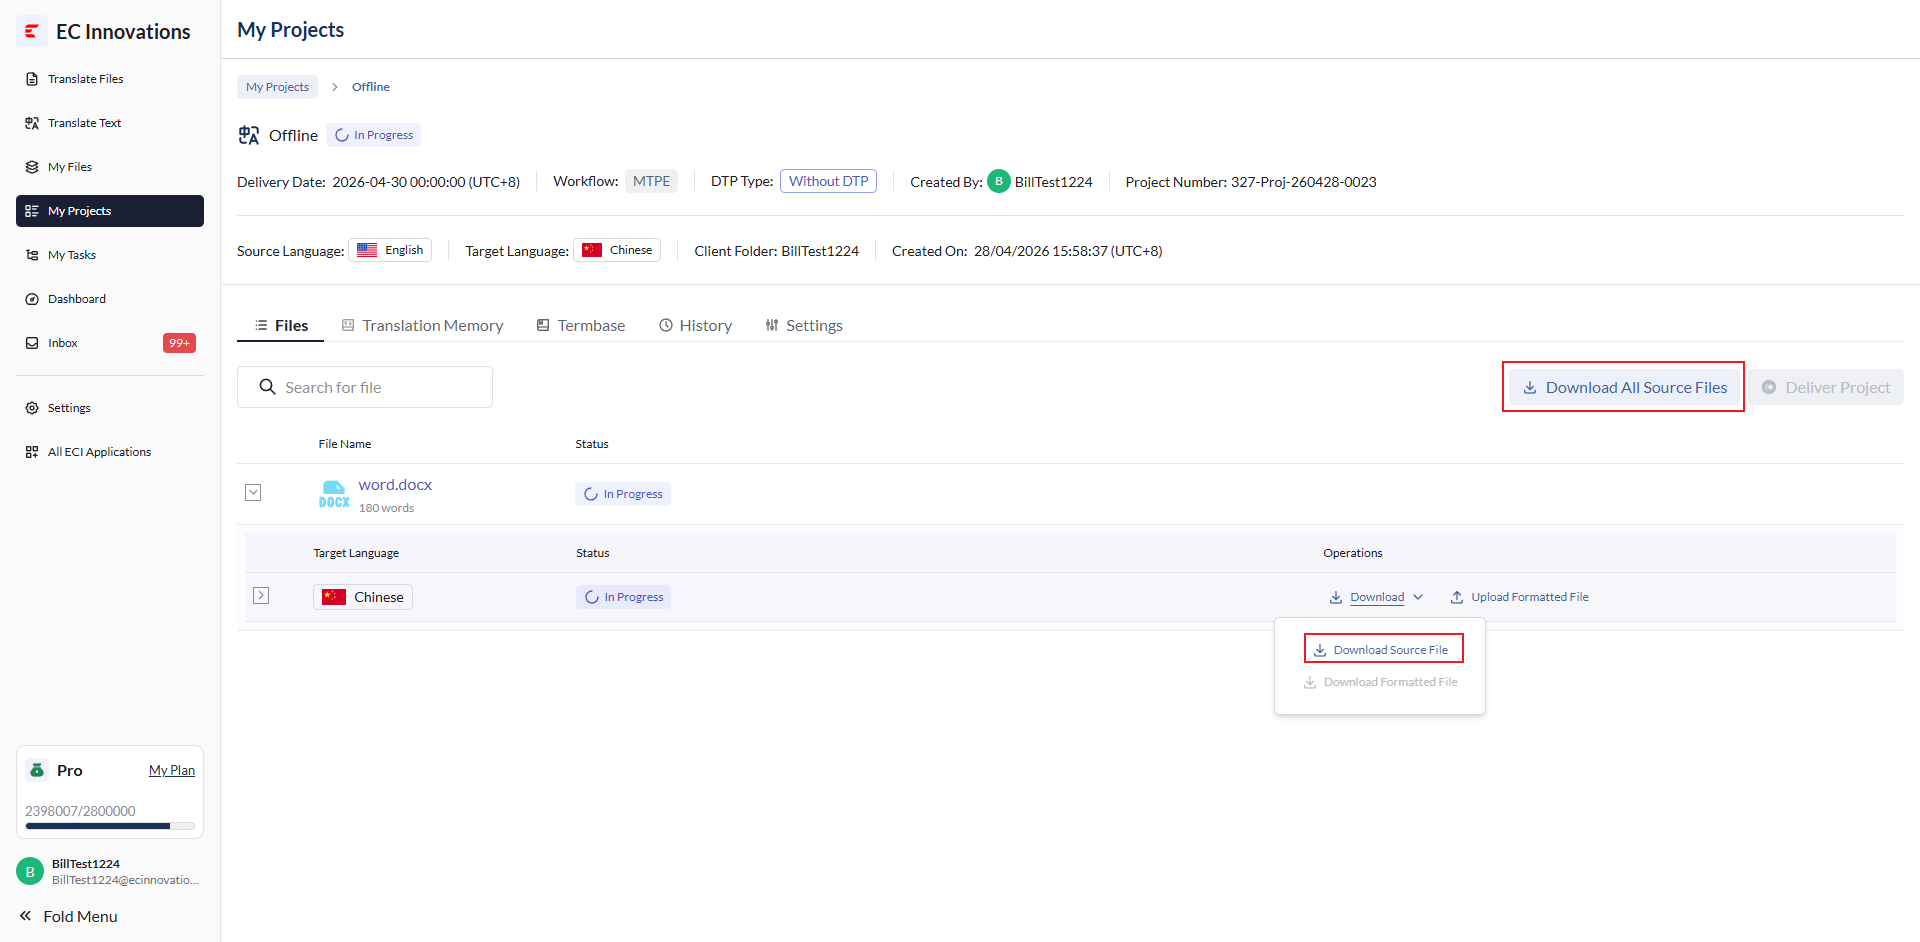
Download the source files, then start translation.
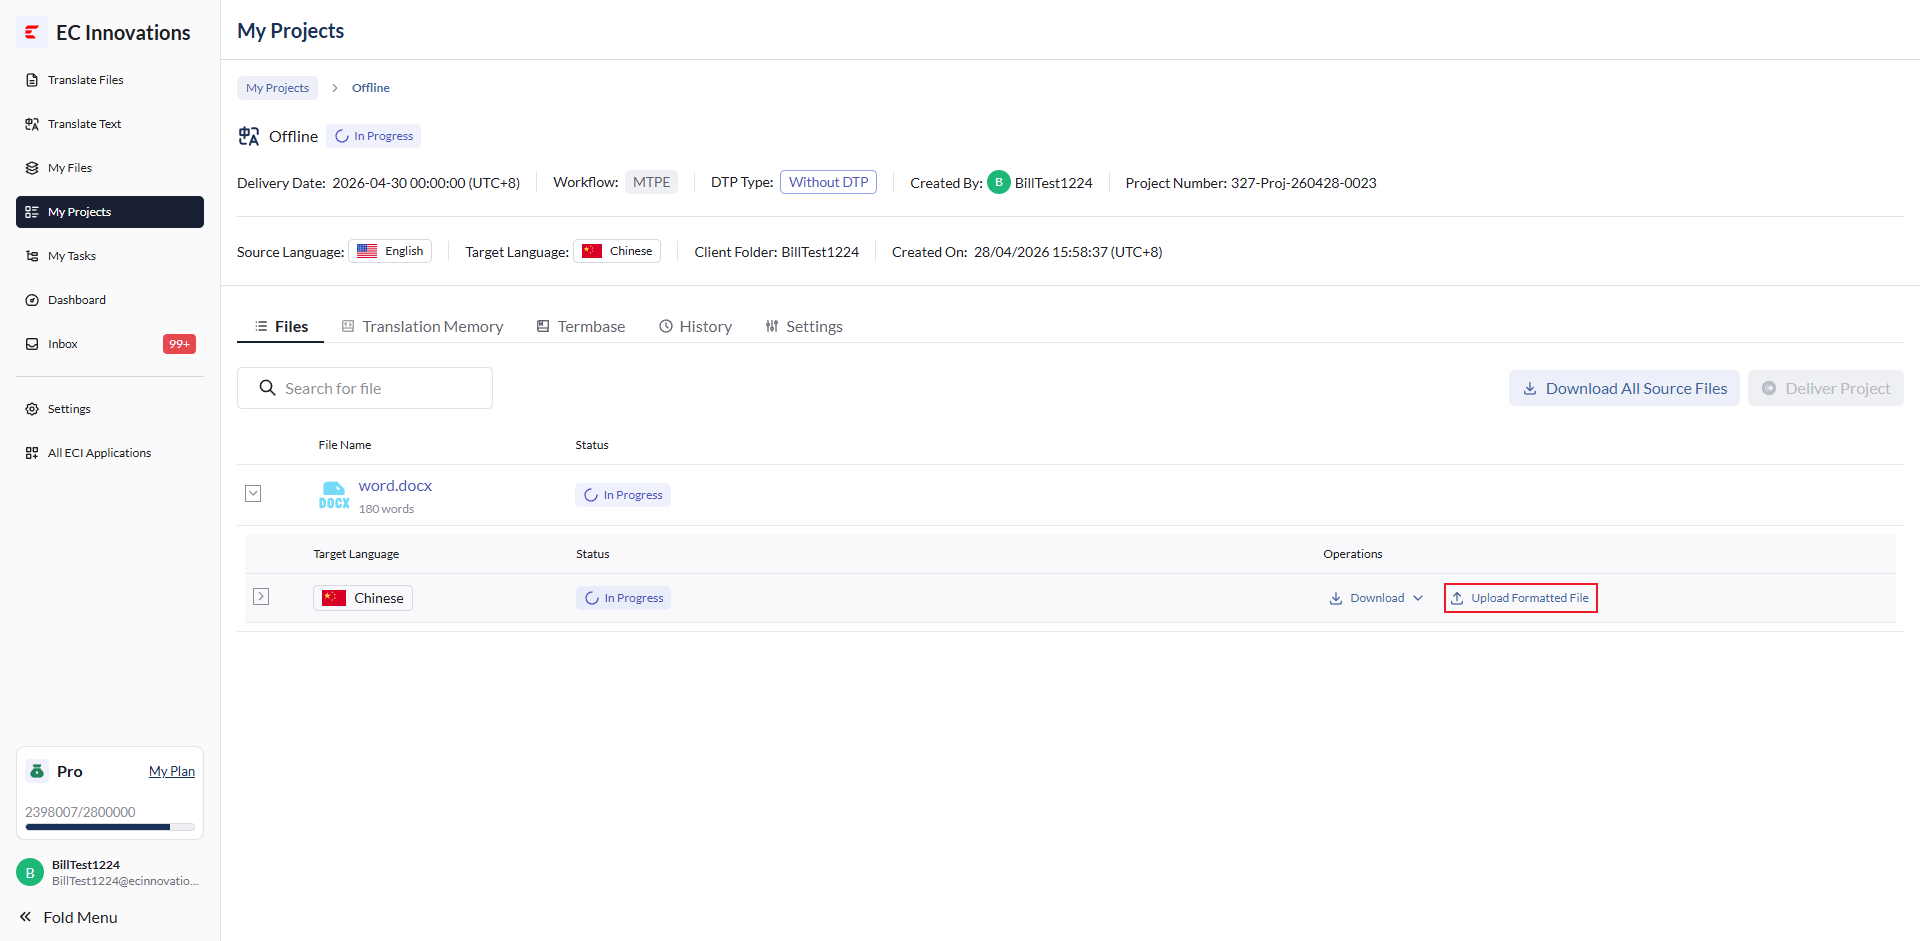
Upload the formatted files.
After the files are uploaded successfully, you can deliver the project.
Edit Quotation
When the PM has just received a project and the project has not started yet, the PM can initiate price negotiation. Click ‘Edit Quotation’ to open the quotation details pop-up and update the quotation details.
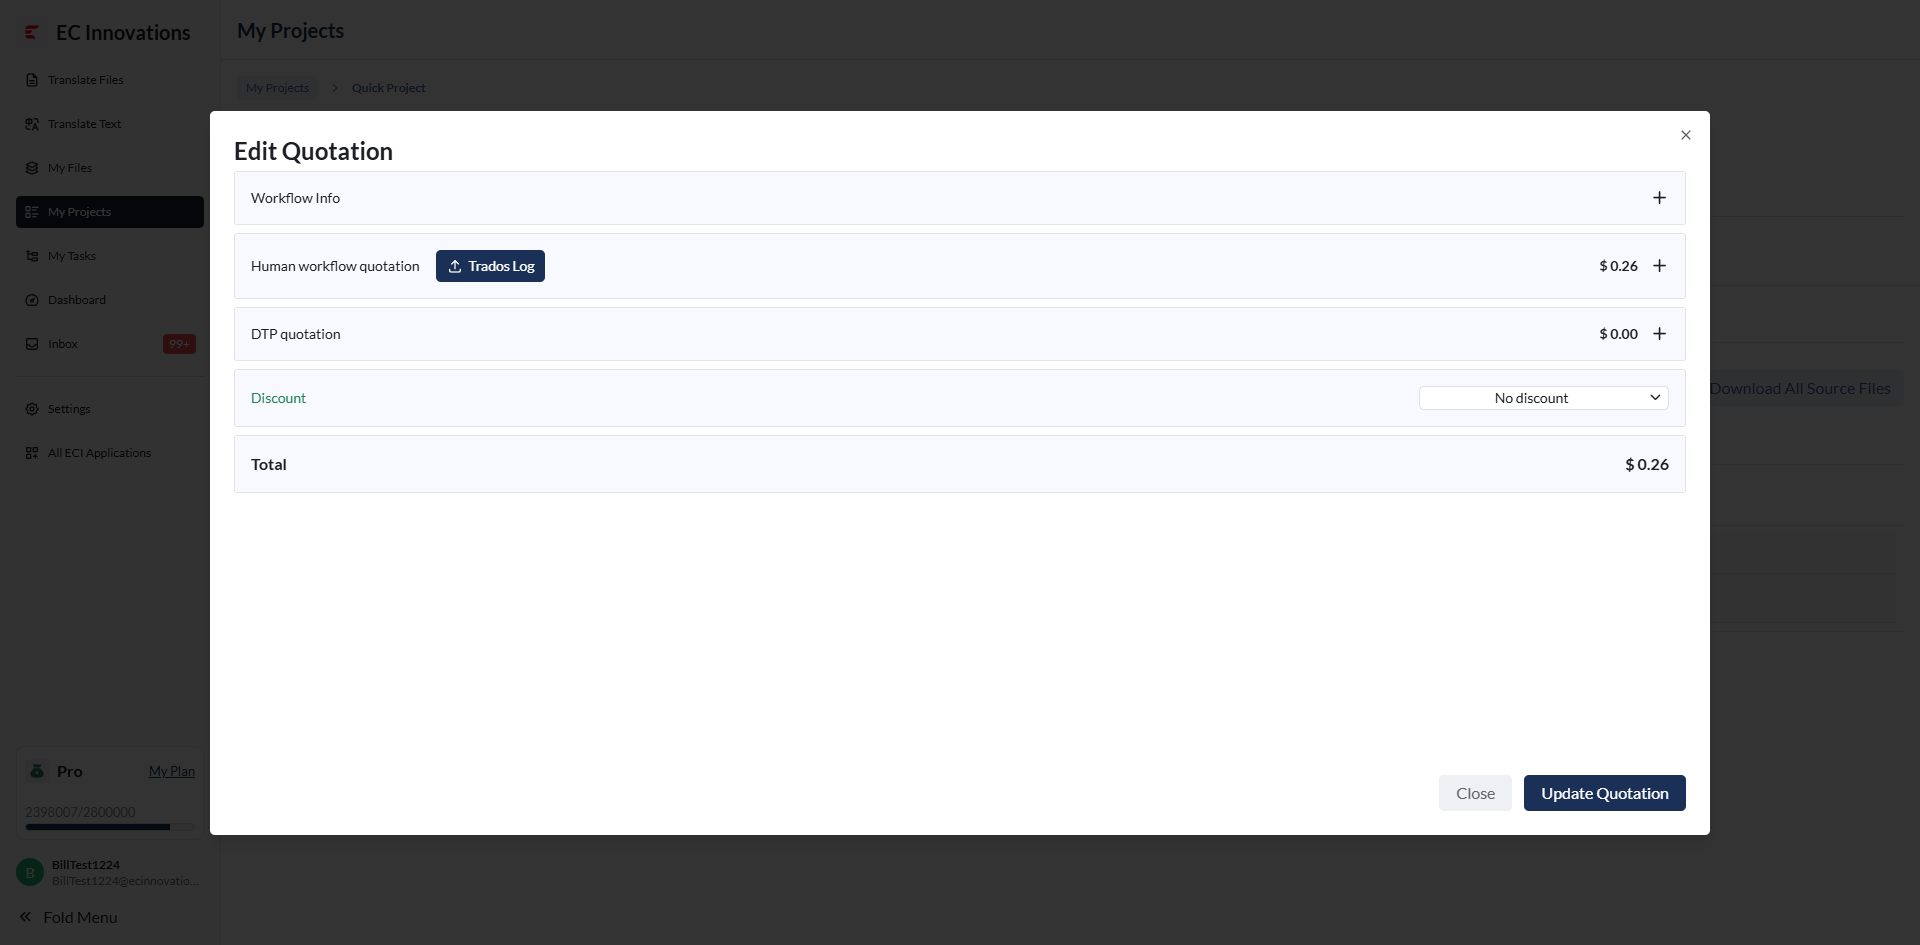
Click ‘Trados Log’ to open the ‘Upload Log File’ pop-up.
Click ‘Upload’ to upload the Trados log file.
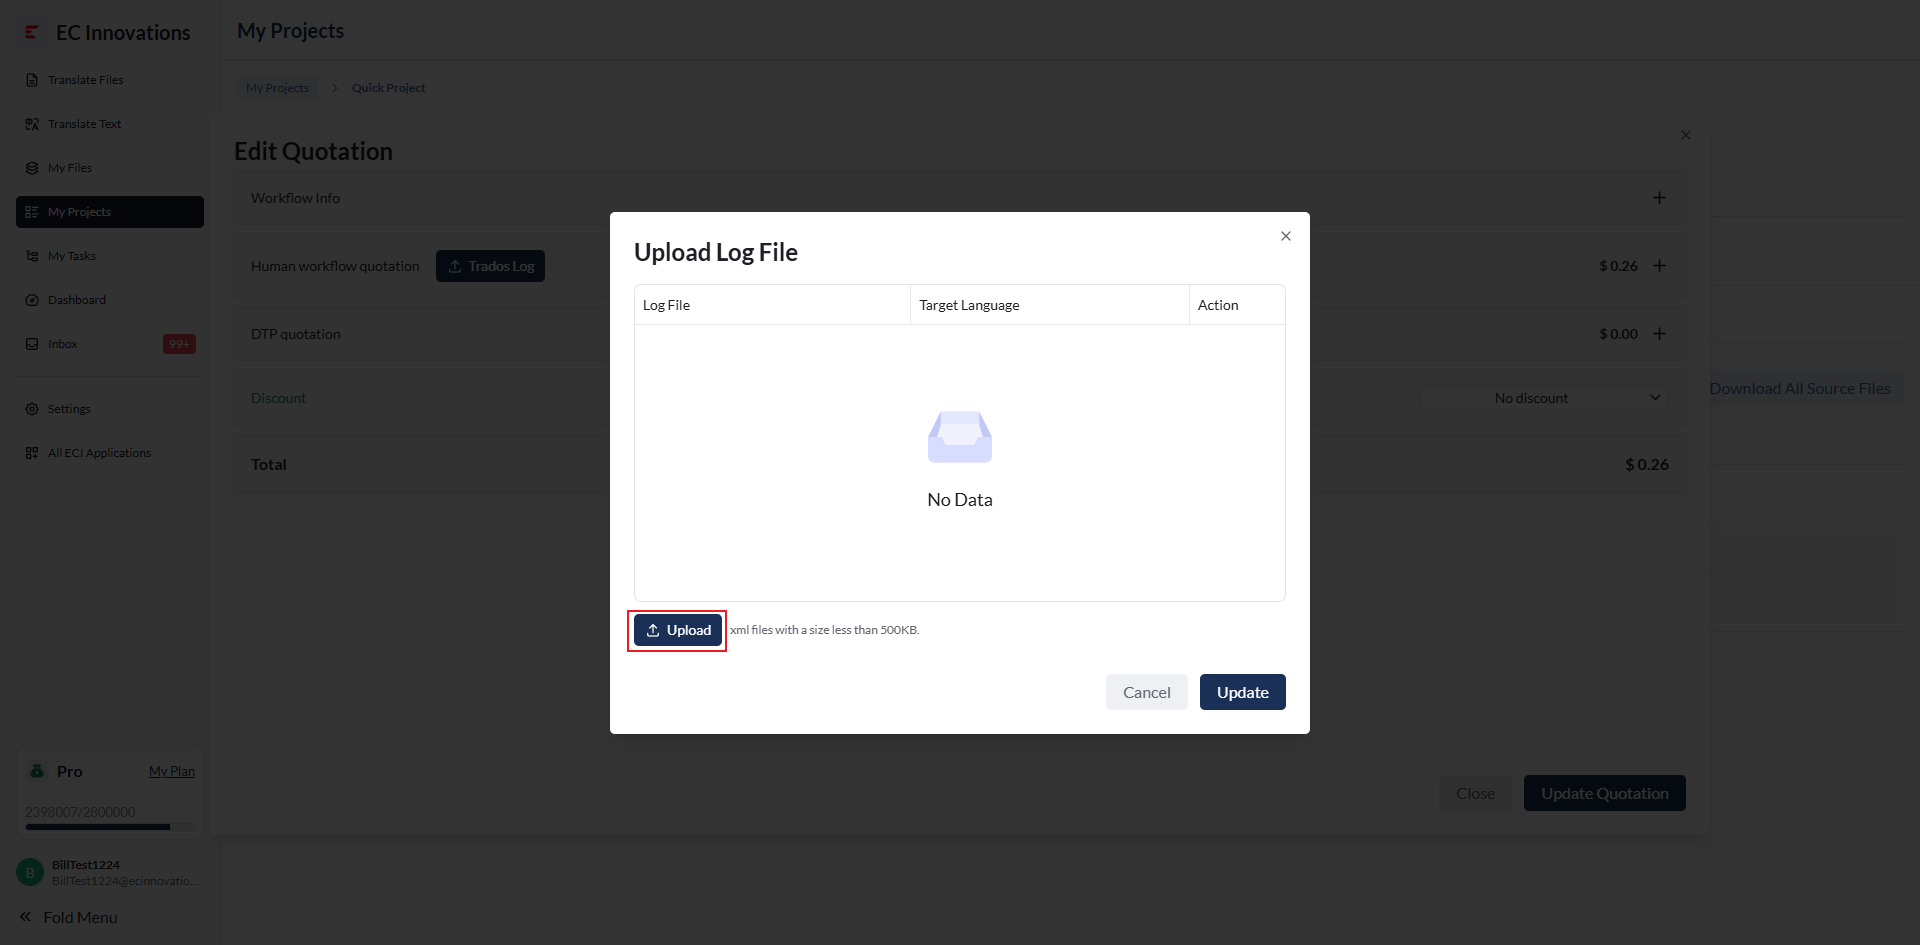
Click ‘Update’ to automatically update the quotation.
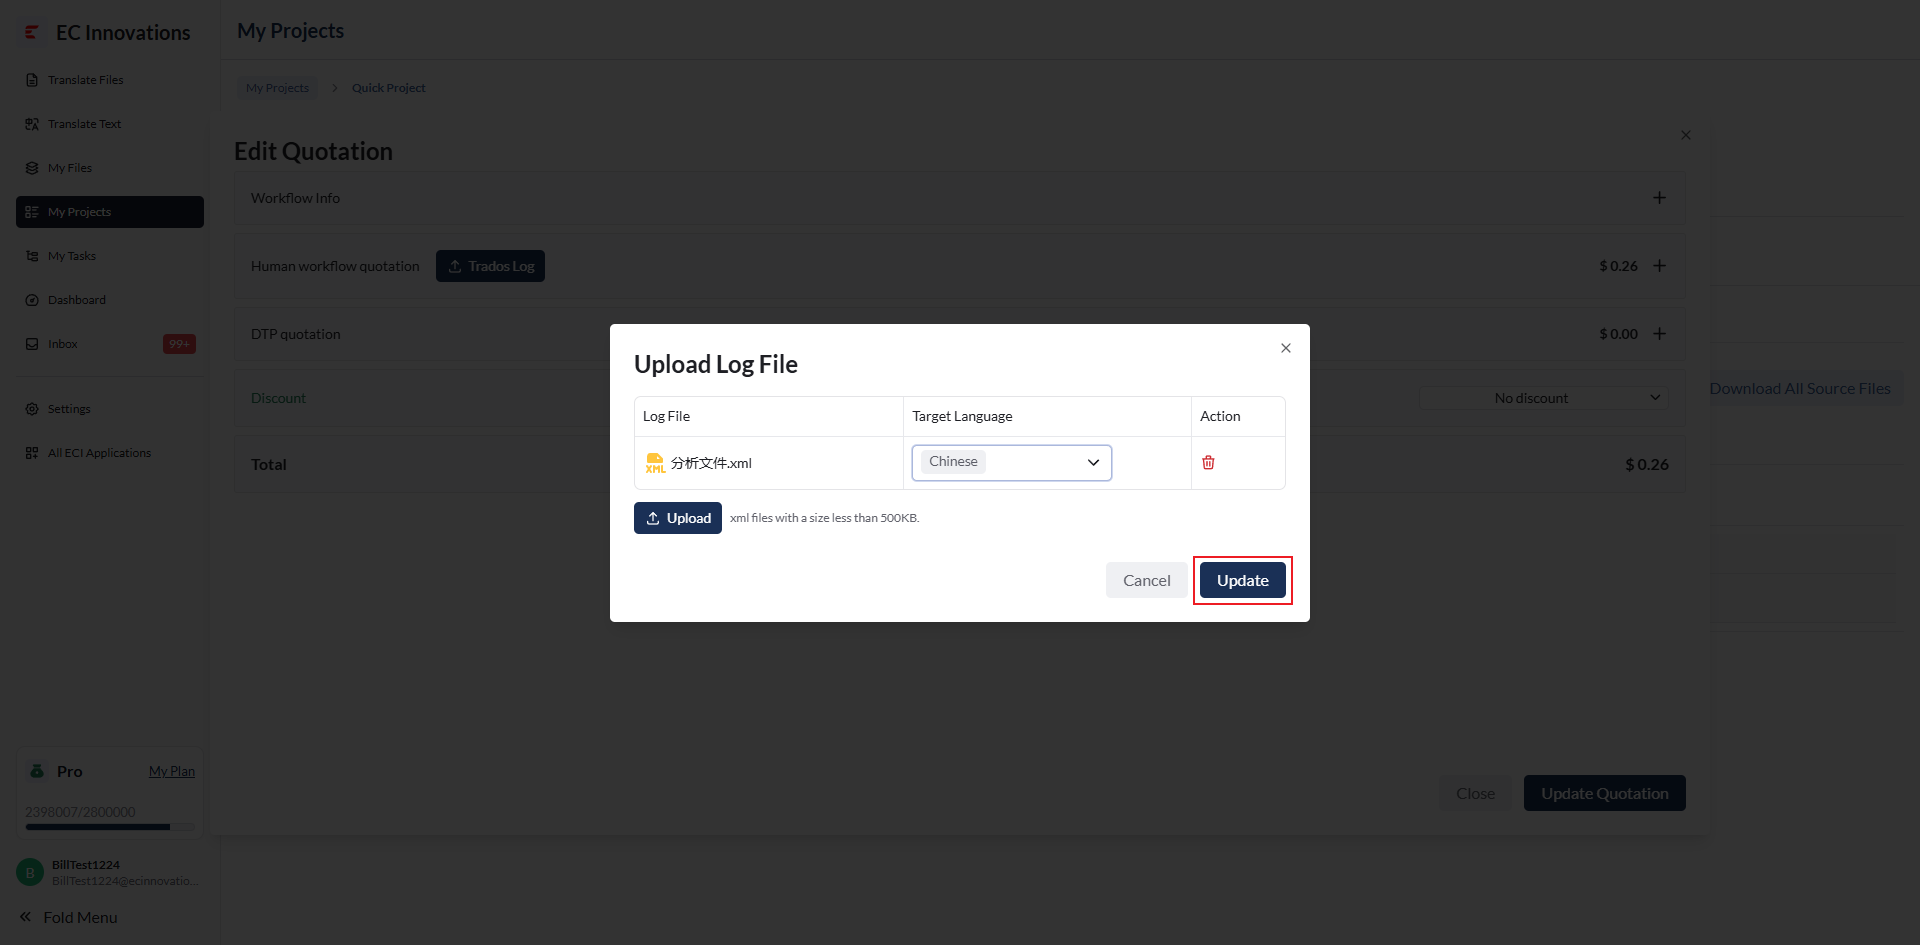
Expand Human workflow quotation, then switch to a translation file to manually update the quotation.
Click the edit icon to show the input field for the Words value.
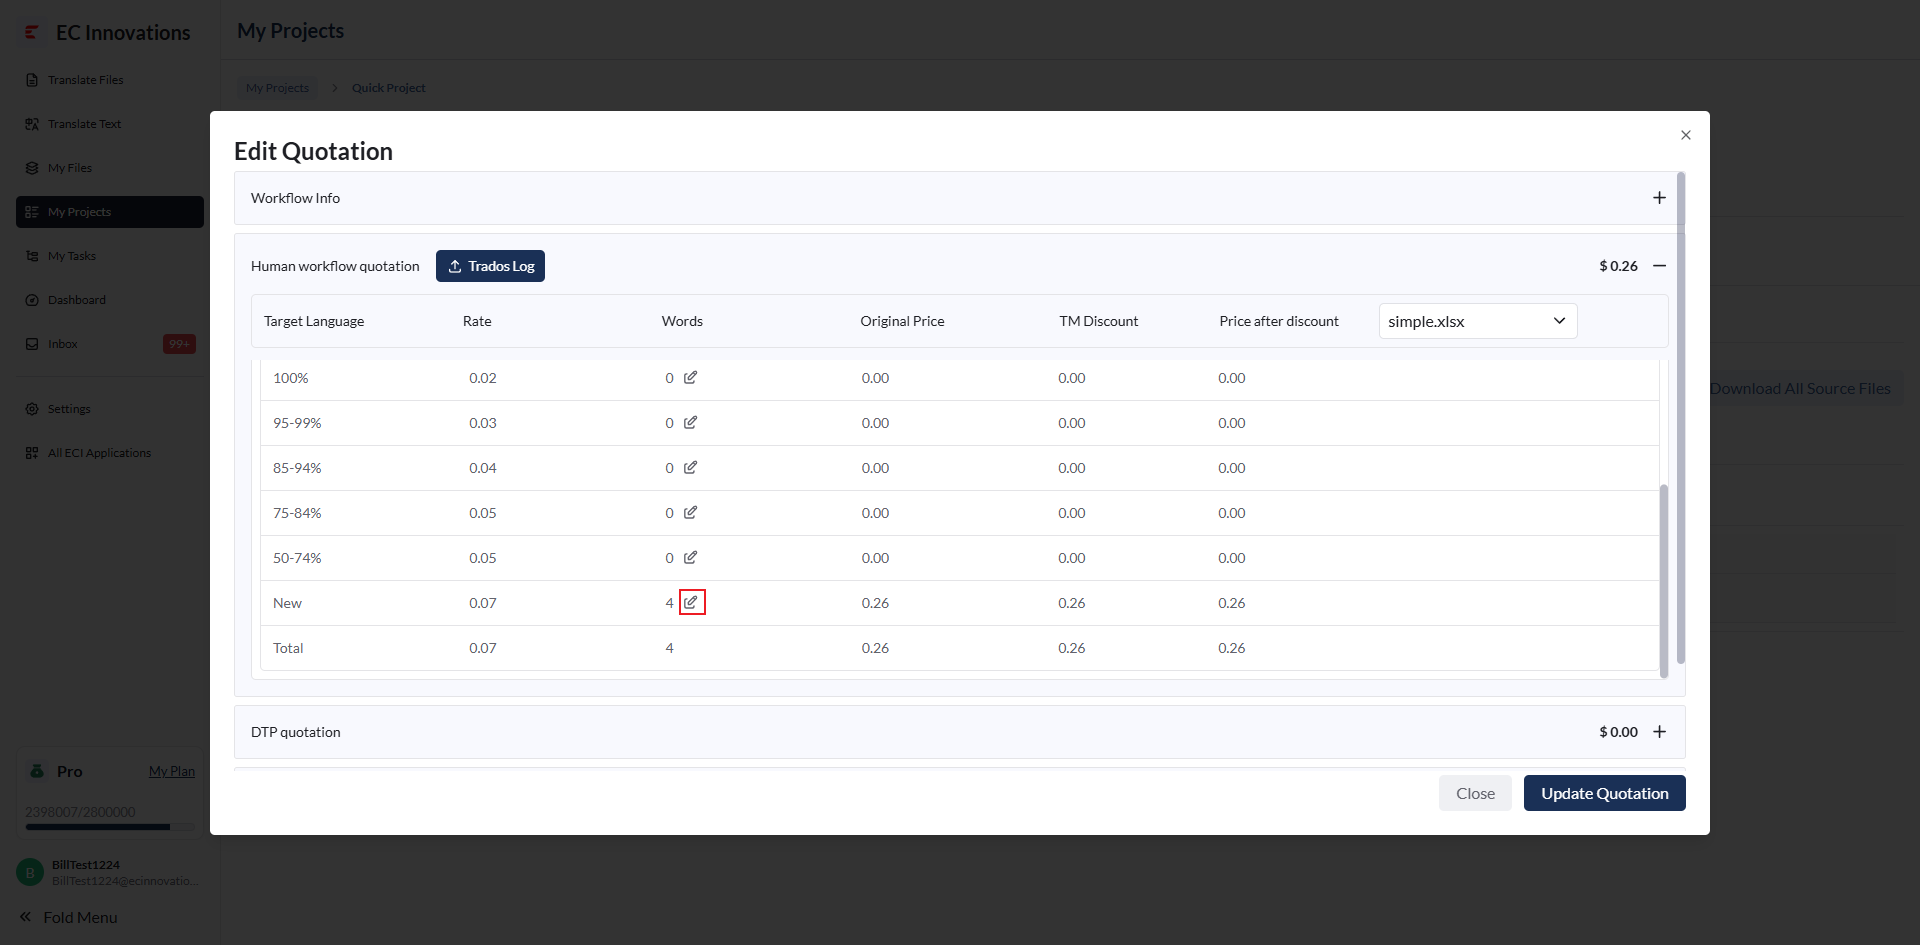
Enter the new Words value, then click the ✅ icon to save the new quotation amount.
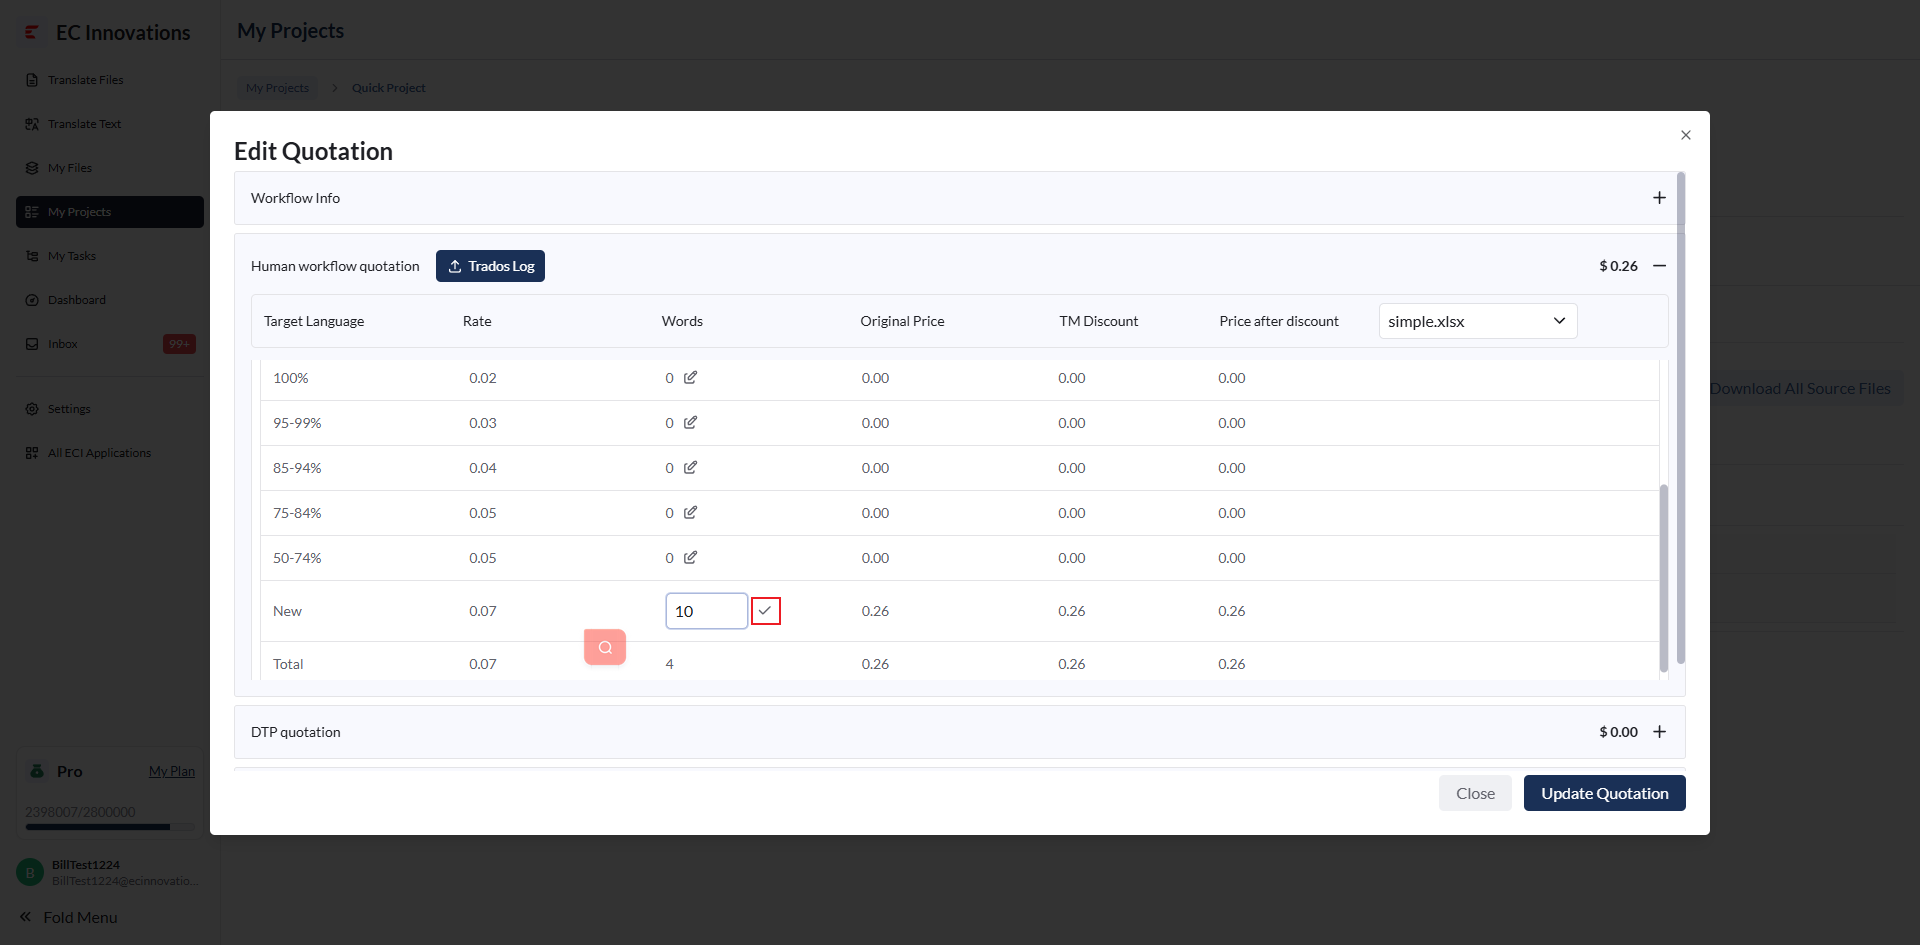
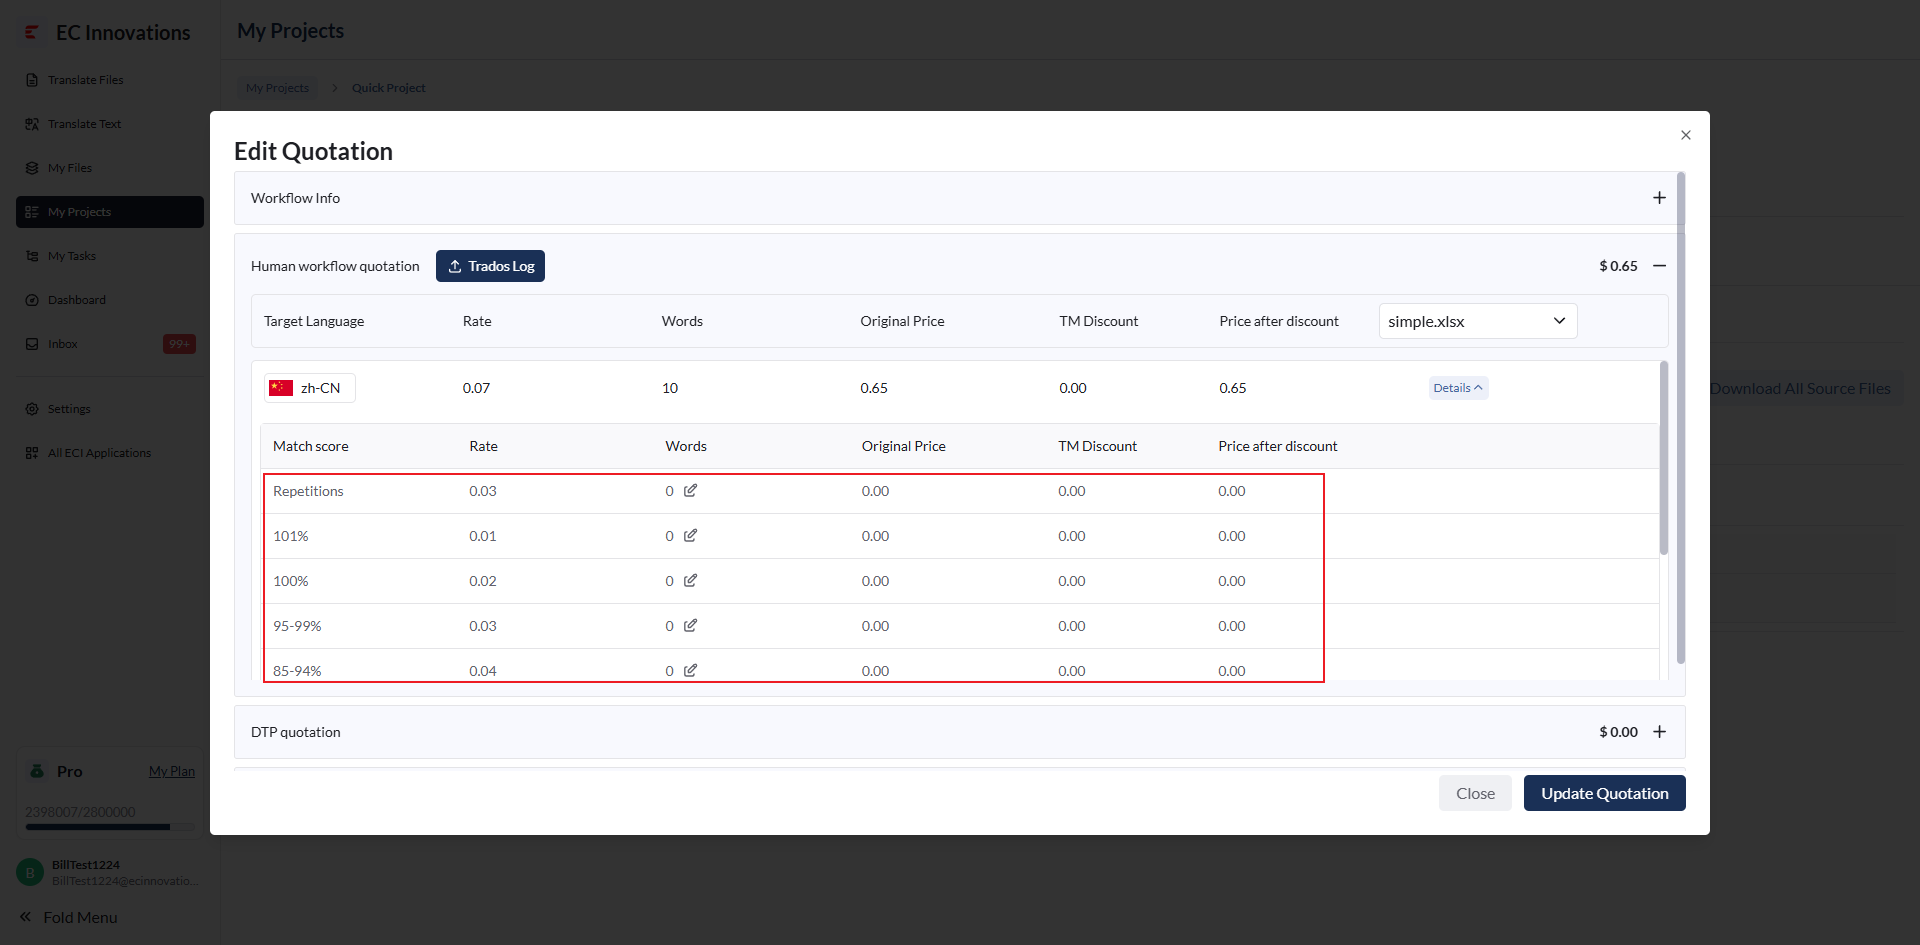
Note: You can only modify Words values that already have a quotation. Otherwise, the updated quotation amount will not take effect.
Expand DTP quotation to modify the DTP quotation. The operation is the same as above.
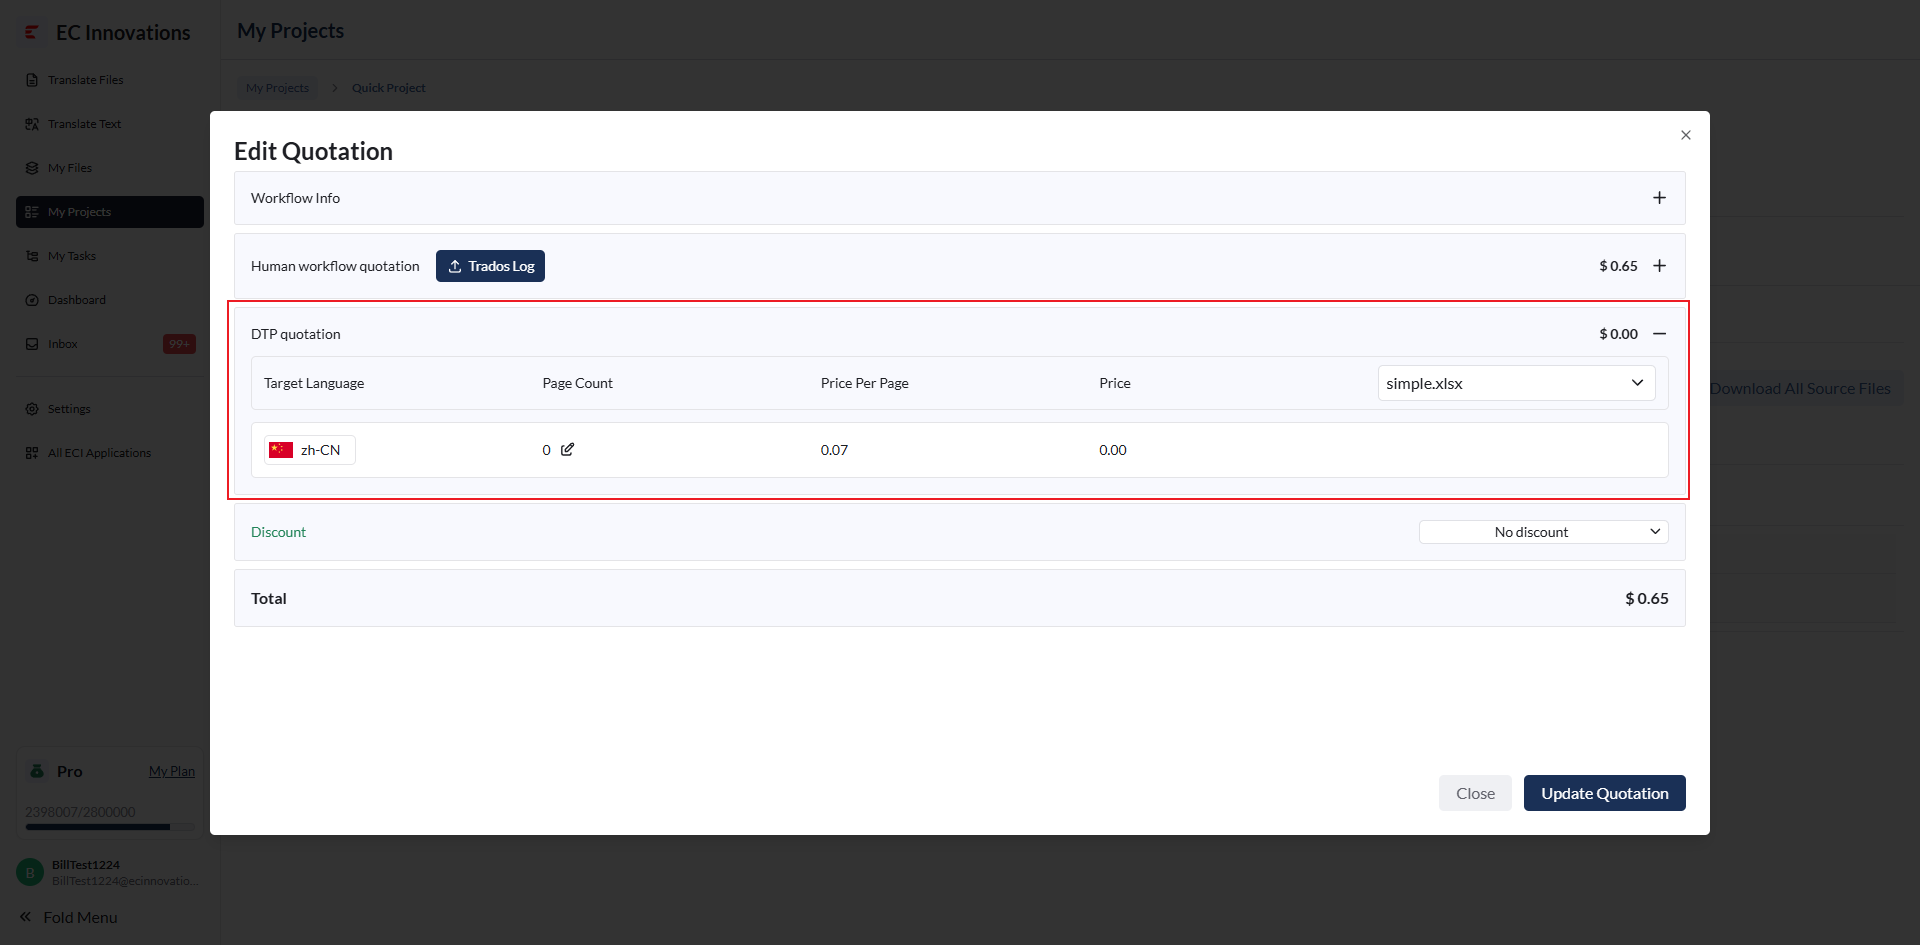
Select Discount to modify the discount.
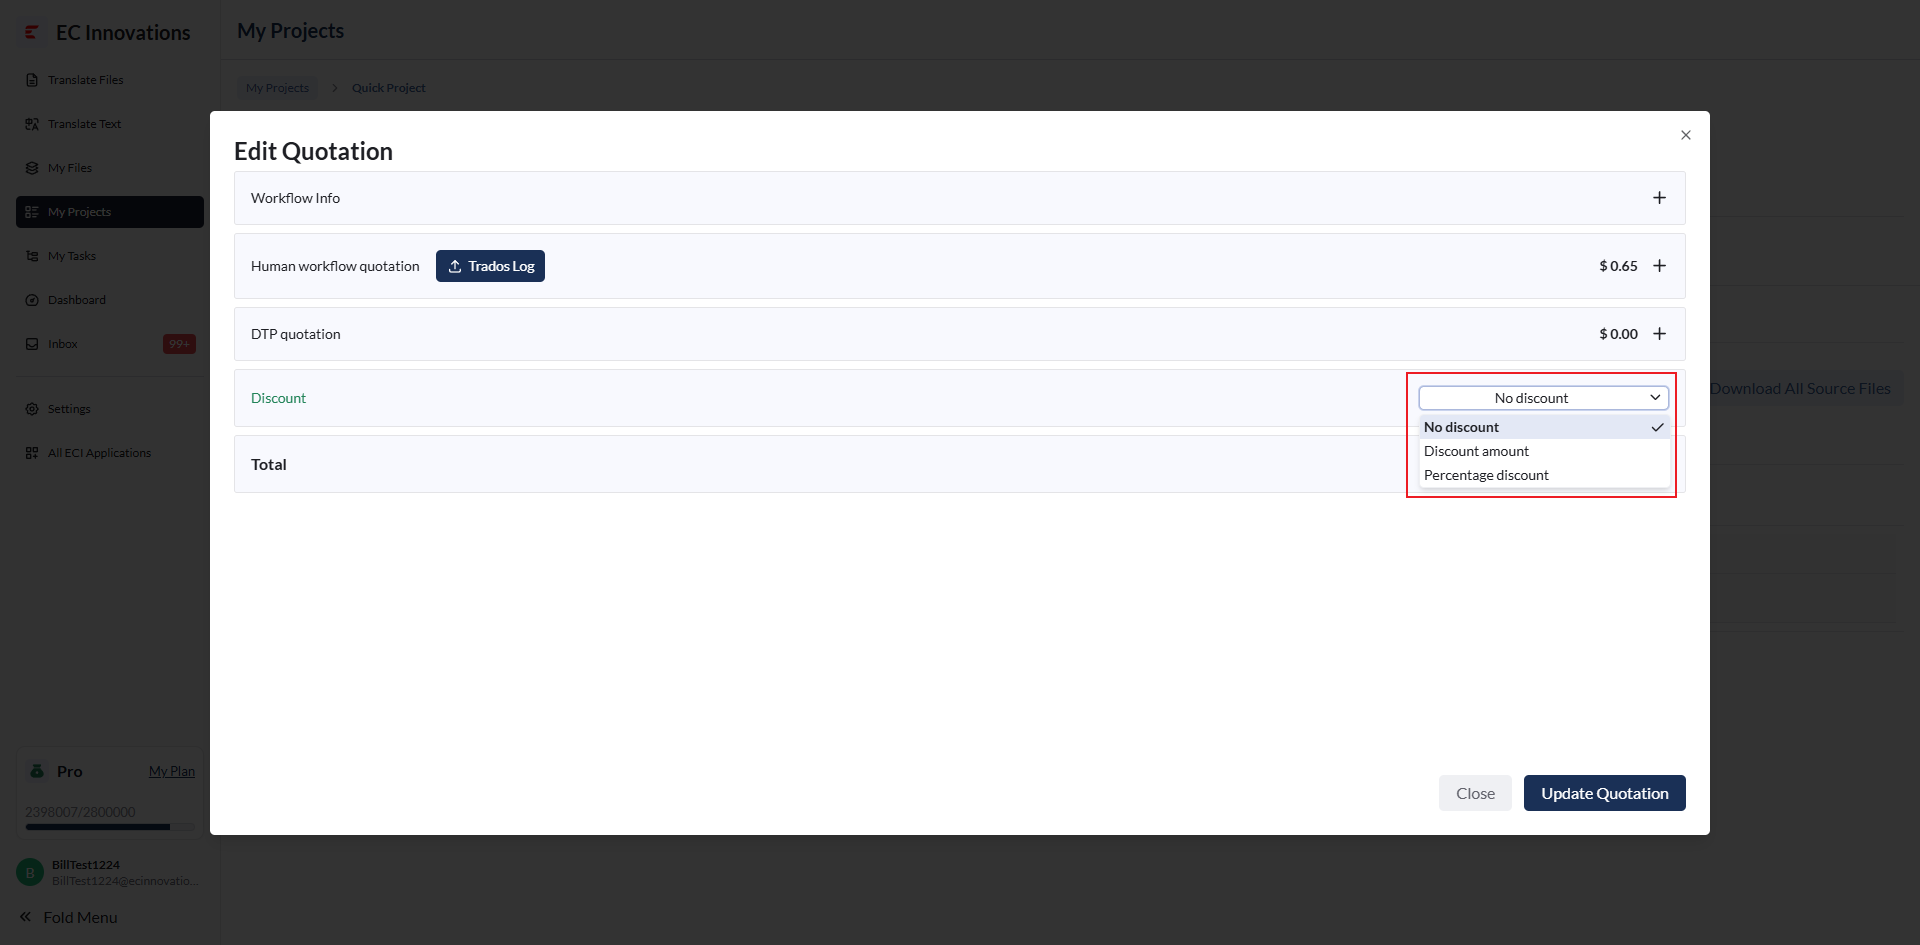
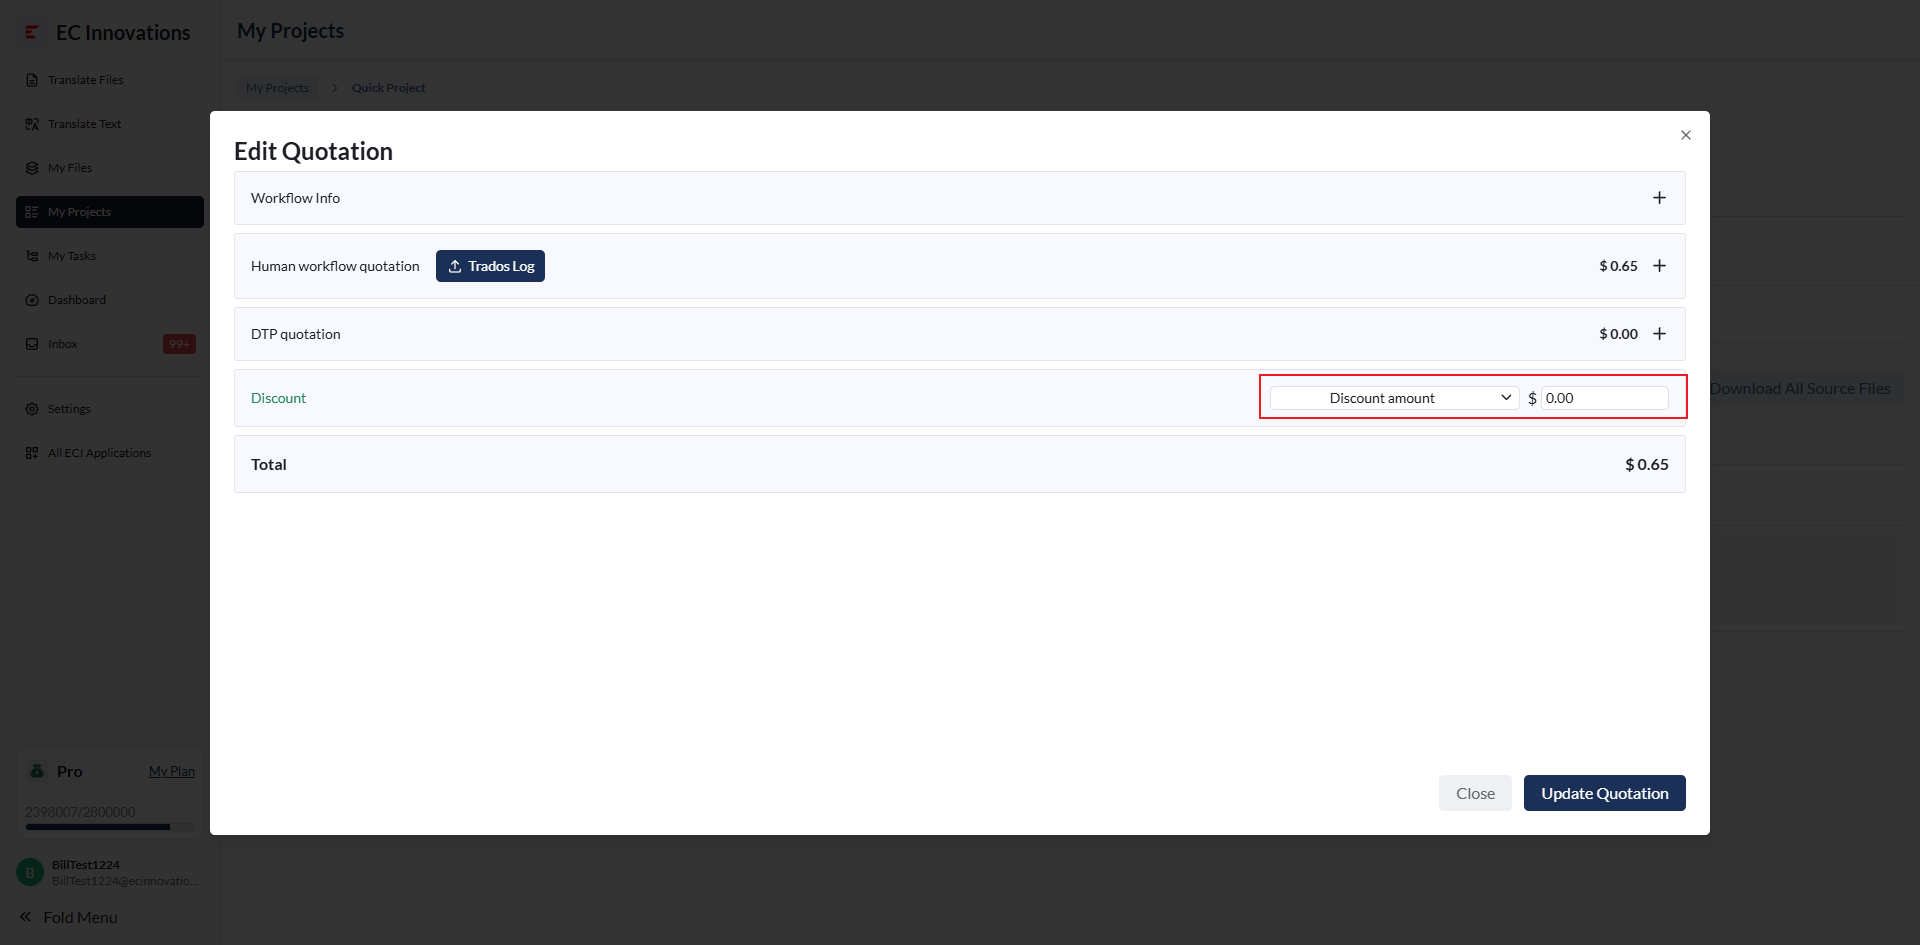
Discount amount: Directly modify the discount amount. The total price is calculated as: total price = original price - discount amount.
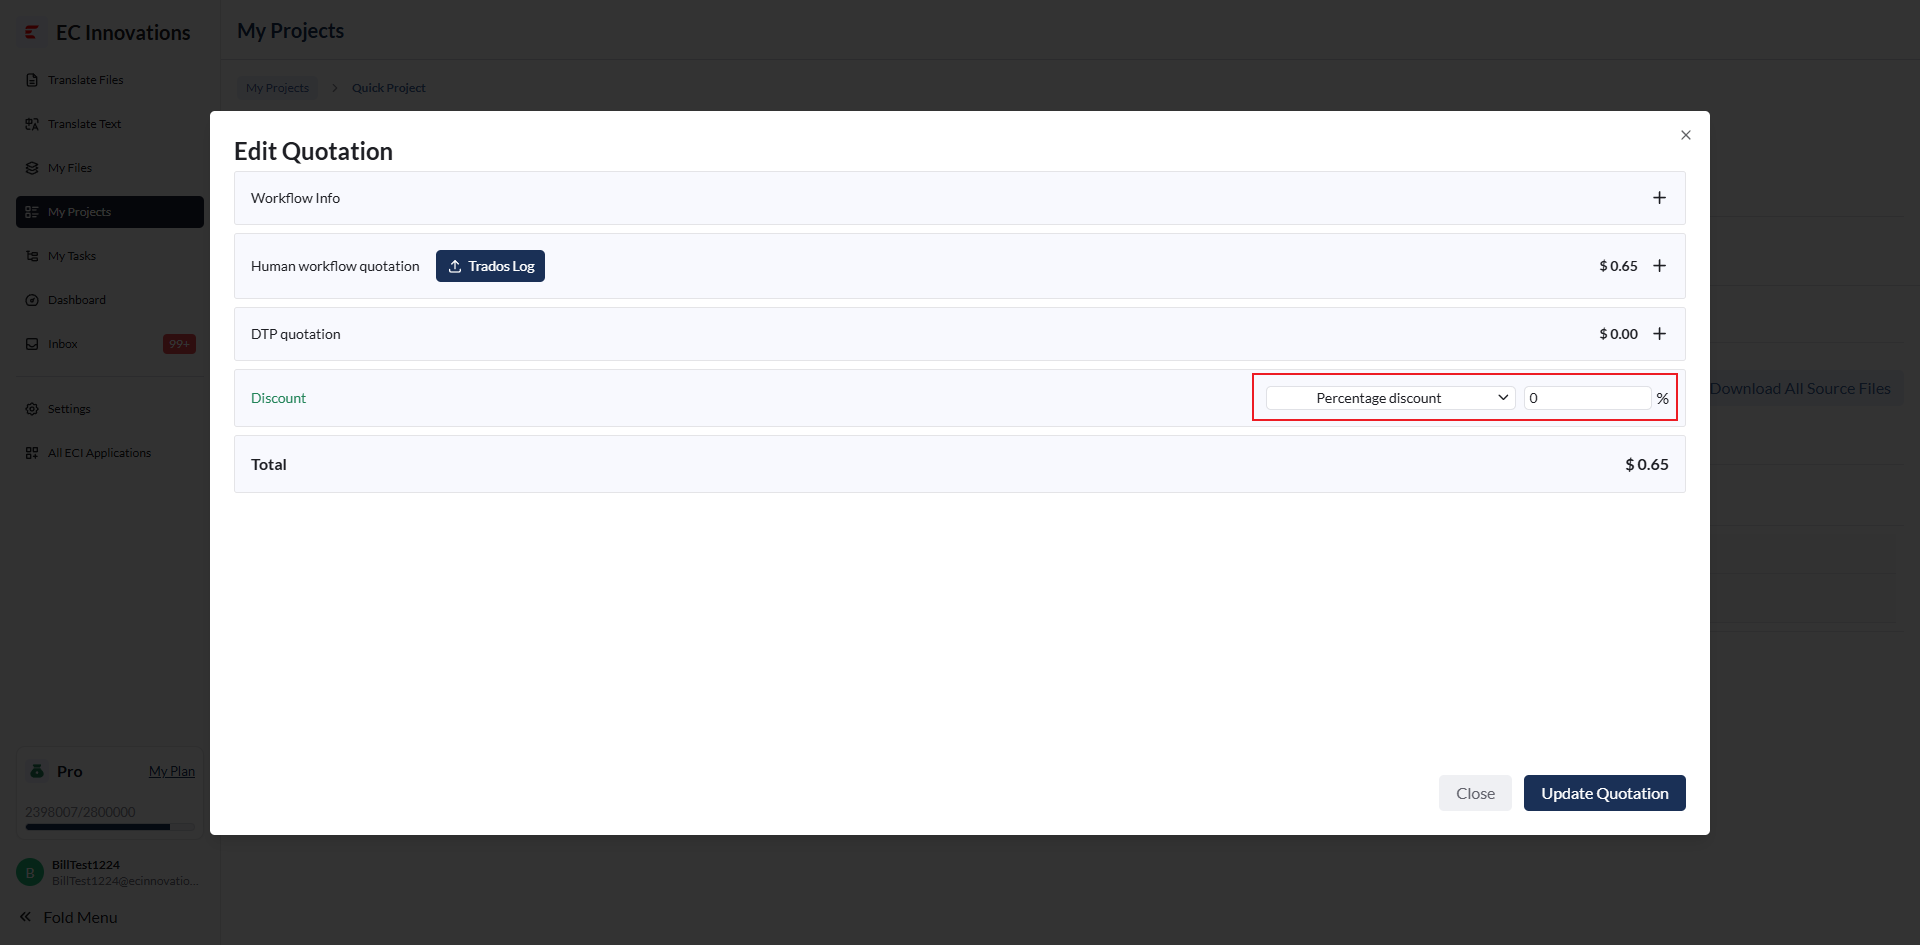
Percentage discount: Directly modify the discount percentage. The total price is calculated as: total price = original price × (1 - discount percentage).
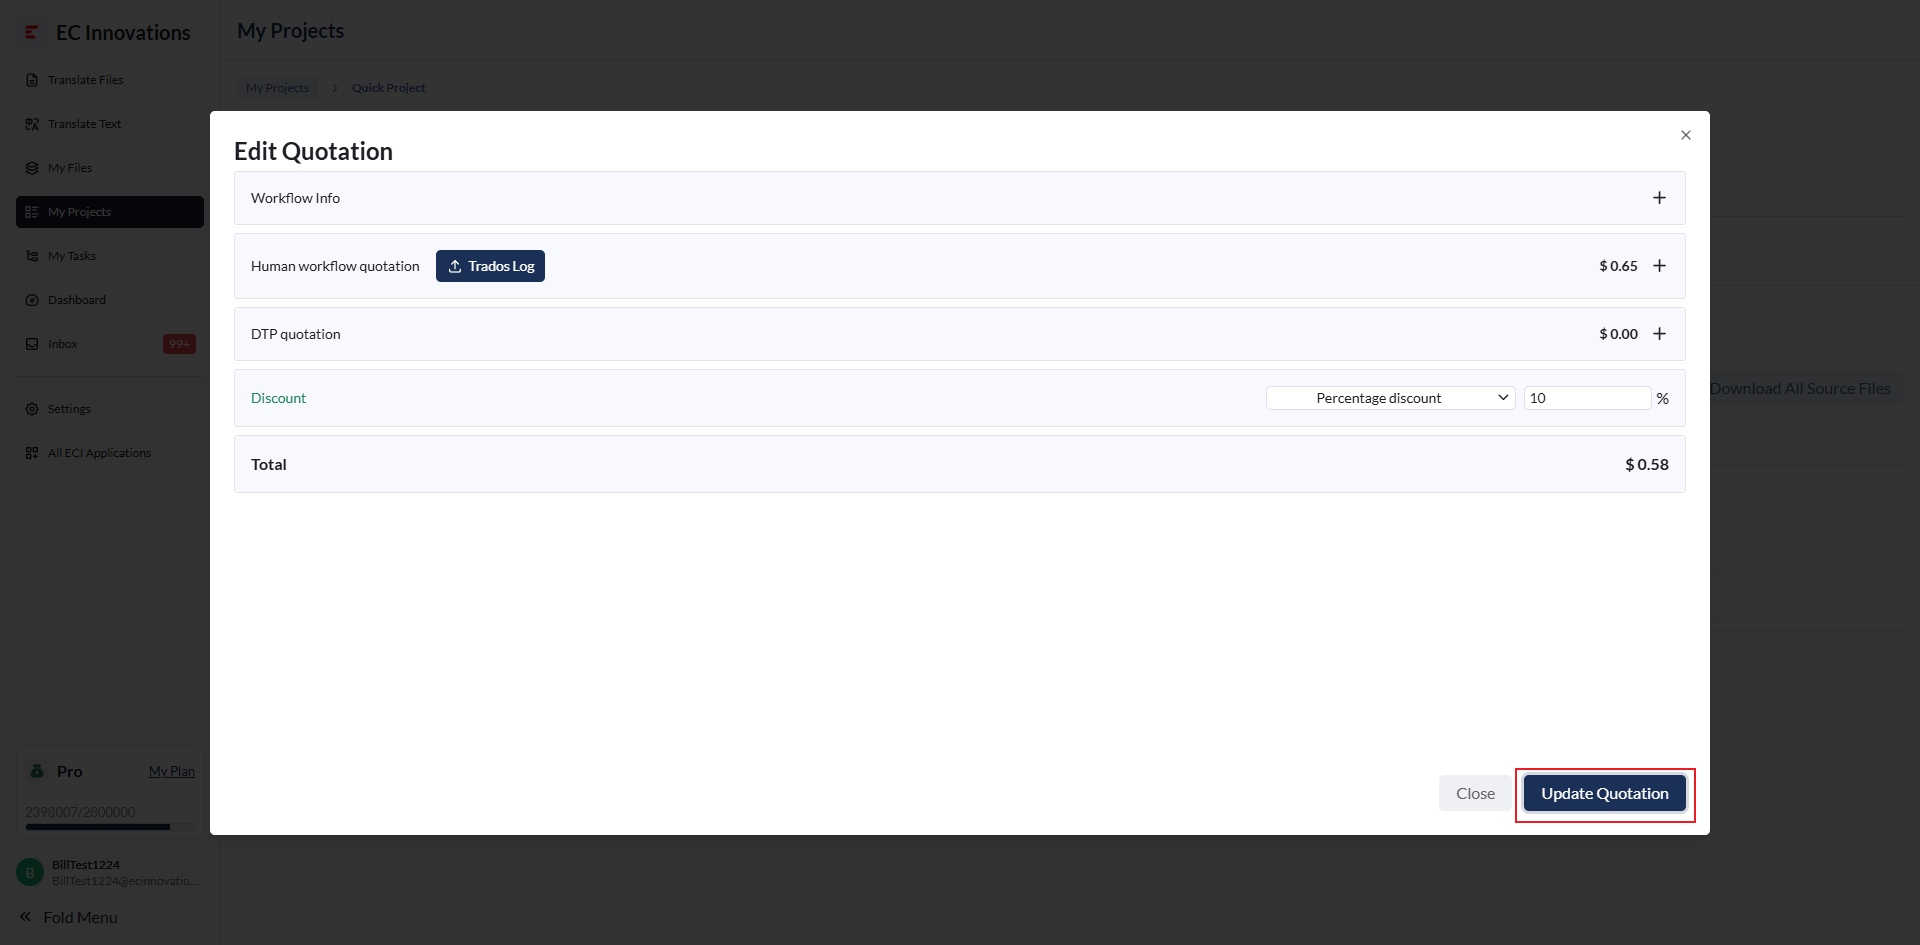
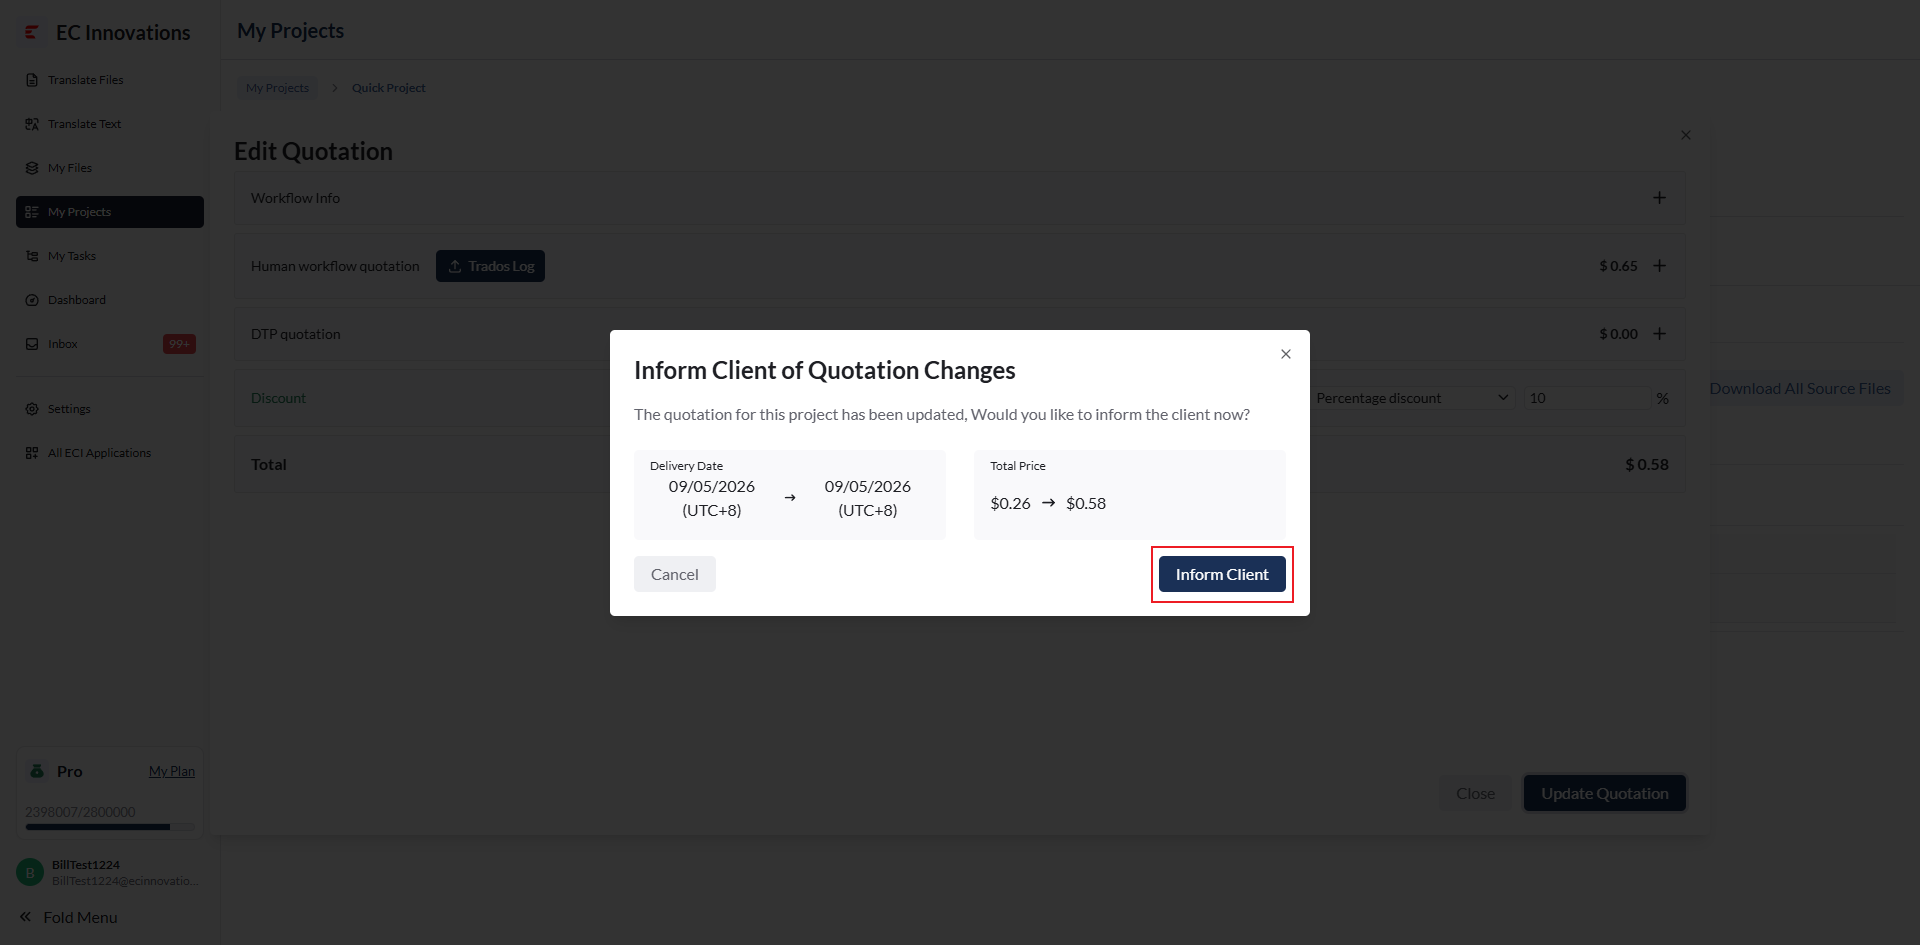
After modifying the quotation, click ‘Update Quotation’ to display the updated content.
Click ‘Inform Client’ to update the quotation.
After the quotation is updated successfully, click ‘Check Quotation’ to review the quotation.