Translation Memory
Introduction
- Stores historical translation sentence pairs, including source text and target text. During translation, the system automatically matches similar sentence pairs and prioritizes high-quality previous translations, reducing repetitive translation work and improving translation efficiency.
Core Features
- Supports TM creation, bulk and single deletion, import, export, editing, member permission management, and TM approval.
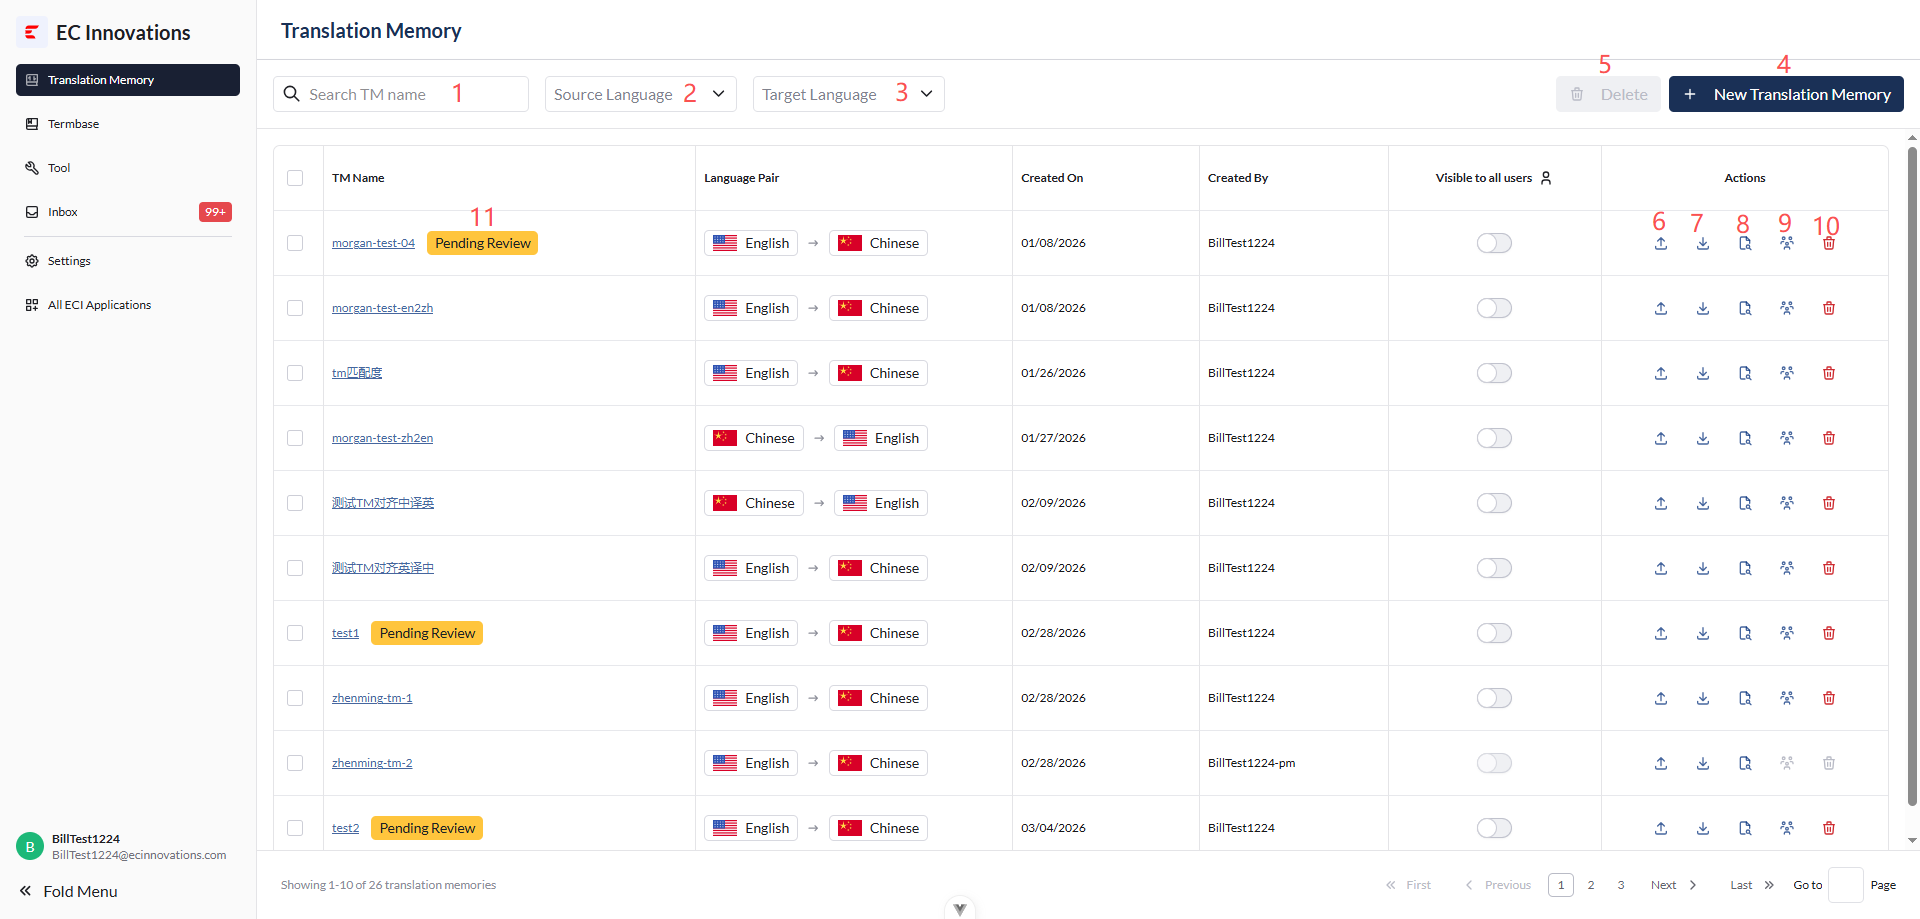
- Filter the TM list by keyword.
- Filter the TM list by the source language in the first column under ‘Language Pair’.
- Filter the TM list by the target language in the second column under ‘Language Pair’.
- Click ‘New Translation Memory’ to create a new TM.
- Select the checkboxes on the left, then click ‘Delete’ to delete the selected TMs in bulk.
- Click ‘Import’ to import TM data.
- Click ‘Export’ to export data.
- Click ‘Detail’ to edit TM data.
- Click ‘Group Members’ to manage members of the corresponding TM.
- Click ‘Delete’ in the TM row to delete the corresponding TM.
- If there is data in the pending review list, ‘Pending Review’ will be displayed.
Create a TM
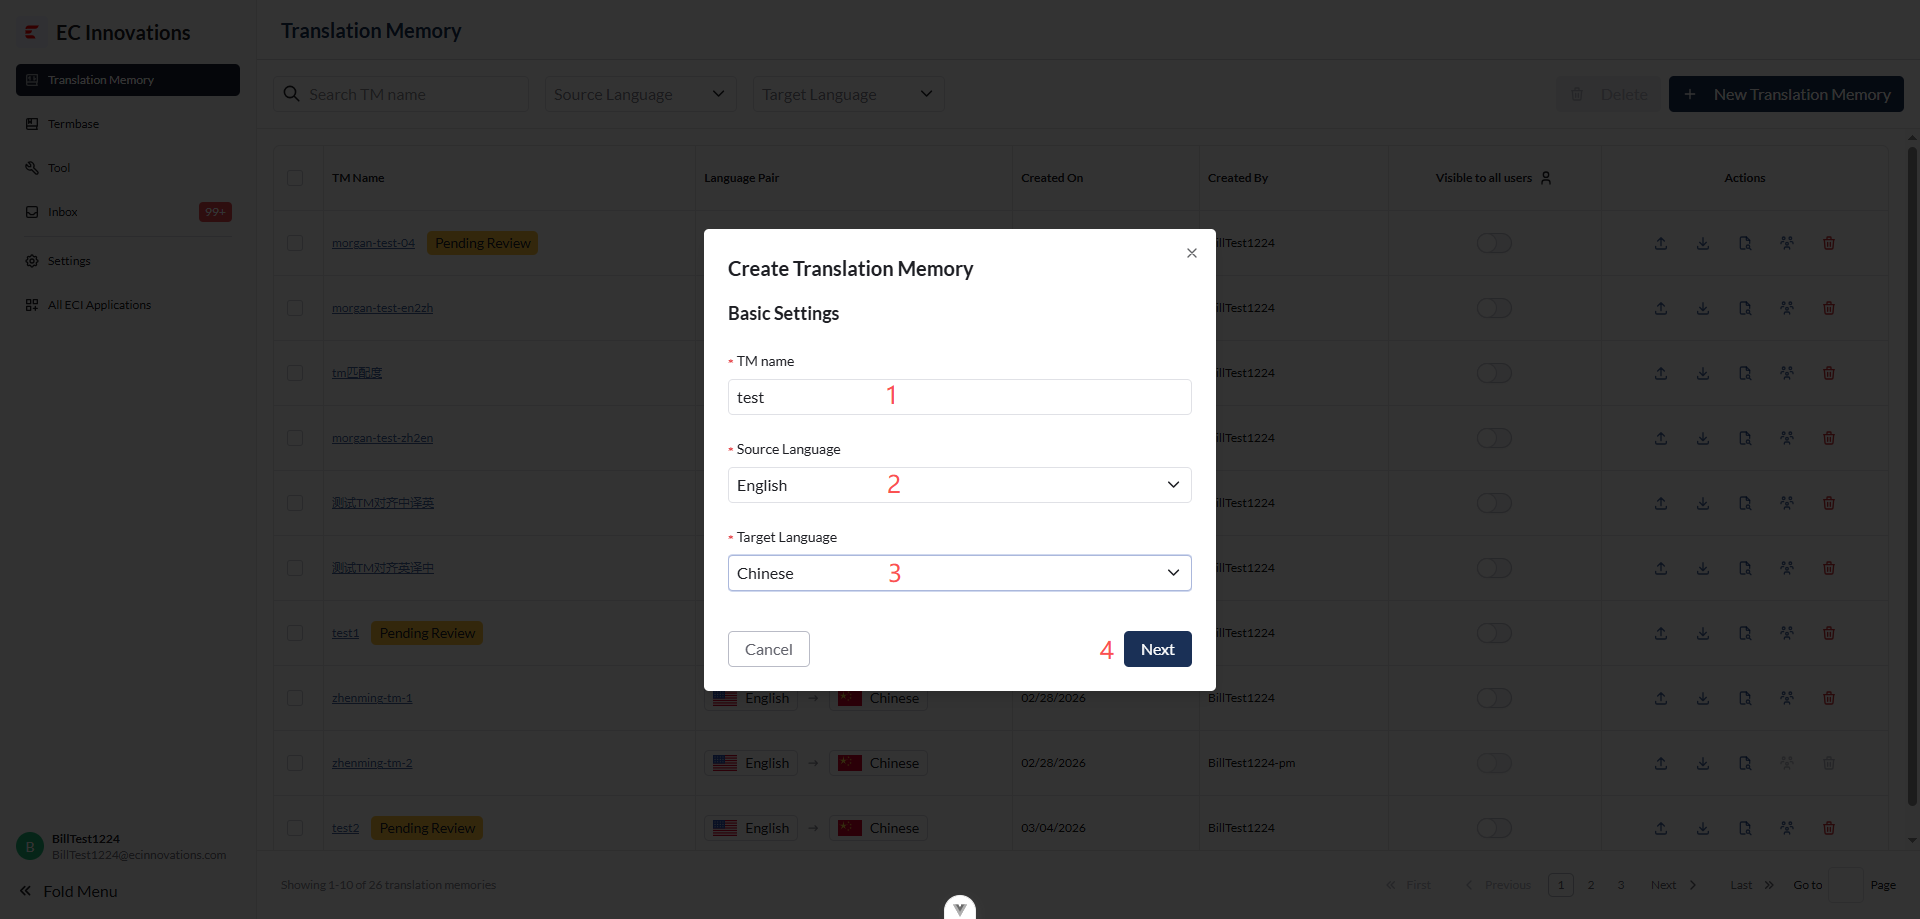
- Enter the TM name.
- Select the source language.
- Select the target language.
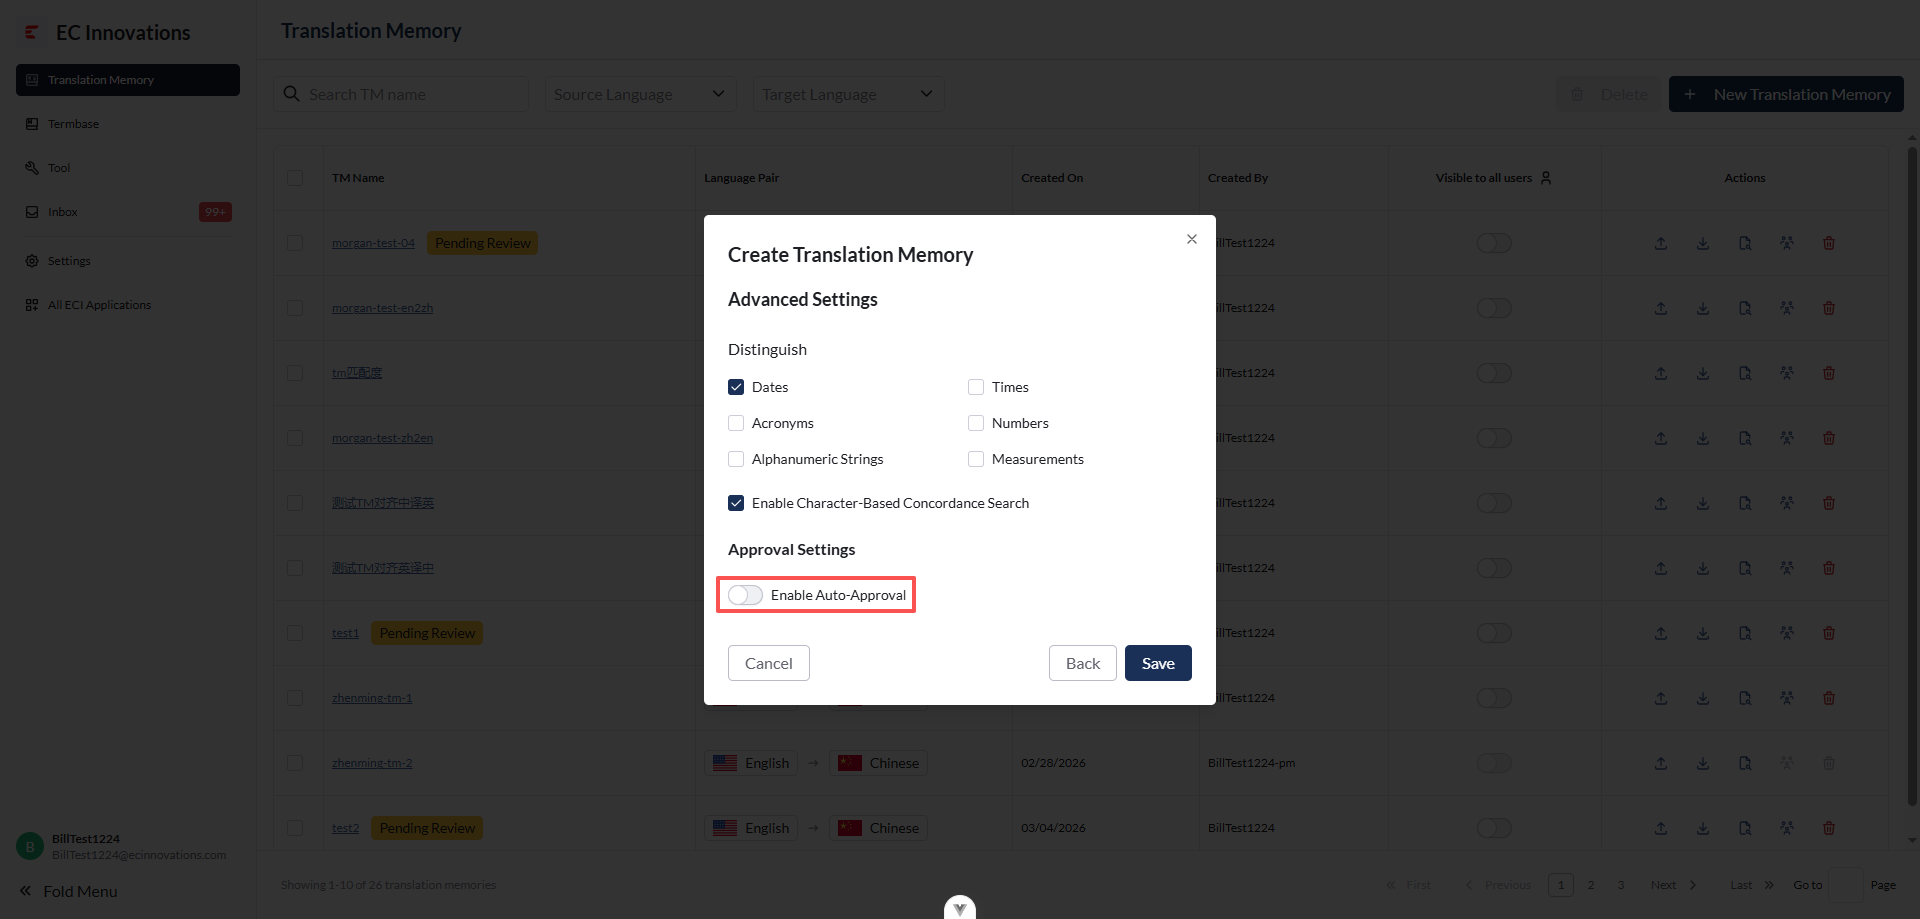
- Click ‘Next’ to go to the TM configuration page. If automatic approval is enabled, future approval requests from editors will be approved automatically.
Delete a TM
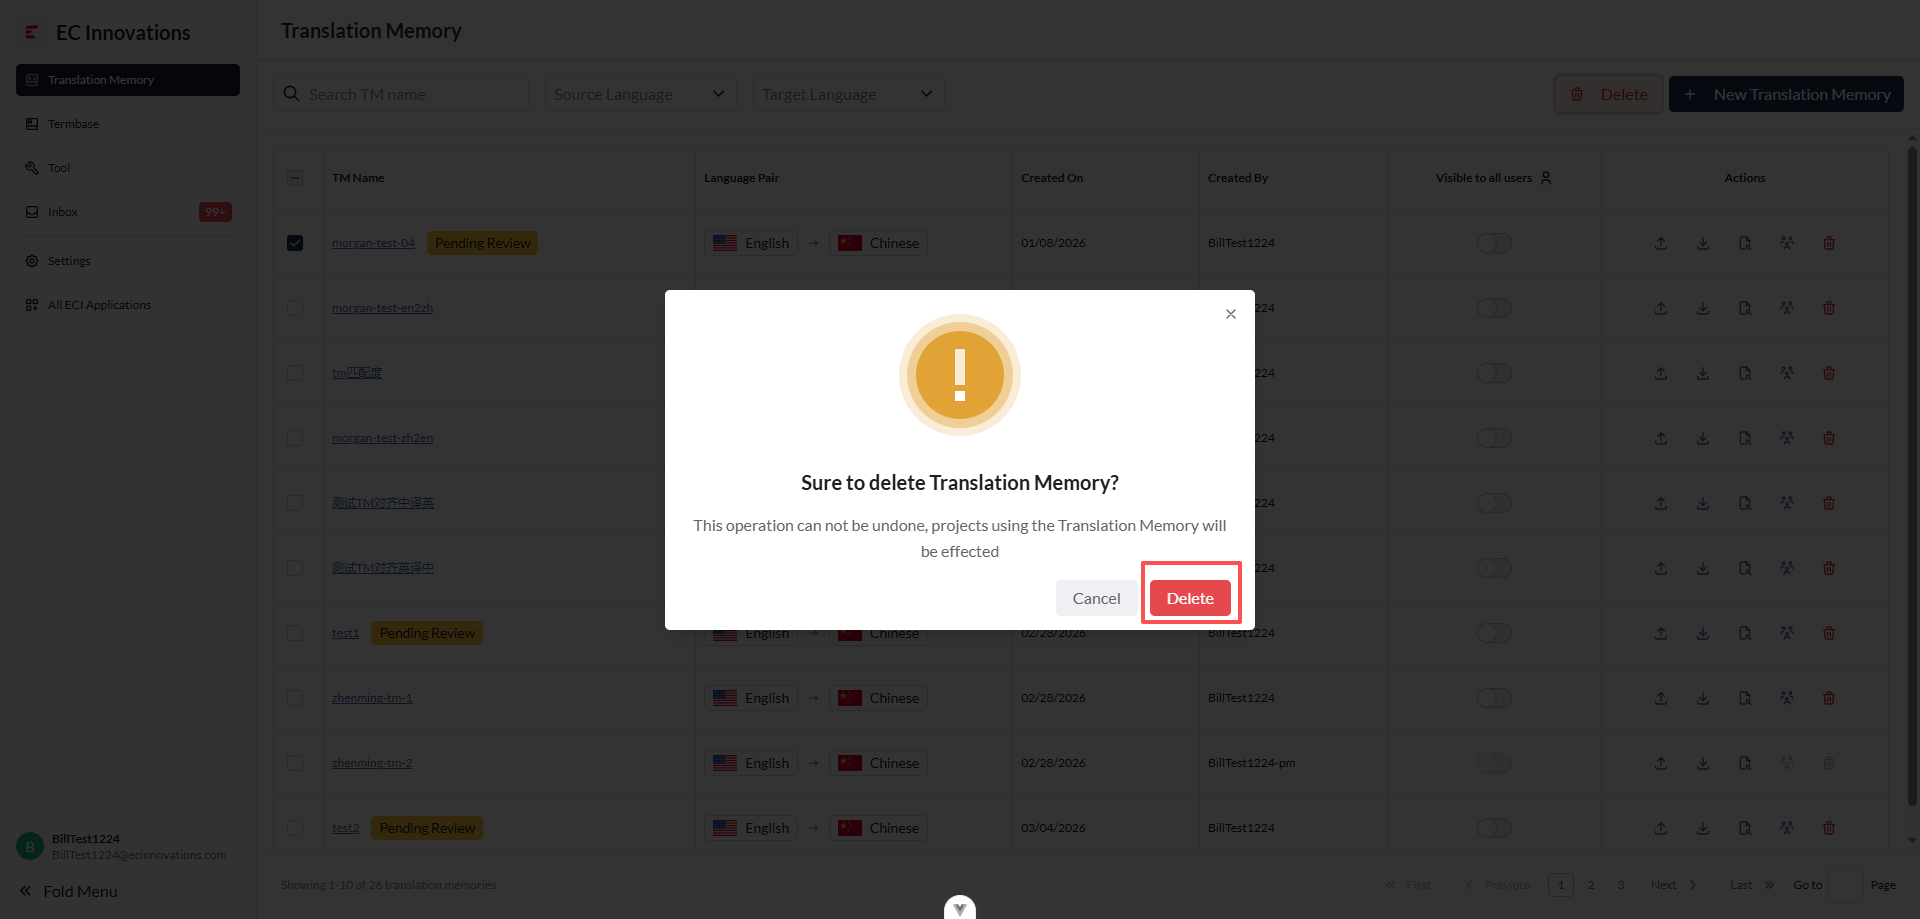
- Click ‘Delete’ to delete the current TM.
Import a TM
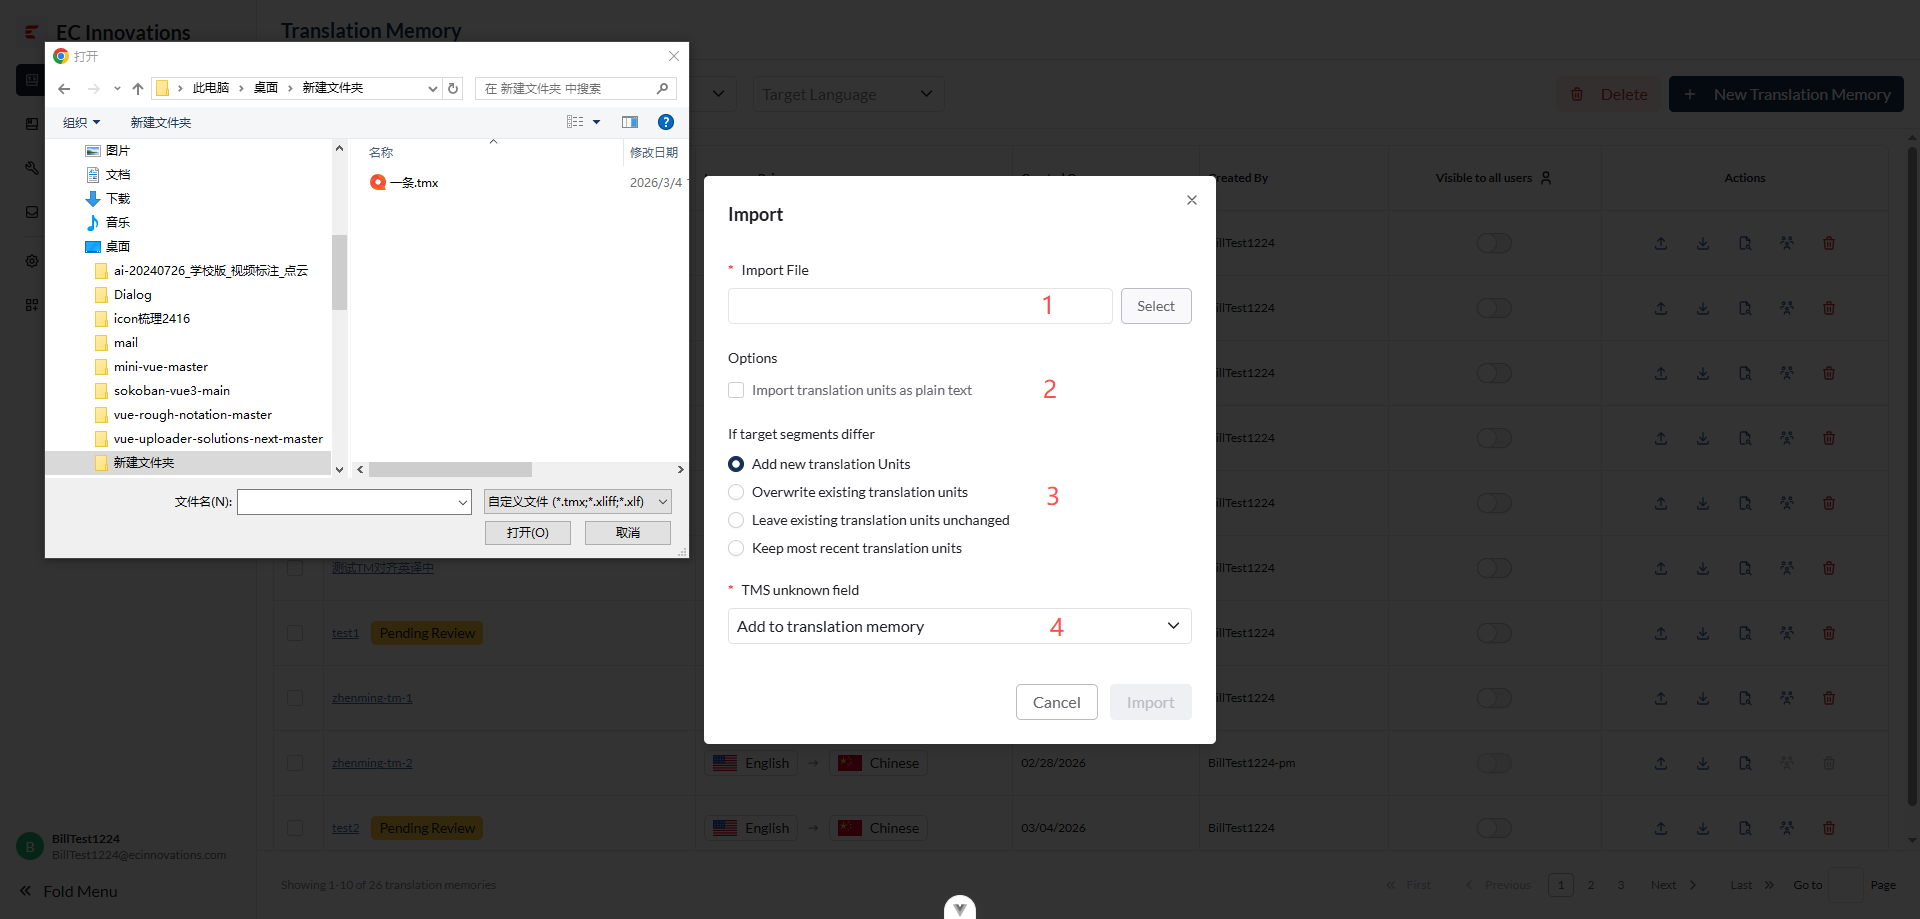
- Click ‘Select’ to choose the TM data file in .tmx format.
- Under ‘Options’, you can select ‘Import translation units as plain text’ to import TM data as plain text.
- Under ‘If target segment differ’, ‘Add new translation Units’ is selected by default.
Configuration options when the source text in the TM file is the same but the target text is different:
- ‘Add new translation Units’: Add the data as new entries.
- ‘Overwrite existing translation units’: Overwrite existing data by deleting entries with the same source text in the database and importing the current TM data.
- ‘Leave existing translation units unchanged’: Skip the current import and keep the existing data in the database.
- ‘Keep most recent translation units’: Keep the most recent data.
- For unknown TMS fields in the imported file, you can choose to add, ignore, skip, or fail the import.
TM Member Management
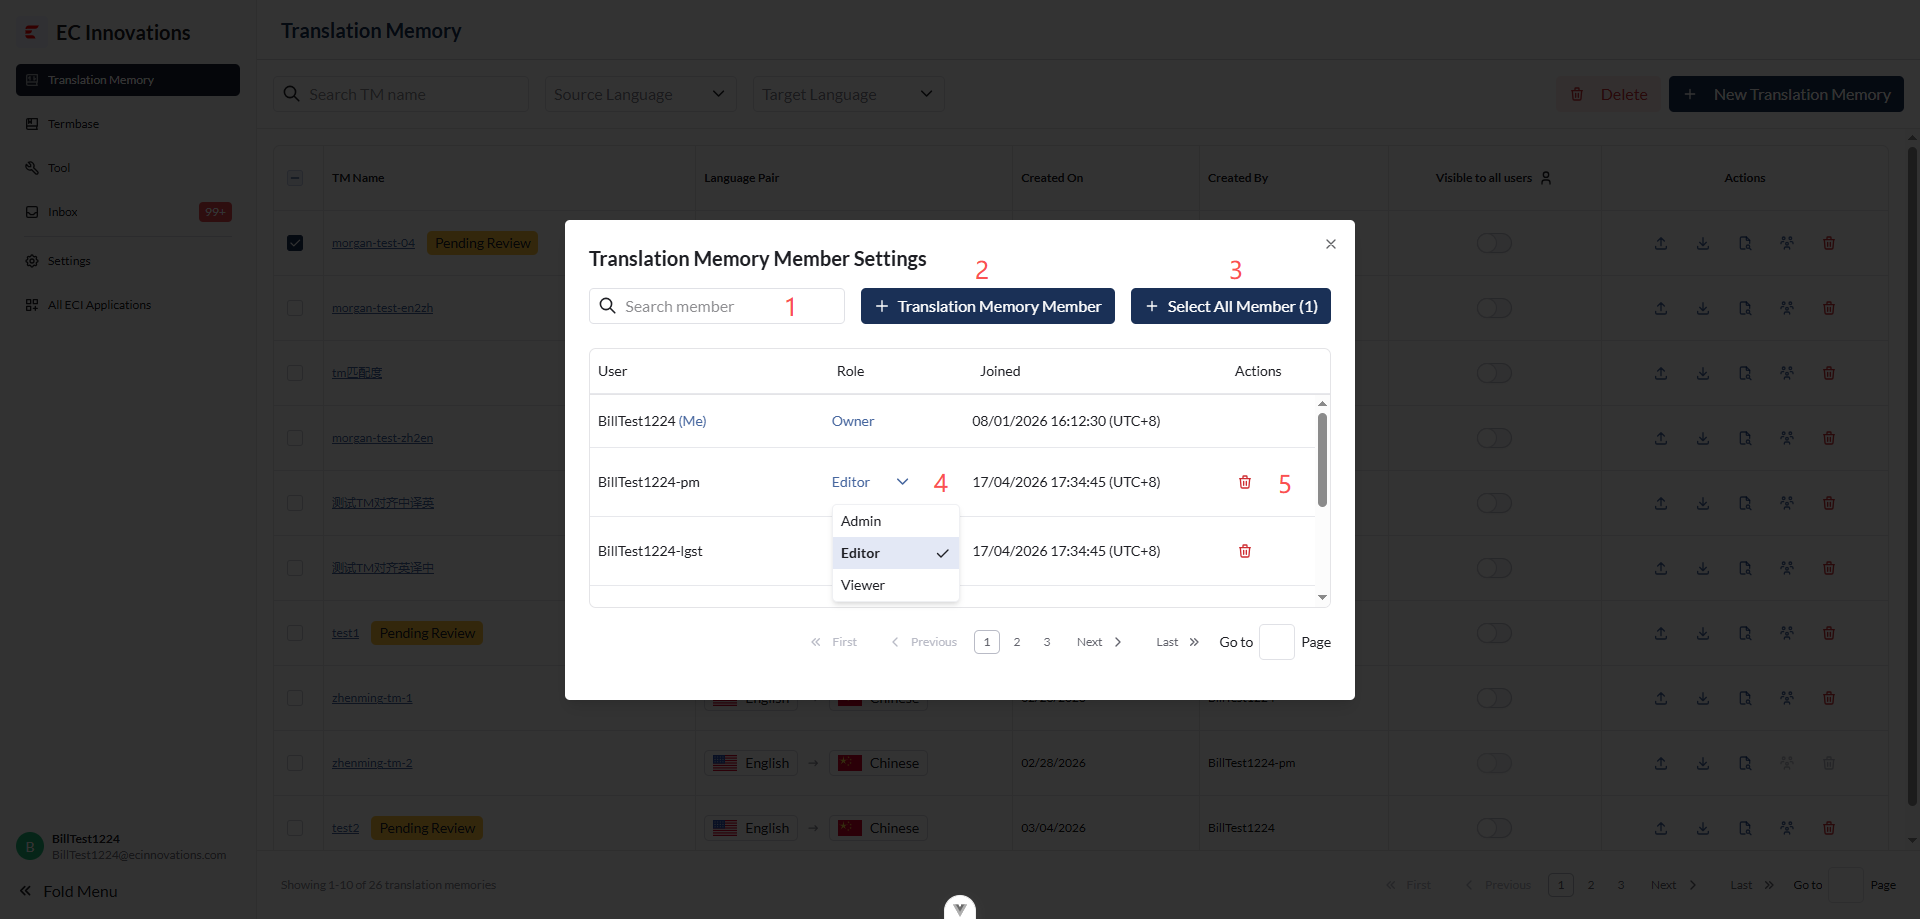
- Enter a user name keyword to filter the list.
- Click ‘+ Translation Memory Member’ to open the add member page.
- Click ‘Select All Member’ to invite all members in the organization to the TM. The default role is ‘Viewer’.
- Modify a member’s role in the TM. Available roles include ‘Admin’, ‘Editor’, and ‘Viewer’.
- Click ‘Remove’ to remove the member from the TM.
Role Overview
| Role | Delete TM | Import TM | Export TM | Member Management | Apply TM | Automatic Approval | Approve TM |
|---|---|---|---|---|---|---|---|
| Owner | ✅️ | ✅️ | ✅️ | ✅️ | ✅️ | ✅️ | ✅️ |
| Admin | ❌️ | ✅️ | ✅️ | ✅️ | ✅️ | ❌️ | ✅️ |
| Editor | ❌️ | ✅️ | ✅️ | ❌️ | ✅️ | ❌️ | ❌️ |
| Viewer | ❌️ | ❌️ | ❌️ | ❌️ | ✅️ | ❌️ | ❌️ |
- Note: Only the Owner and Admin can change roles. The Owner can change any user to any role except Owner. Admins can change all roles except Owner and Admin.
TM Details
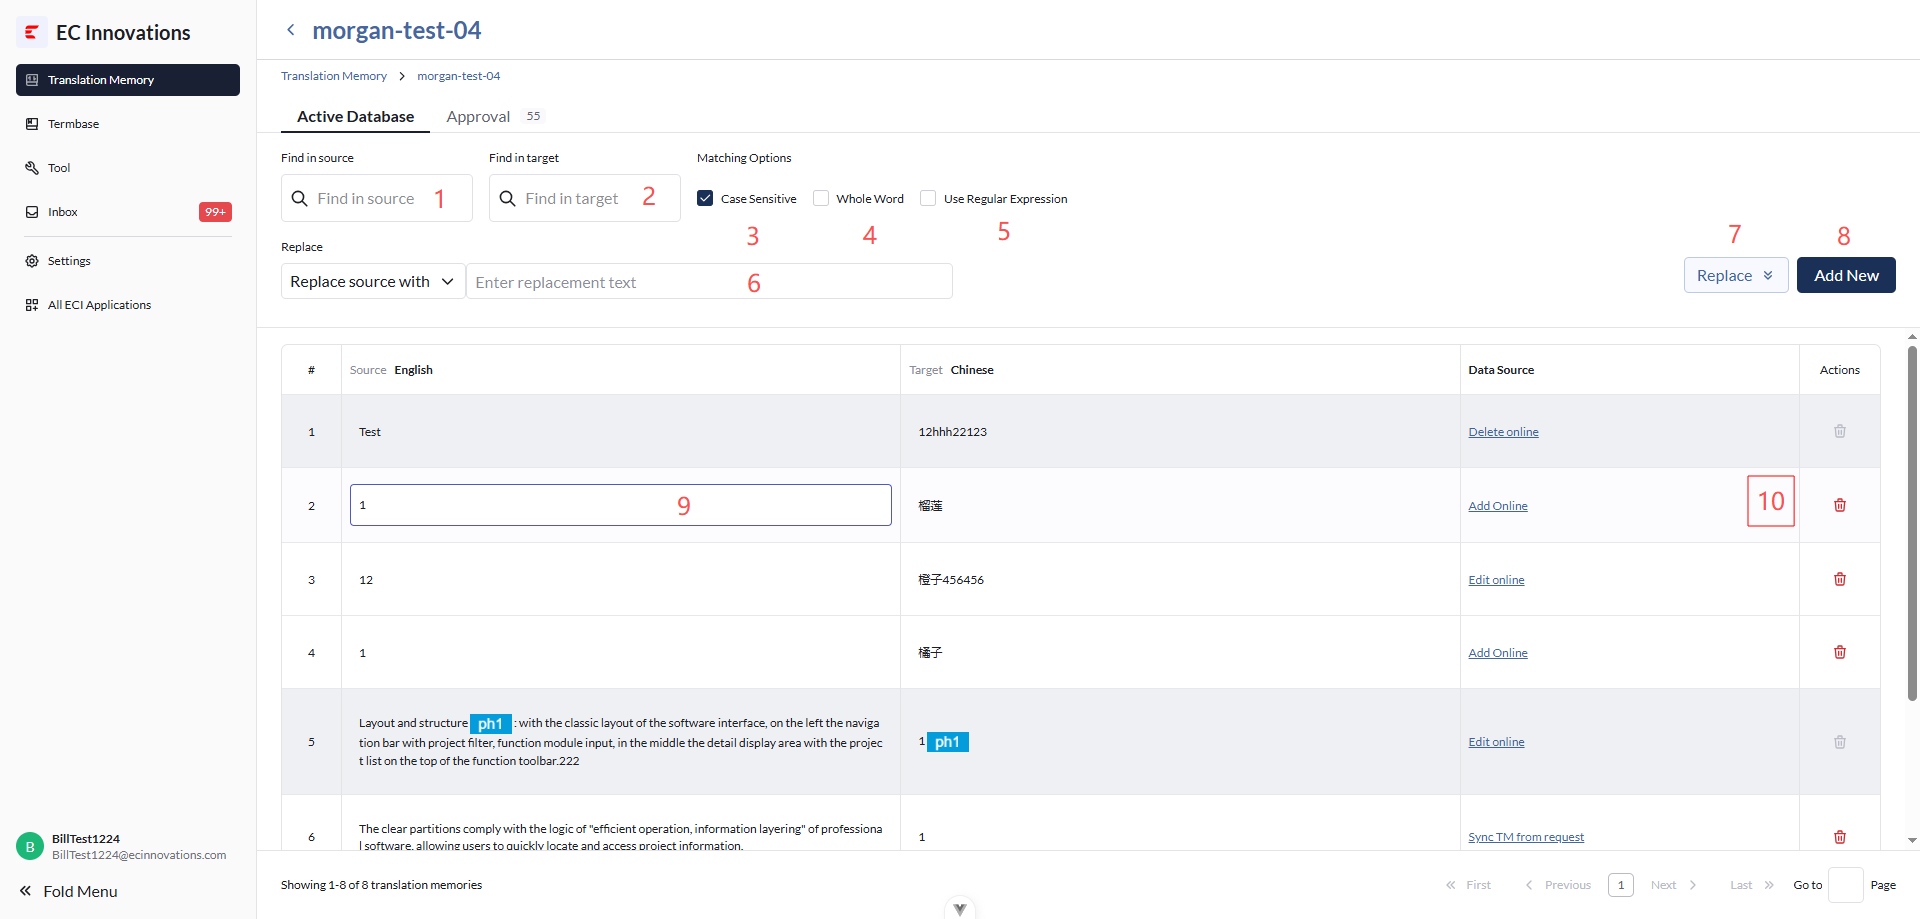
- Filter TM data by source language keyword.
- Filter TM data by target language keyword.
- Select ‘Case sensitive’ to make the search case-sensitive.
- Select ‘Whole word’ to match whole words only.
- Select ‘Use regular expression’ to use regular expressions in search.
- Enter the word or phrase you want to replace the result with.
- Click ‘Replace’ to replace the search result with the replacement text.
- Click ‘Add New’ to create a new TM entry.
- Double-click the source language cell to make it editable. The change is saved after the input field loses focus.
- Click the delete button to remove the entry from the TM.
TM Replacement
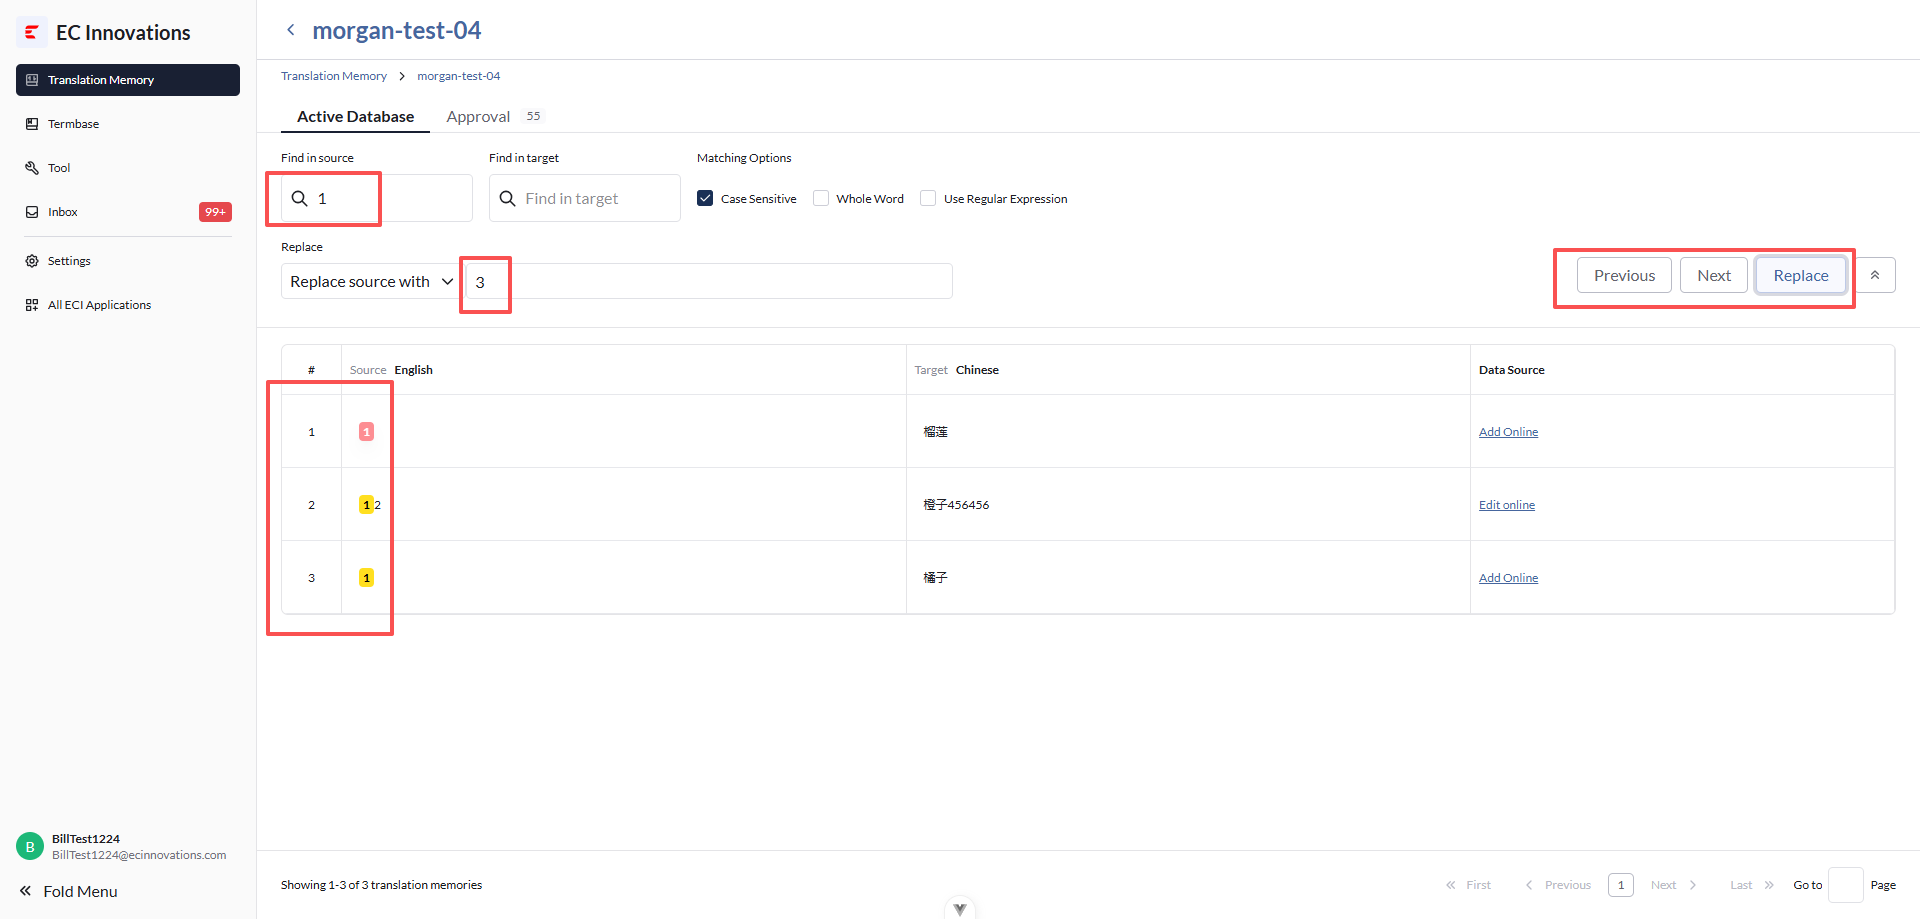
- Click ‘Next’ to search the next result. Click ‘Previous’ to search the previous result. Click ‘Replace’ to replace the search result with the replacement text.
- Note: If the current role is Owner or Admin, the replacement can be performed directly. If the current role is Editor, the replacement must go through the approval list.
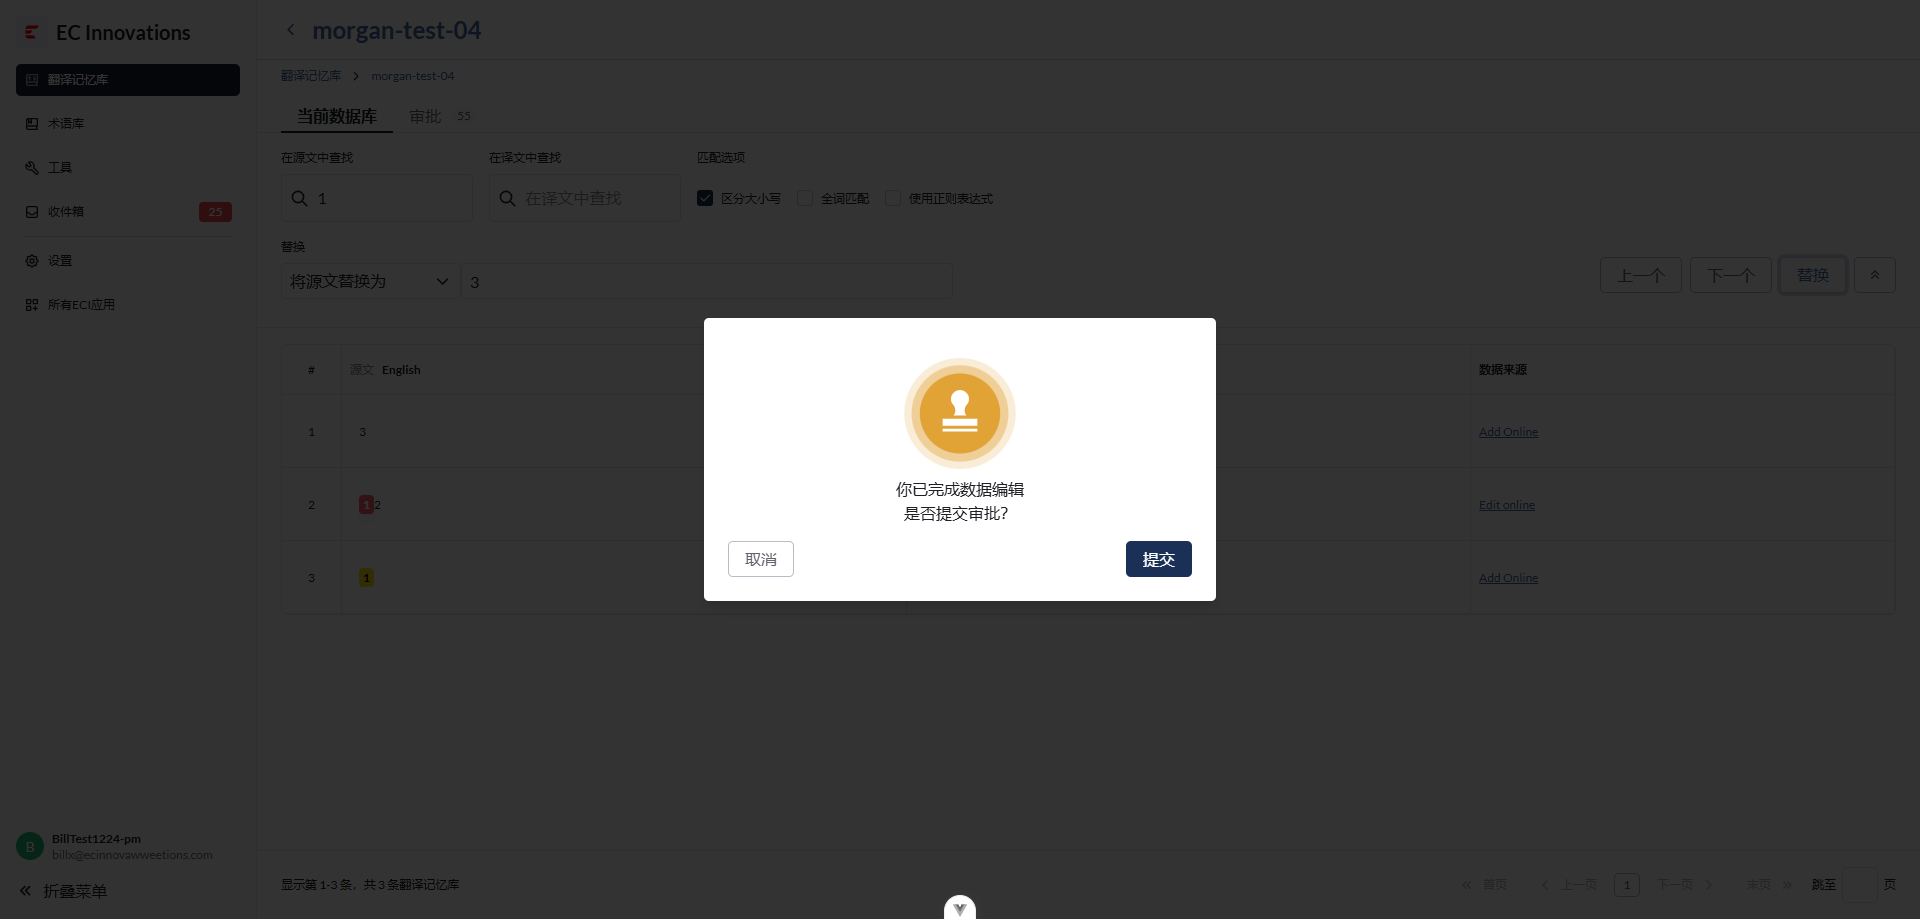
Segment Locking
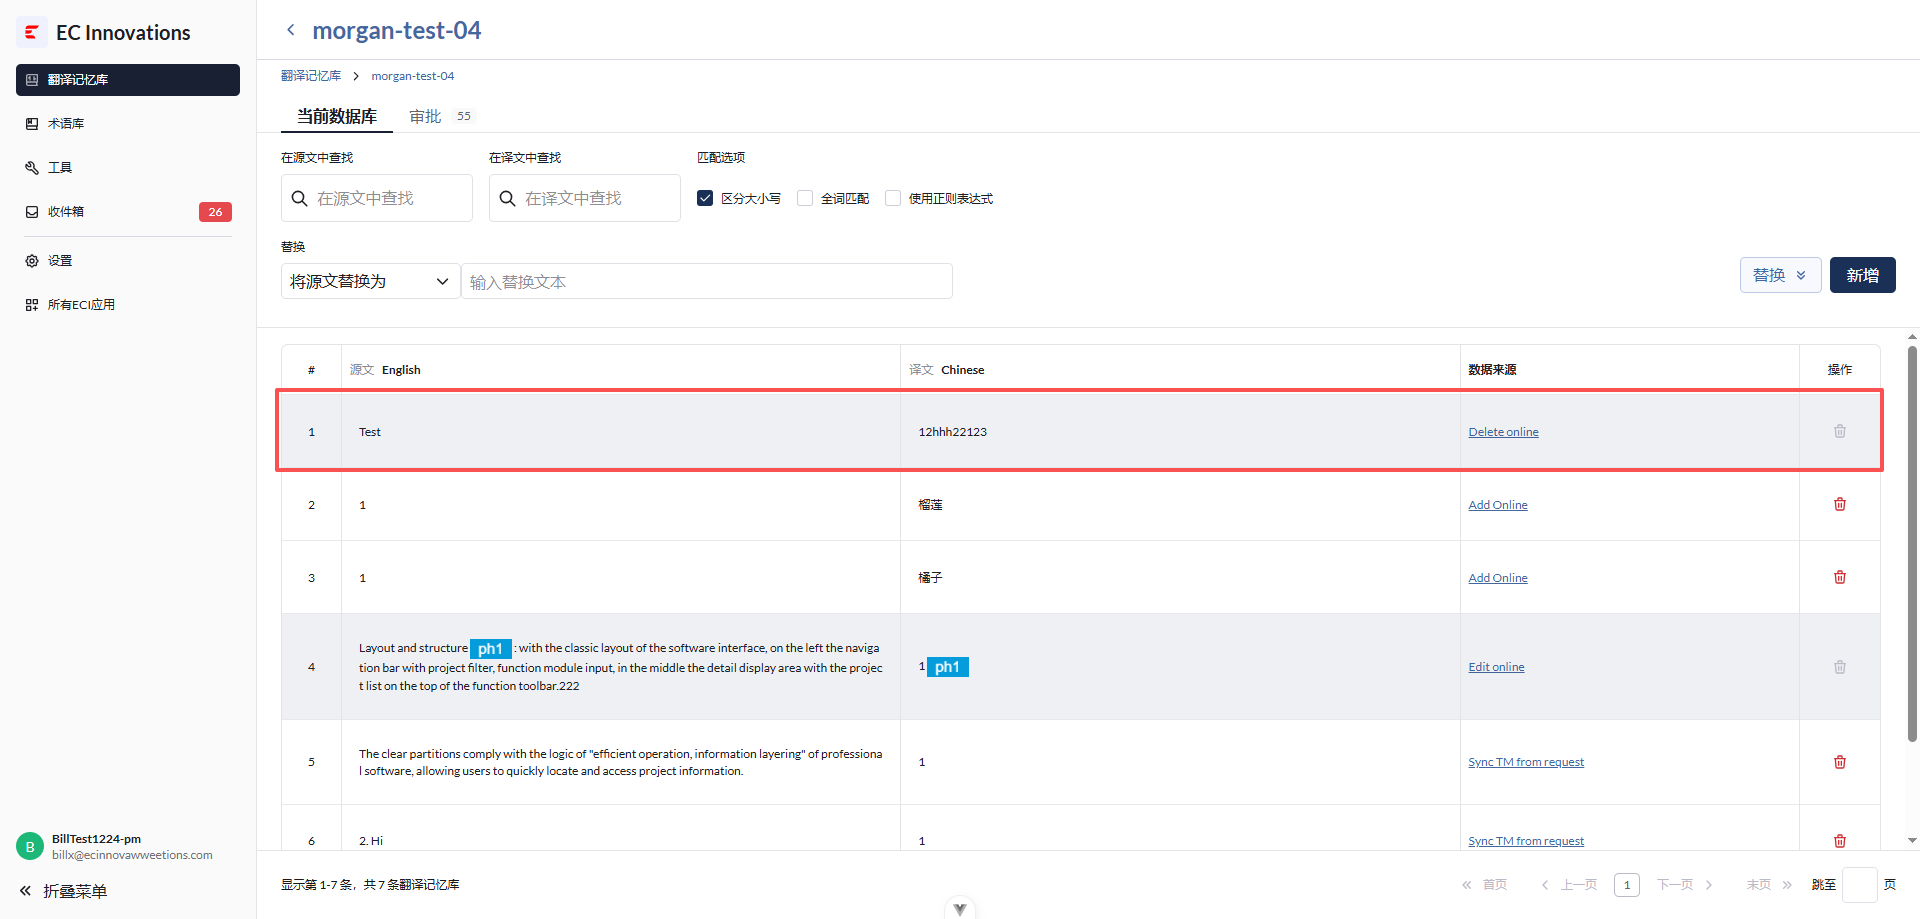
- If an entry has entered the approval list and is pending approval, the segment cannot be edited or deleted.
Approval List
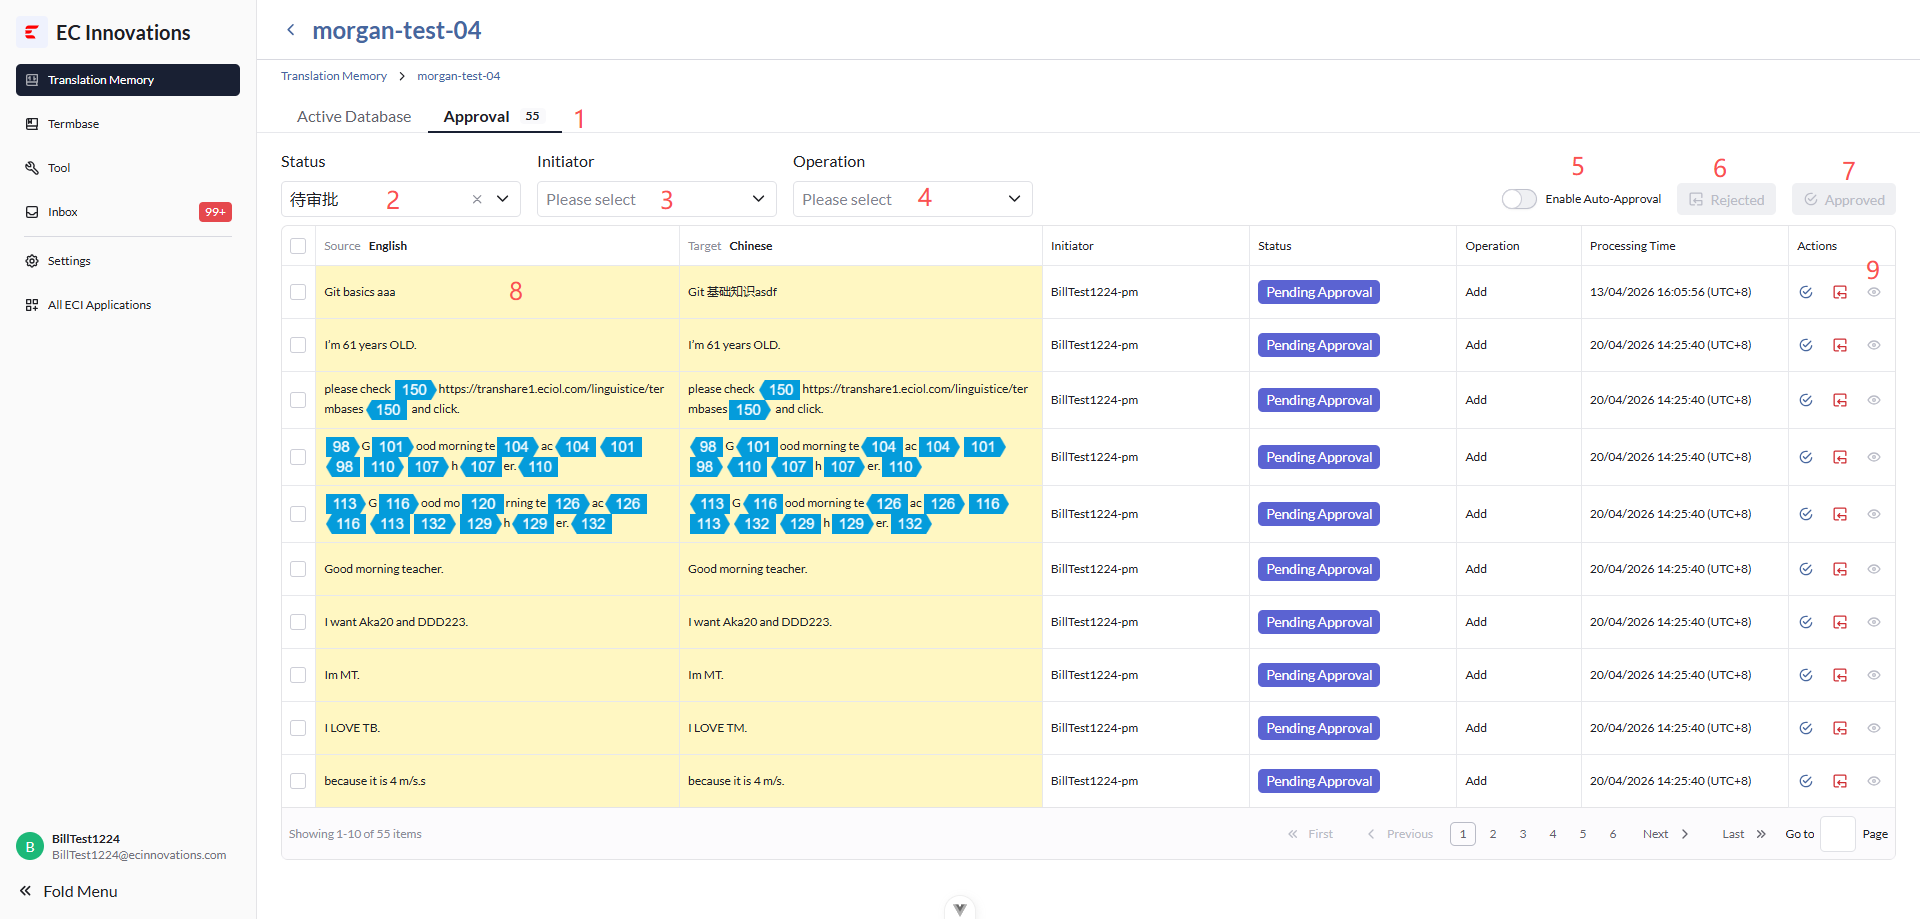
- Number of pending approval items.
- Filter approval list data by approval status. Available statuses include all, pending approval, approved, rejected, operation failed, and invalid.
- Filter approval list data by requester.
- Filter approval list data by operation type. Available types include add, edit, delete, and overwrite.
- Enable or disable automatic approval. Only the Owner role has this switch.
- Bulk reject approvals. Only Owner and Admin roles have this button.
- Bulk approve approvals. Only Owner and Admin roles have this button.
- Source language and target language. If there are changes, the cells will be highlighted.
- View the approval rejection reason.
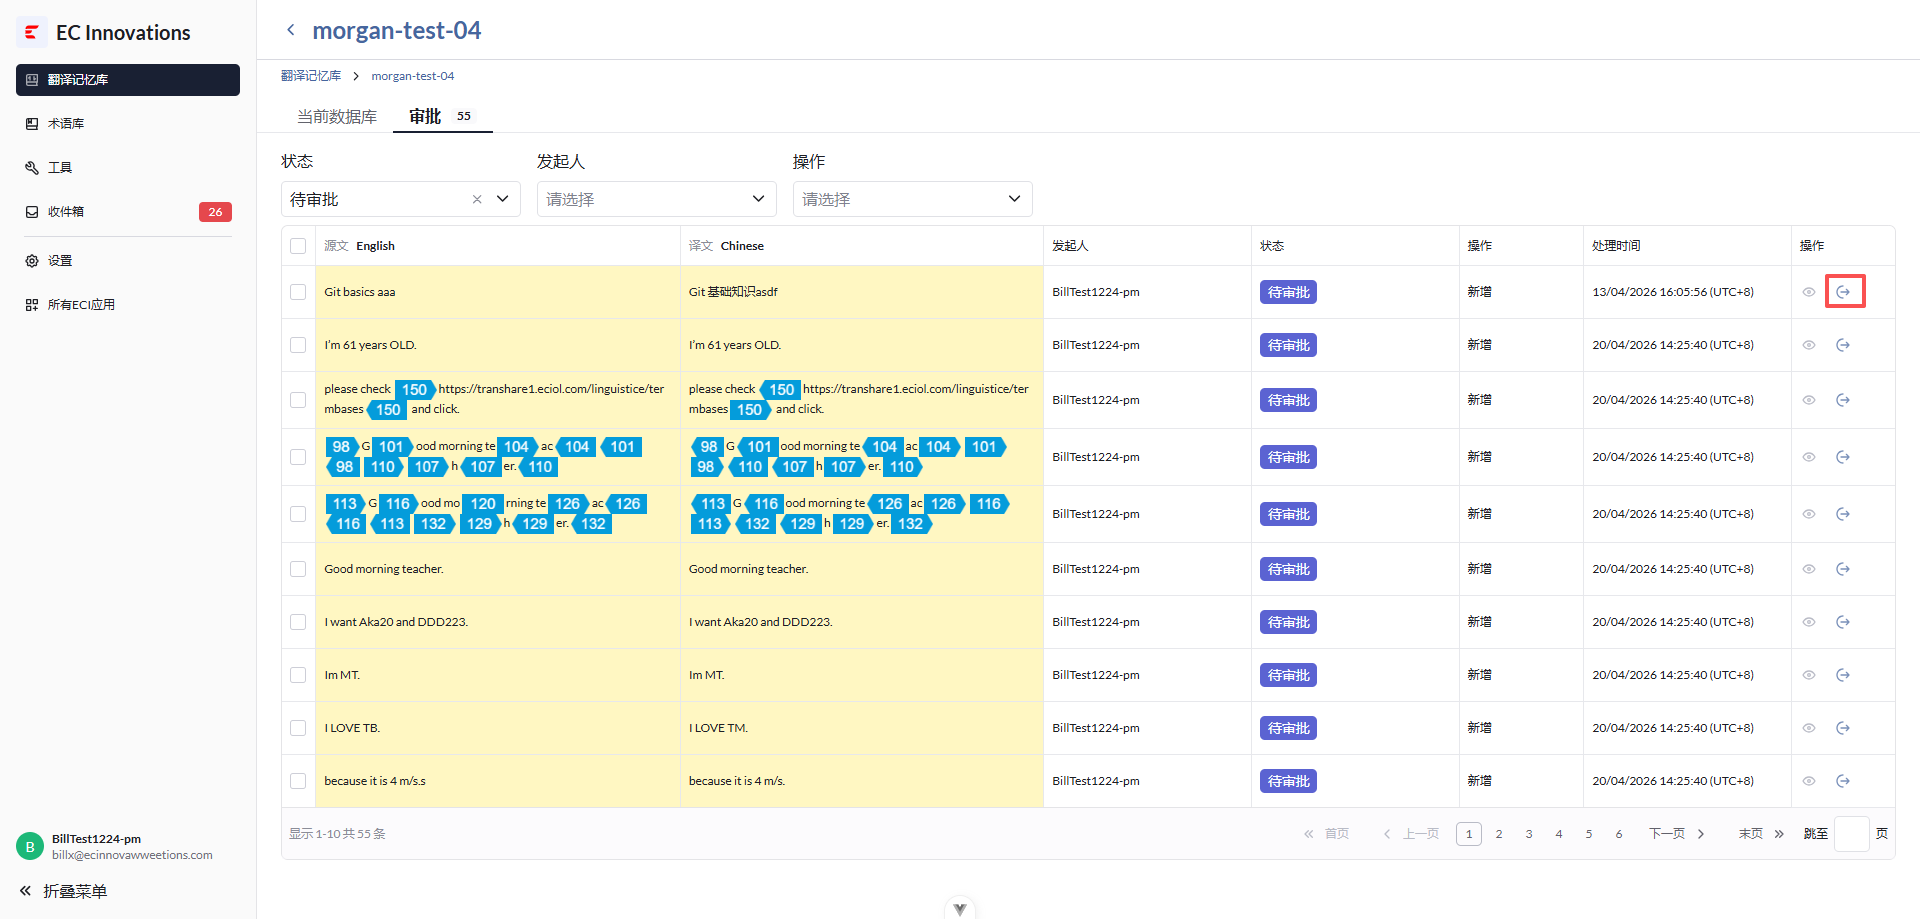
- If an approval has not been rejected or approved, the Editor can withdraw it.